Product Photography for Macro Photographers
/Greetings everyone,
My apologies in advance for what will be a perfunctory post today. There is much to be done for the coming week and there are still a number of important side-projects that need to be attended to. So I will get straight into today’s business. The theme for this week is “Product Photography”, a discipline with which macro photography has much in common. I have always found this type of photography especially satisfying. It is extremely demanding, requires a great deal of precision and attention to detail, and is probably the best way to learn lighting for macro photography. It is also one of the few ways, other than teaching, that I have actually earned some income over the years. And, of course, it will soon be gone forever.
This type of technical photography has been one of the prime targets for automation and standardization. Much of the day-to-day product photography, the bulk cataloging of a business’ line of goods, the pack shots, is already being taken over by clever automated systems that can produce decent pack shots quickly and with relatively little human intervention. But this is not where the product photographer makes her money. That is from the creative “hero” shots, the images that are designed to sell a product by creating a legend around the product, by telling a compelling story, and by making the product look bigger, better, faster, more desirable than the competition. The problem for product photographers is that they no longer need to spend a week photographing the latest Mercedes sport coupe, in fact, they don’t have to photograph it at all. A robot at the factory has already captured thousands of hi-resolution images to create a stunningly detailed 3-dimensional model of the car. The manufacturer can, with a few keystrokes, put the car on a Tuscan hilltop, or on the streets of Atlanta, it can change the color of the paint and the style of upholstery, They can fill the car with beautiful people, or show it driving autonomously. This is not something we might expect to see within the coming decade - it is already here - and the top end product photographer has already begun to feel his relevance starting to fade as computational image-making becomes more and more capable with every passing week.
I think this is a real shame, of course, because I like to create interesting and creative product photographs, but that is not the main reason. The primary concern that I have is that as some of these technical disciplines are taken over by machines, photographers will forget how this sort of work is done, and we will no longer think it is worth teaching - and that will be a great loss. Product photography requires an attention to detail that is not seen in most other areas of picture making. Products must wow the audience while being tru to life in the tiniest fdetails. The images must touch something in the viewer and get them excited about the product. The images, to be reproduced on billboards, in movie theaters, magazines, and on the internet must be color perfect wherever they are seen. Learning how to photograph a product in the studio is one of the best ways I have found to teach lighting at the macro scale. When we learn how to develop a workflow when using multiple off-camera flash sources, or how to use a tilt/shift lens, or design a table-top composition that can sell a $20,000 watch, we are learning how to take full control of the entire studio environment. To really learn product photography you learn how to control all the ambient light, eliminate reflections and vibrations, use bounce cards, mirrors, flags, and snoots, along with filters, gels, and polarizers. I would go so far as to say that almost every skill that I have acquired in the studio, has been informed in some way or another but lessons learned in product photography.

And that is why I want to spend a couple of days this week talking about what we can take from product photography to use in our macro practices. On Tuesday (my birthday!) we will take a closer look at product photography and talk about some of the most valuable lessons that we can learn from this discipline. That will be the subject for Macro Talk at 8PM central time on Tuesday, October 7th. Here is your link to the dicussion…https://youtube.com/live/OReNvjtb3s0?feature=share

On Thursday I am going to bring the discussion down to earth by giving you a series of tips and techniques that you can use today. I’m doing this, of course, because of this months competition theme - “Product Photography”. It occurred to be, after I announced the theme that some of you may not know exactly what we are looking for. So, in MacroTalk Too (2PM Central Time, on October 9th, 2025), I will tell you everything you need to know t create a believable product photograph that you can enter for the competition. The livestream can be found by following this link … https://youtube.com/live/7v7kIJMrOW4?feature=share

By the way, my guest judge for the October contest is none other than last month’s winner, Graham Carey! I am so glad to have the chance to work with Graham, who is not only a lovely chap, but also a brilliant inventor, skilled “maker” and, of course, one of the most exciting macro photographers I know. Having Graham join me to make the “results video” and discuss all the entries is going to be a lot of fun, and probably very educational for me, but it also has a less obvious bonus for you. As a judge, Graham will not be competing in the October competition - do you see my point? You may never get a better opportunity to join our list of elite photographers! So come on Thursday, and get what you need to make it the winner’s circle at the end of the month!

No sooner is MTT over that it will be time to turn to the strangely addictive world of crystal photography and our third episode of Crystal Art - a group of photographers who share a common interest in finding, growing, and photographing birefringent crystals under cross polarization. This may sound like a weirdly narrow field, which I suppose it is, but it is also a great deal of fun. We have a fantastic group, led by my good friend Harold Hall (and his protege… me!). It is a new group but we are off to a great start and this Friday is shaping up to be a lot of fun. I have asked Harold to give us a little introduction, telling us where his interest in crystal imaging came from and about his experience, going from professional travel photography to the mysterious world of Crystal Art. I have several pictures and some video footage to share, and if time permits I want to tell you about one chemical combination that I have encountered that demonstrates some seriously odd behavior. That is all in Crystal Art, which happens at 2PM Central Time over on YouTube, and which is completely free - if you want to come, here is your invitation…
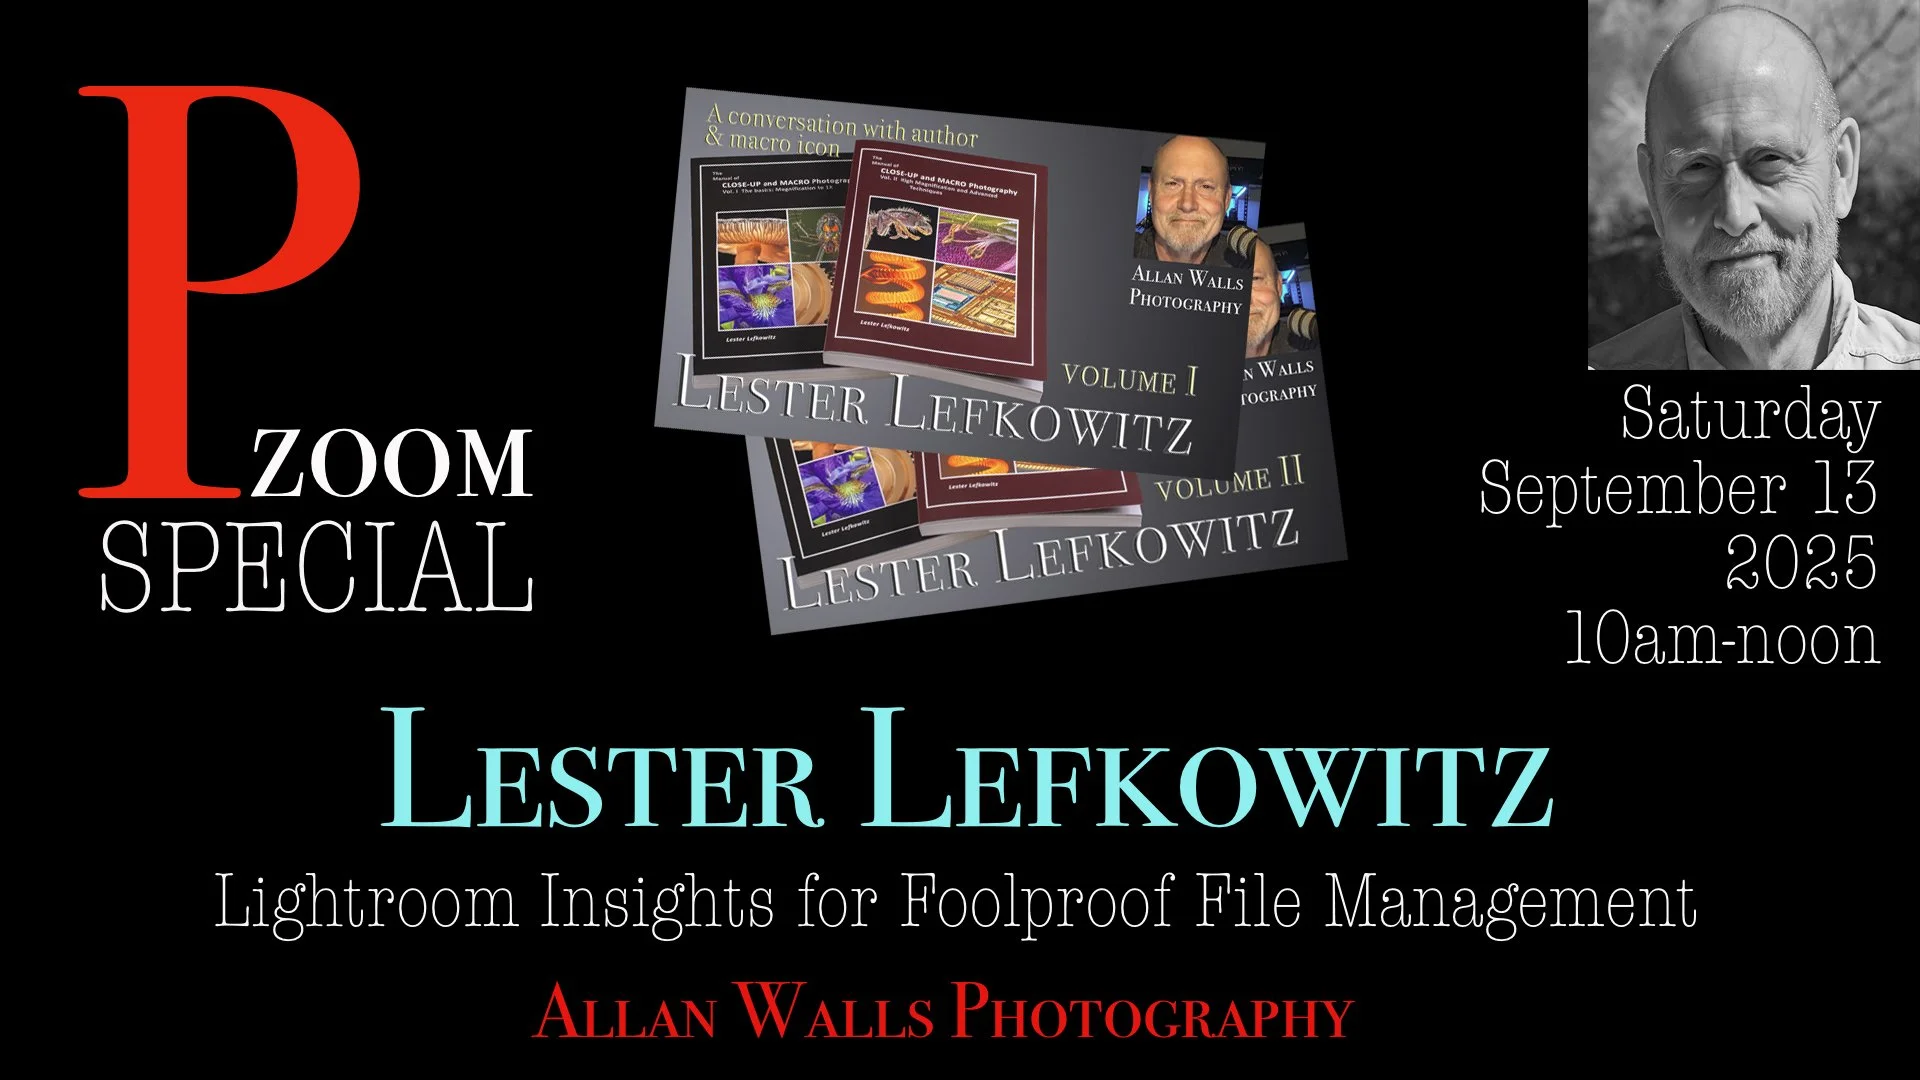
Allan Walls is inviting you to a scheduled Zoom meeting.
Topic: Allan Walls’ Crystal Art with Harold Hall
Time: Oct 10, 2025 02:00 PM Central Time (US and Canada)
Join Zoom Meeting
https://us02web.zoom.us/j/6916802815?pwd=TS9tZi9ZL1NXeVUvOUF4eTg5YjdlZz09&omn=85985086386
Meeting ID: 691 680 2815
Passcode: 678122
Join instructions
https://us02web.zoom.us/meetings/85985086386/invitations?signature=d4O3aDUc63hAJttn9obUZ0o7O-fhliCjnjbr9kcRpMM

After that it is back to our regular schedule on Saturday with another Pzoom meeting. This is a Patreon Only event that I do every other Saturday, and it is one of the ways I say thankyou to my Patreon supporters. The weekend I will be bringing some content that I have been working on for quite some time now - how (and why) to buy a microscope in 2025. That will be after we have all our usual activities. So if you want to give an update, ask a question, show off some work, or get some feedback, let me know on Saturday and I will make sure you get as much time as you need. If you would like to know more about Patreon and about how you can support my channel, please visit www.patreon.com/allanwallsphotography. For my Patreon friends - your link for the Pzoom on Saturday will be posted on Patreon later today.

Anyone waiting for the Microscope Focus Block Conversion / Crystal Polarizer Photography price lists, please bear with me a little longer. I did complete the lists but wanted to get a couple of my friends to look them over before sending them out.
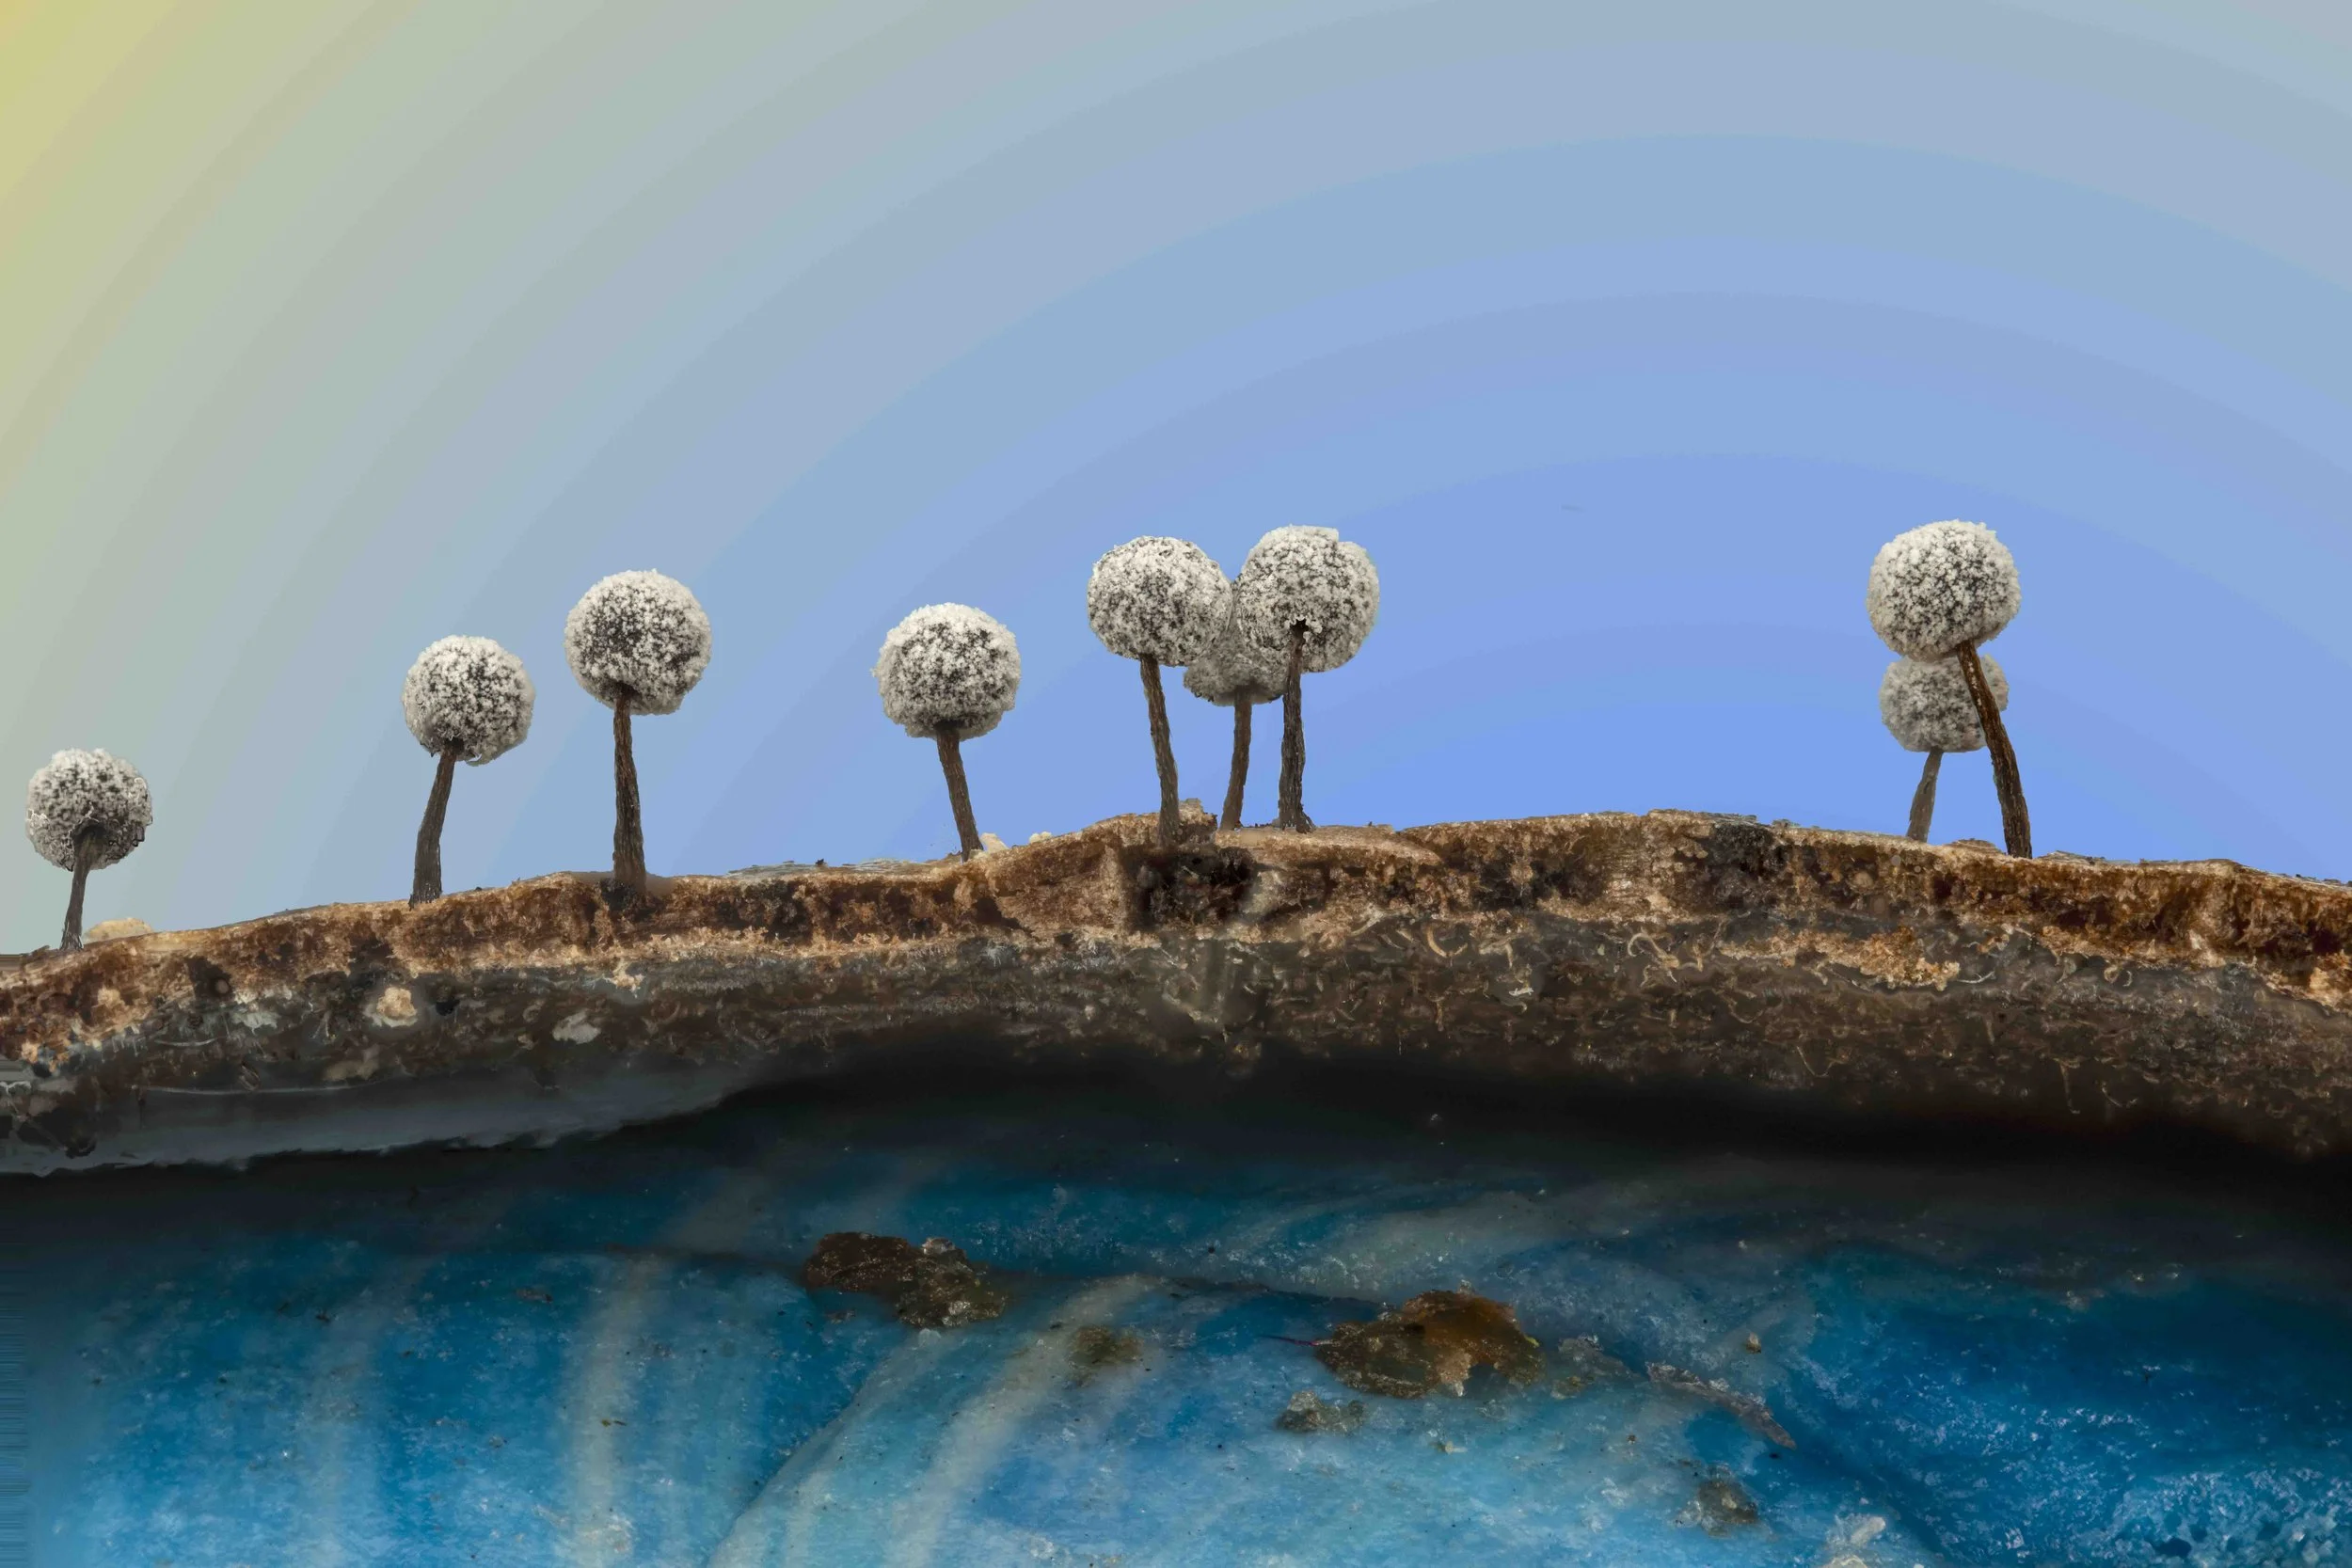
Summer is drawing to a close in Middle Earth and I have had precious little time to spend in Nature this year. But I plan to remedy that this weekend. We have rain forecast for the next few days with nicer weather by the weekend. I plan to be crawling along the forest floor with magnifying glass in hand, in search of slime mold fruiting bodies. I can’t wait! If any of you live near here (Peoria in Illinois) and would care to join me for a few hours of myxomycetal exploration, let me know.
That’s all I have time for today and I hope to see you at one or more of this week’s events!
Allan
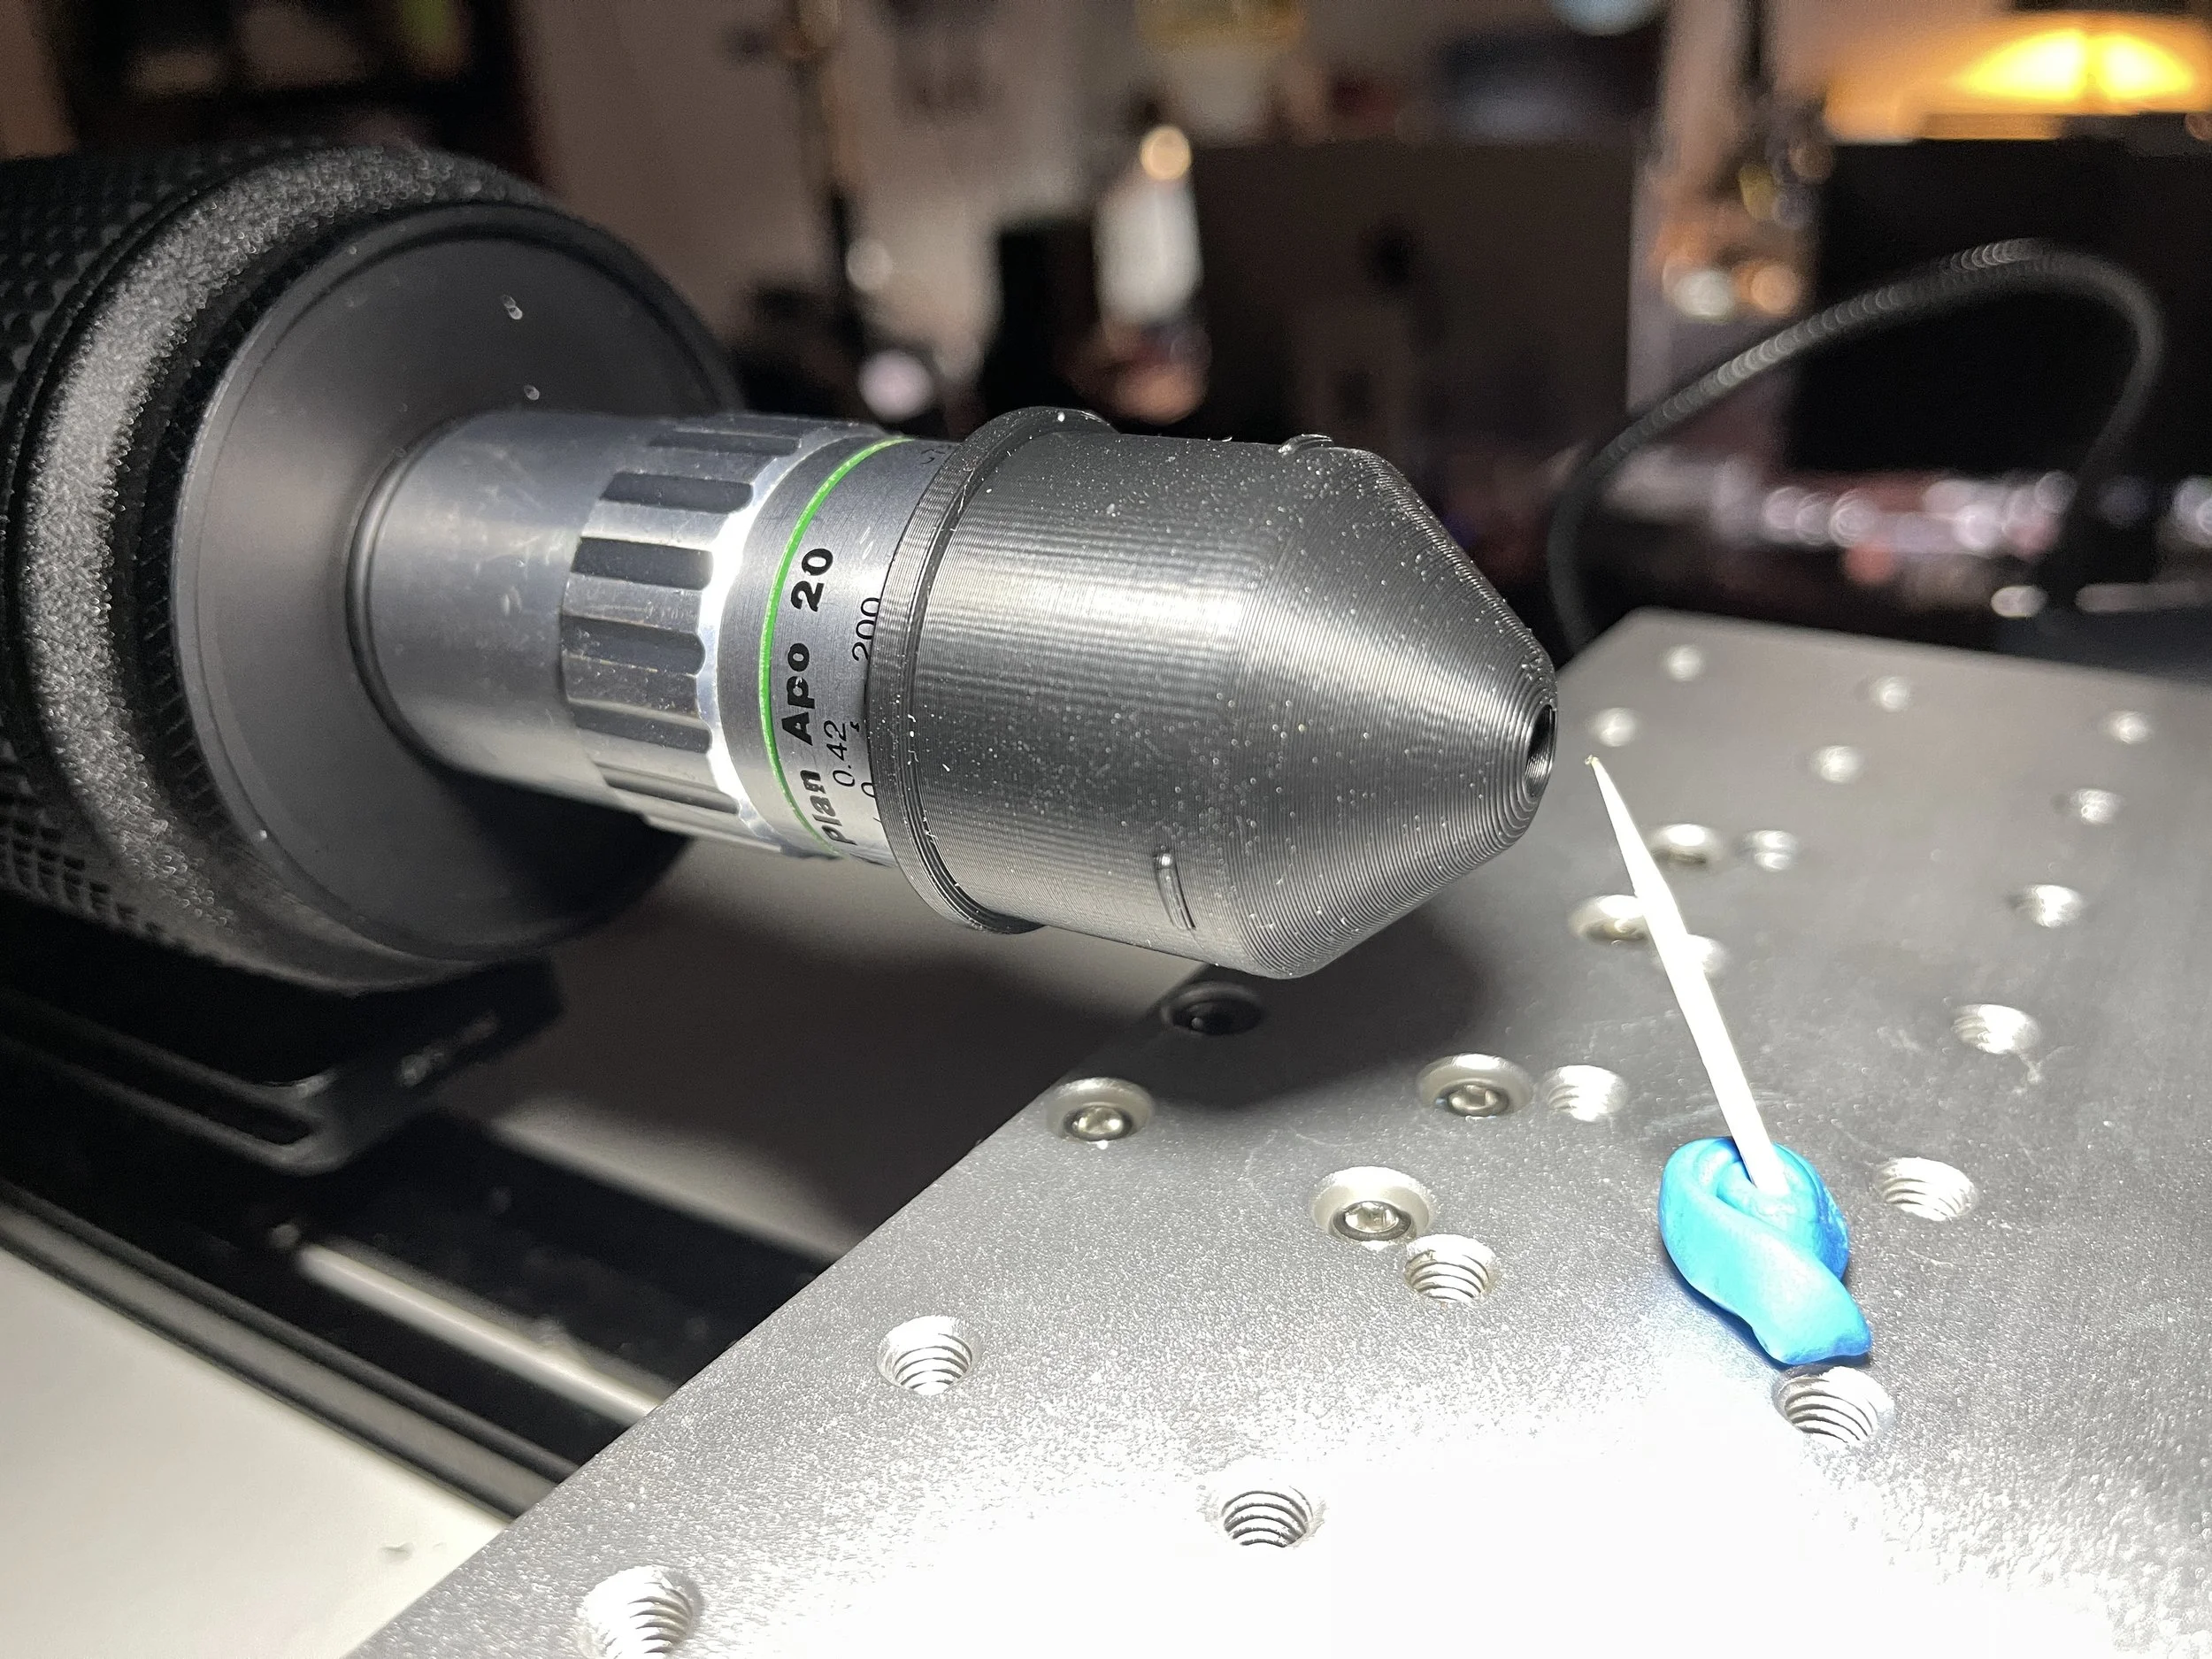
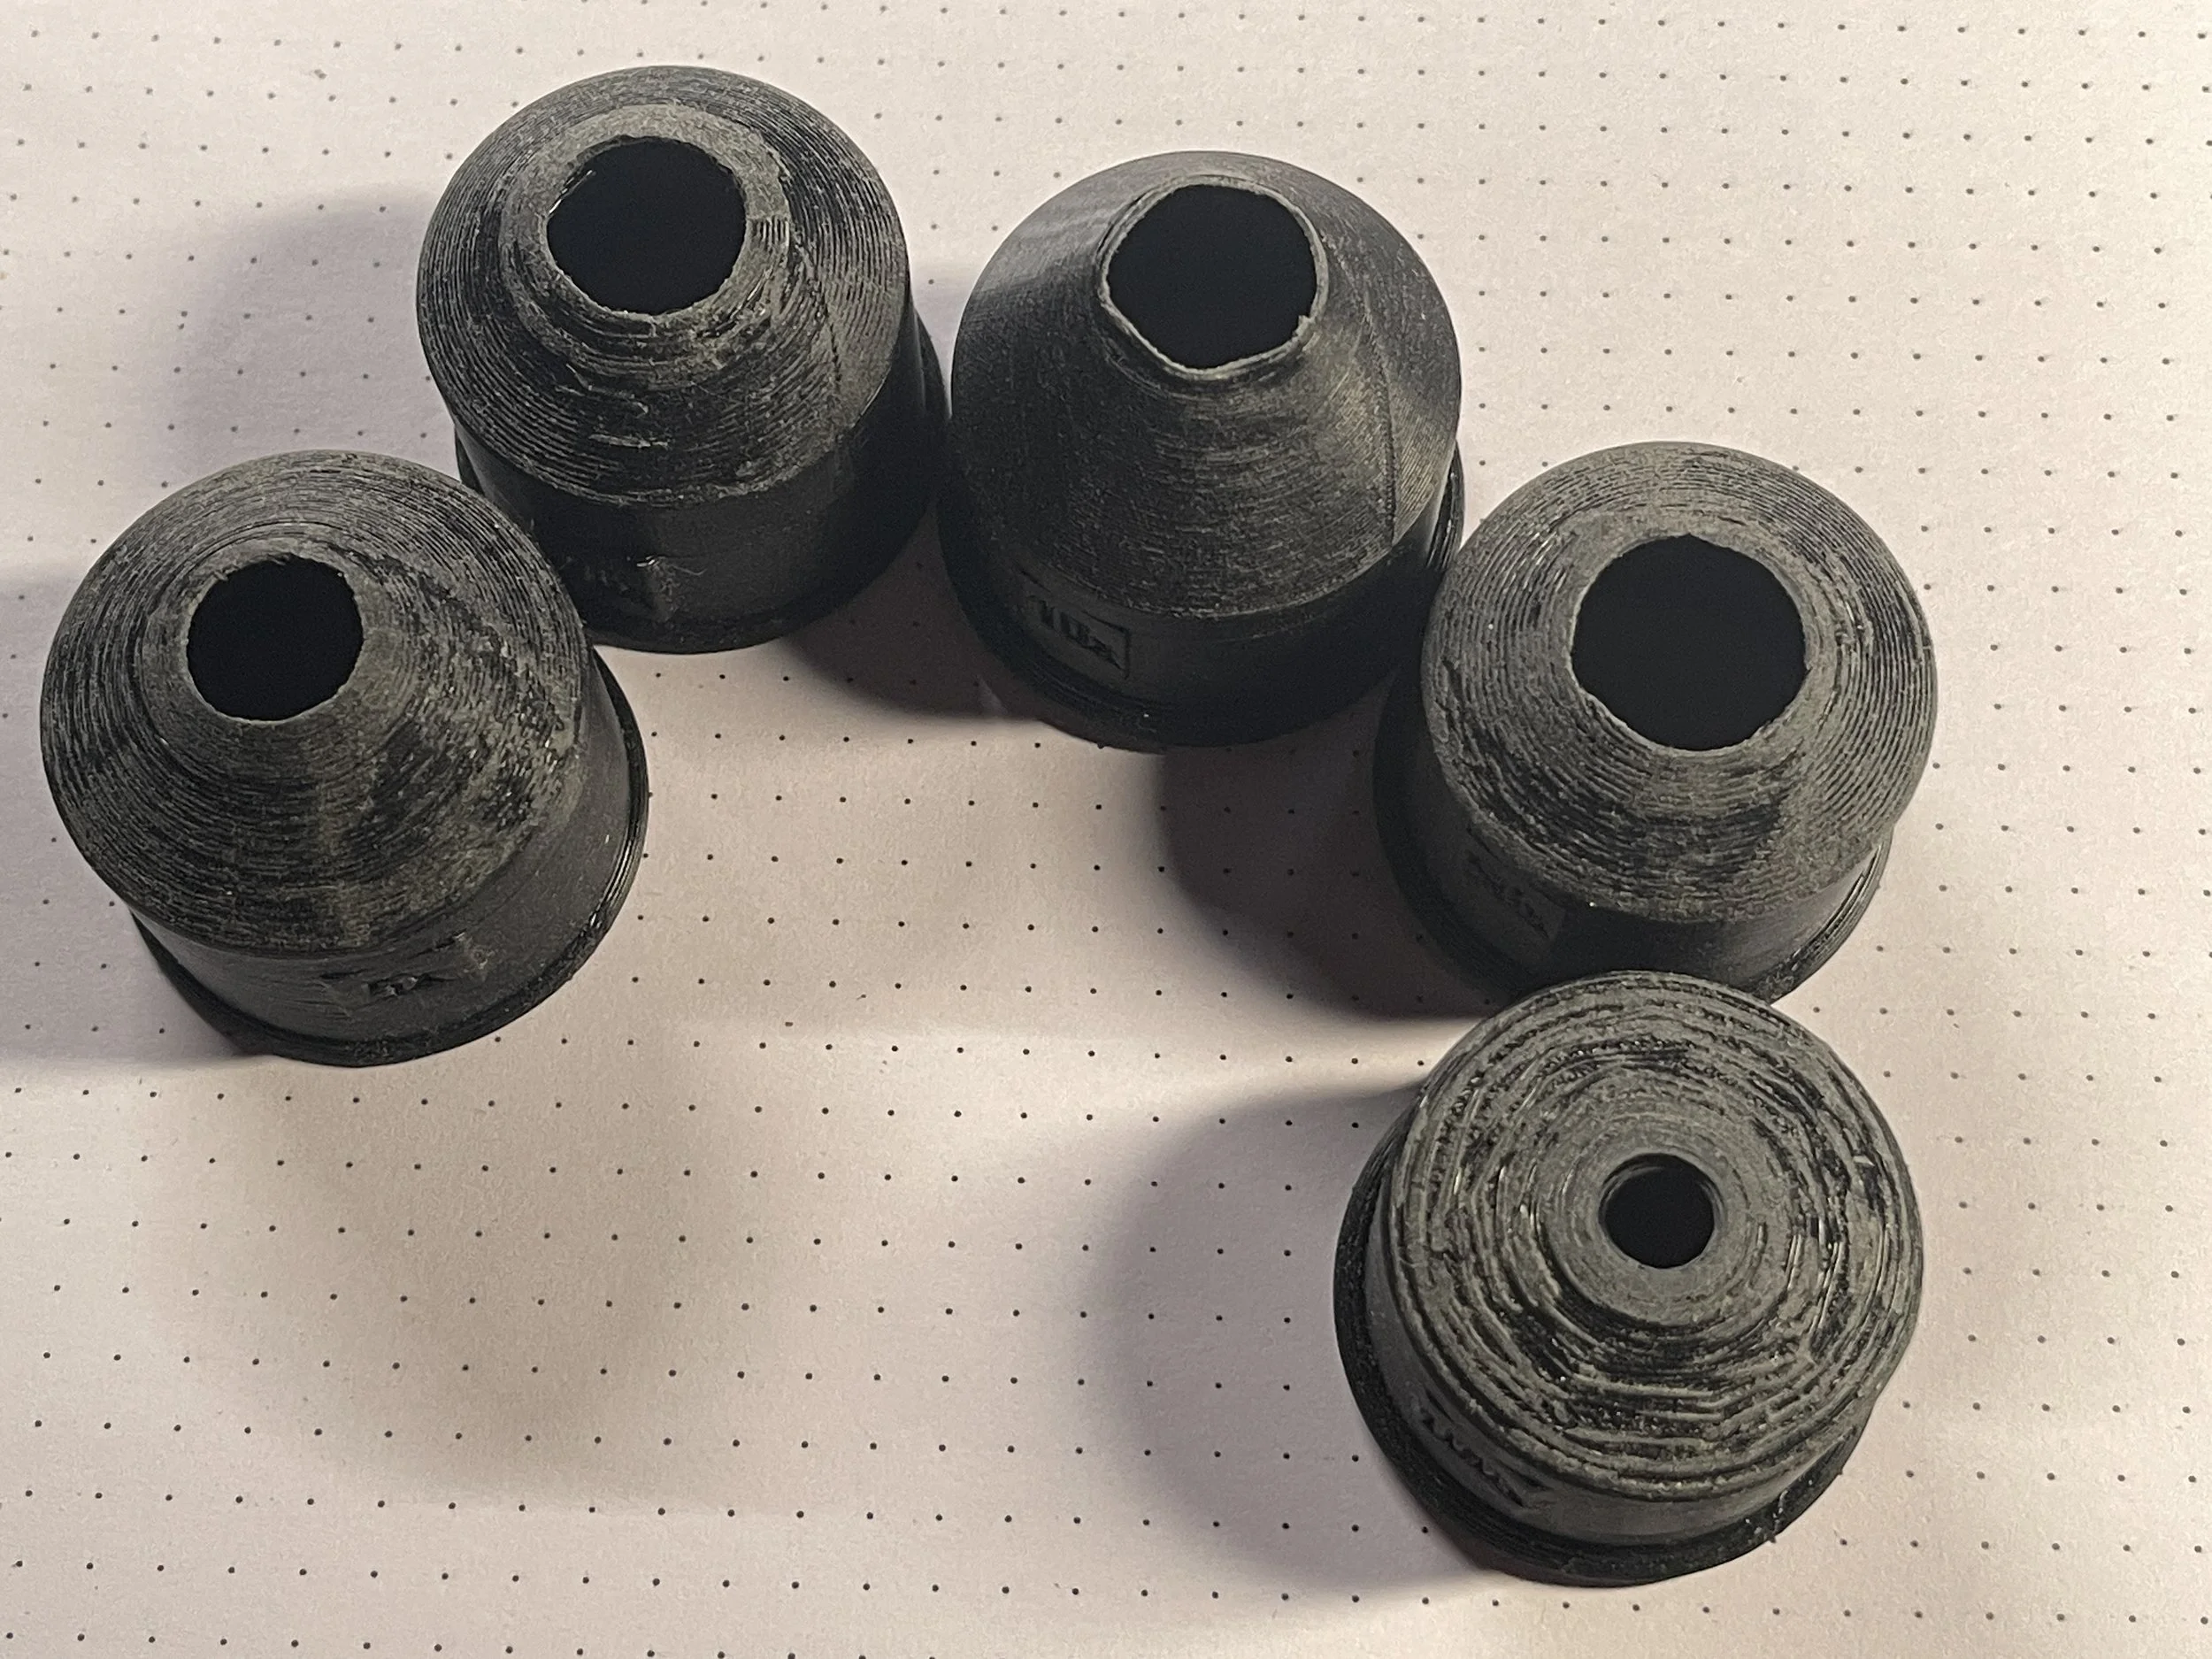
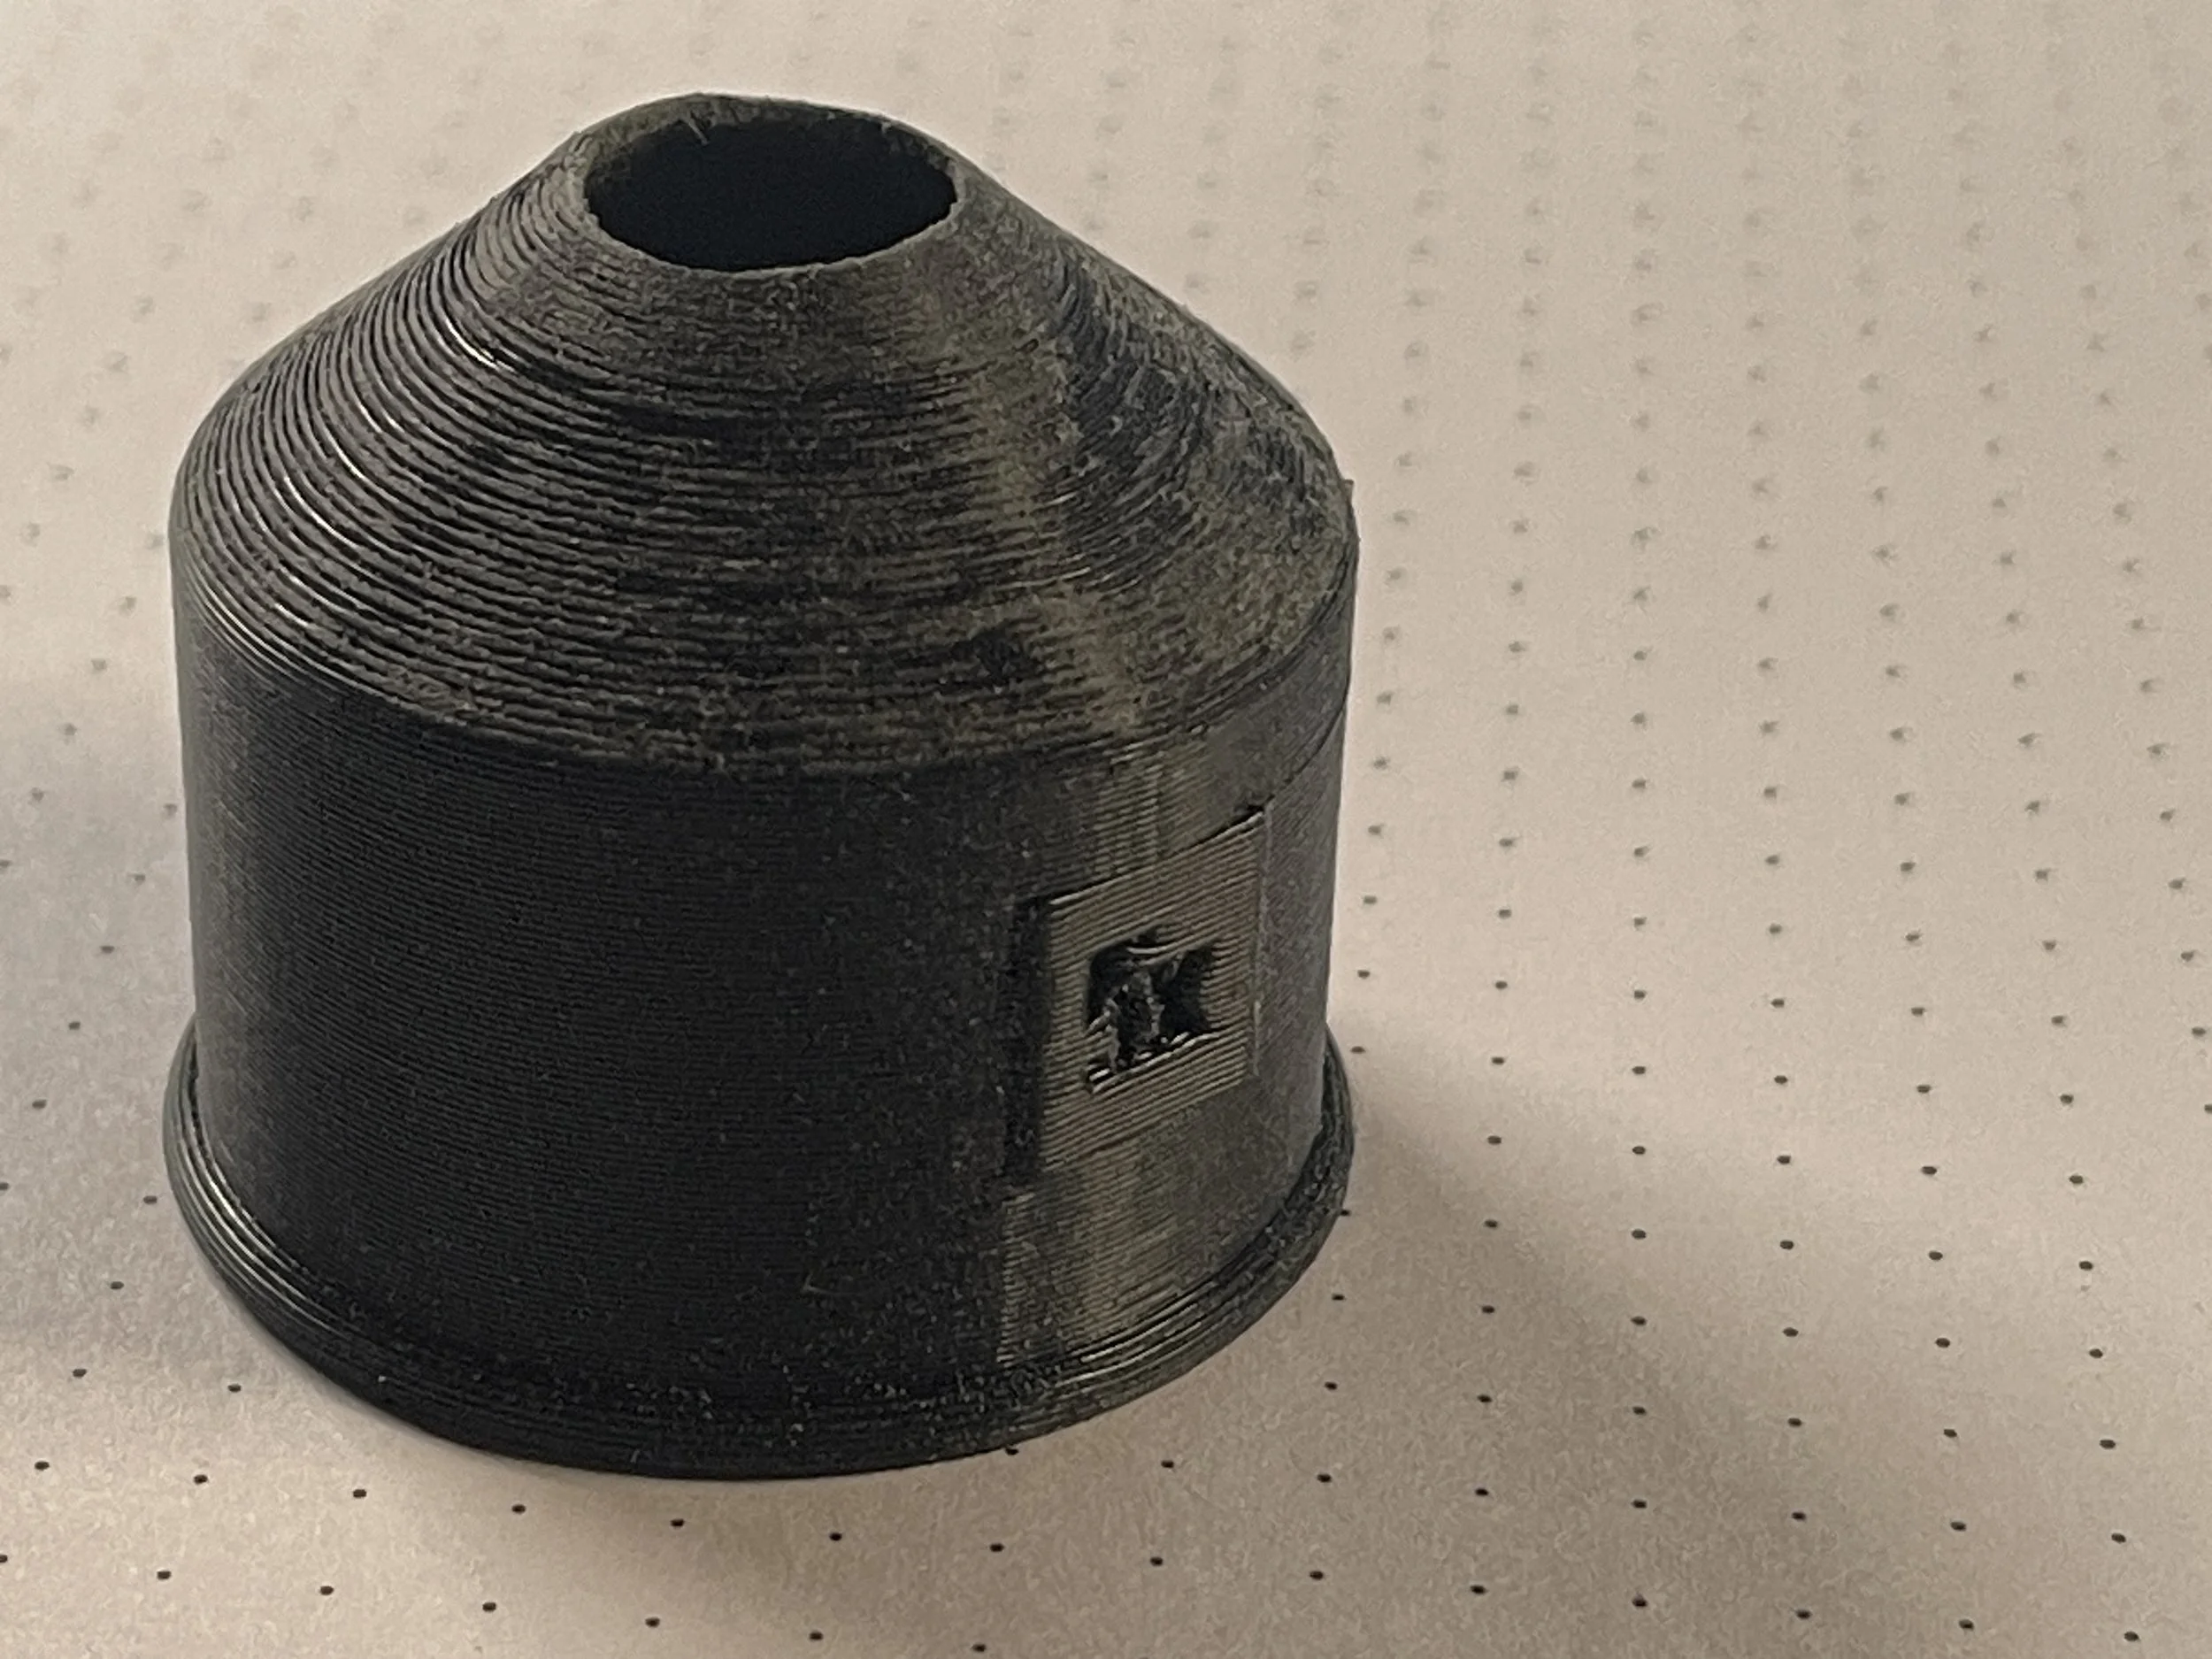
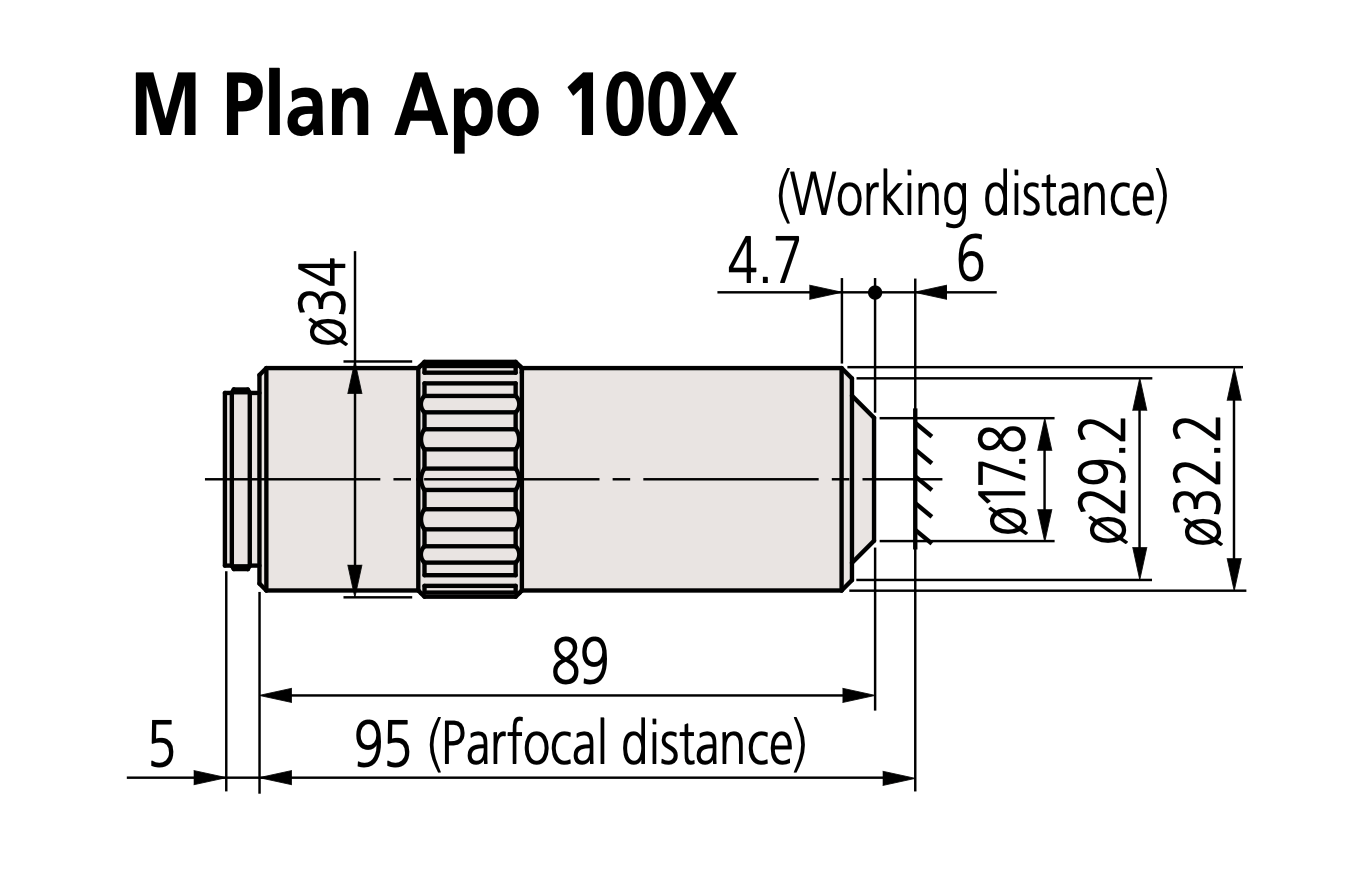
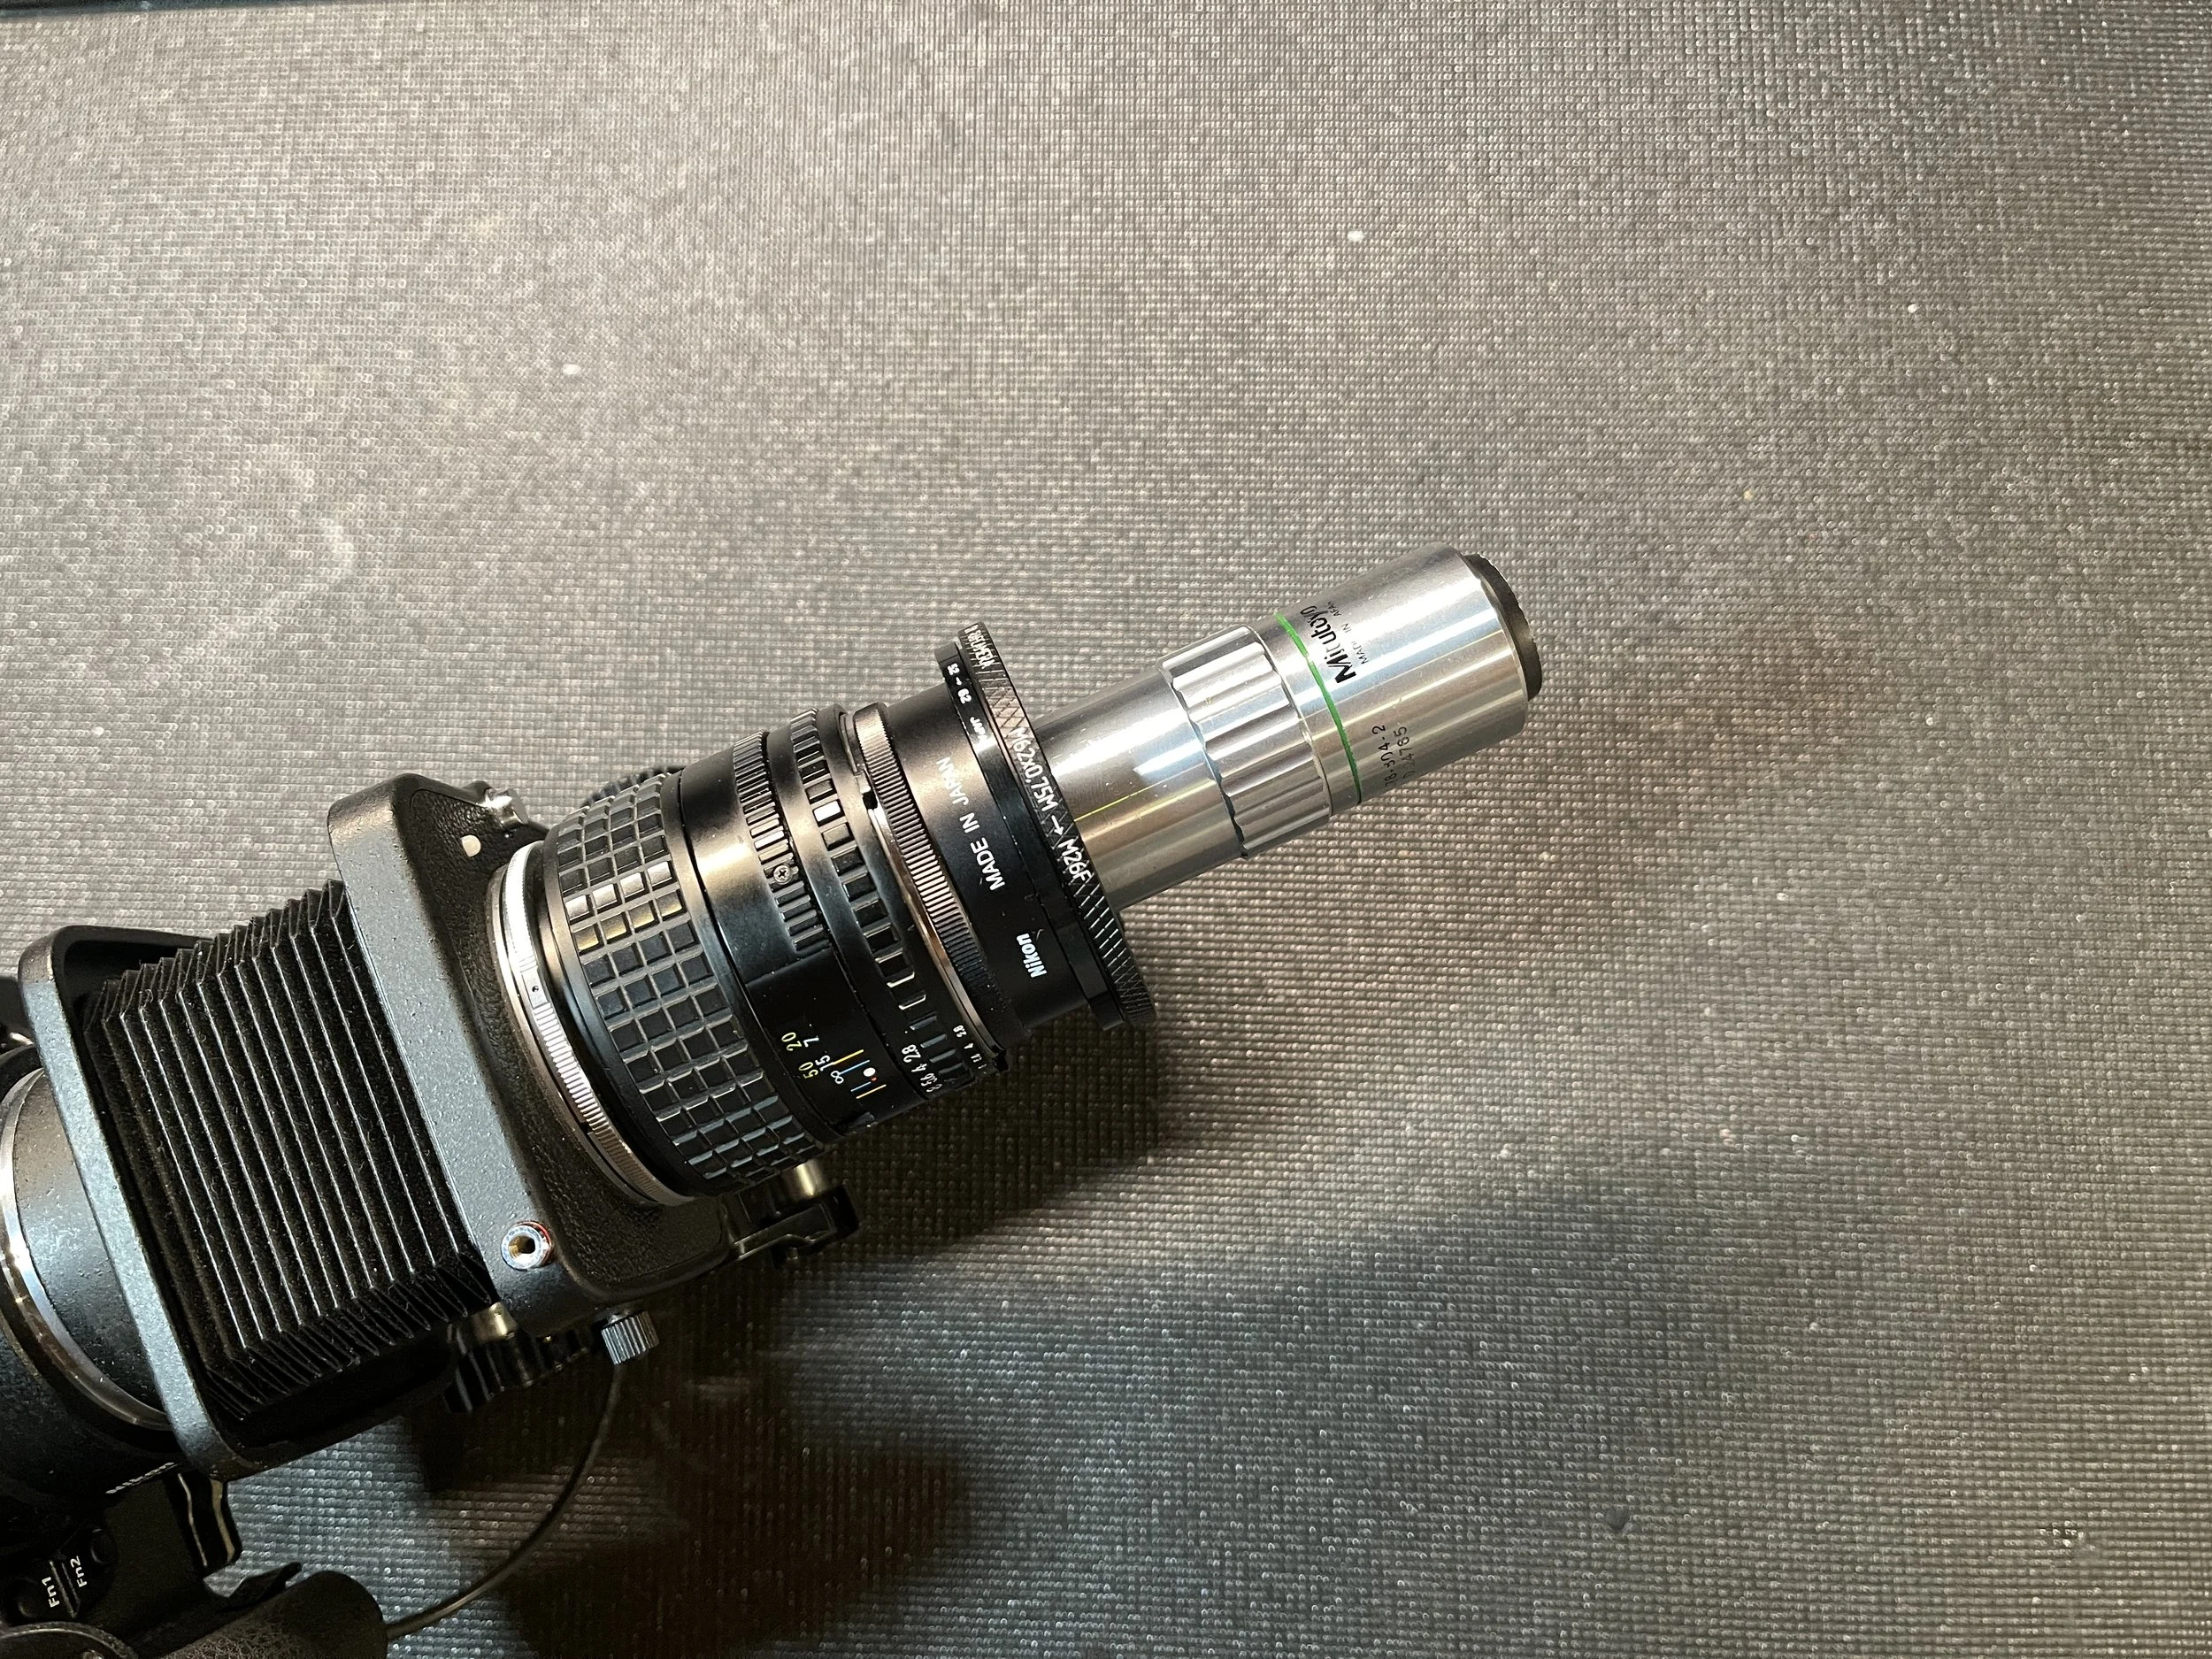
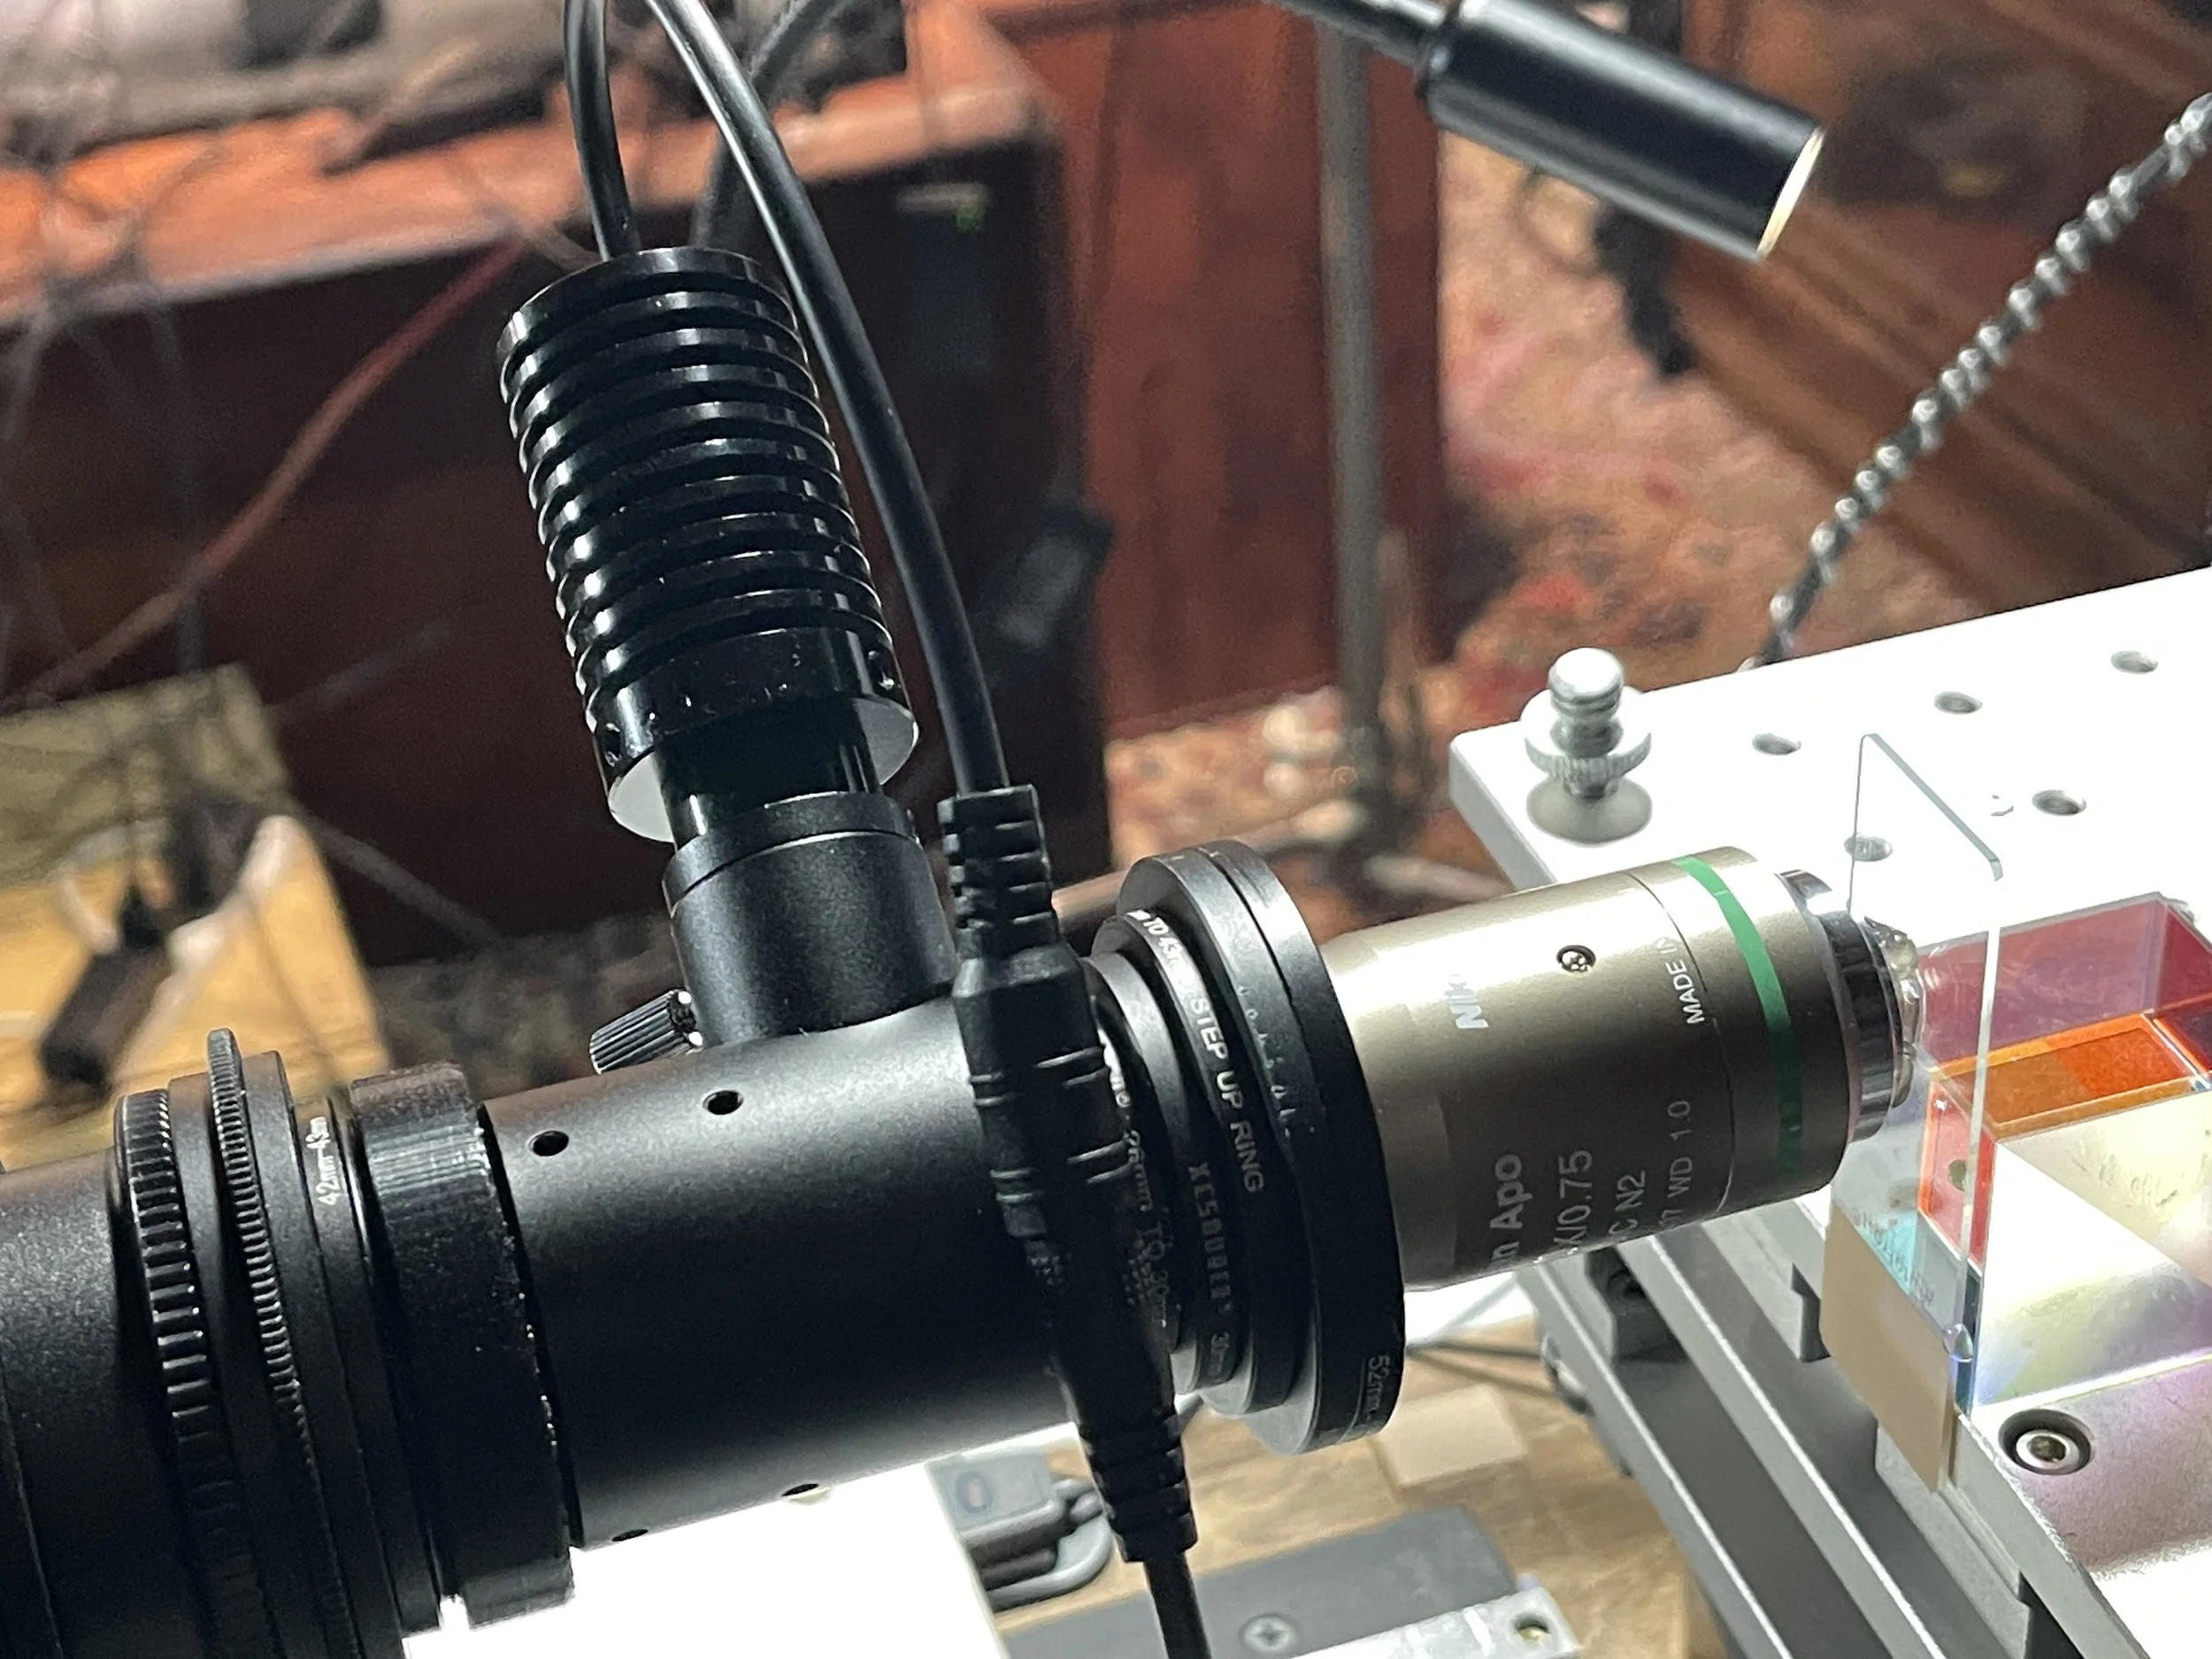
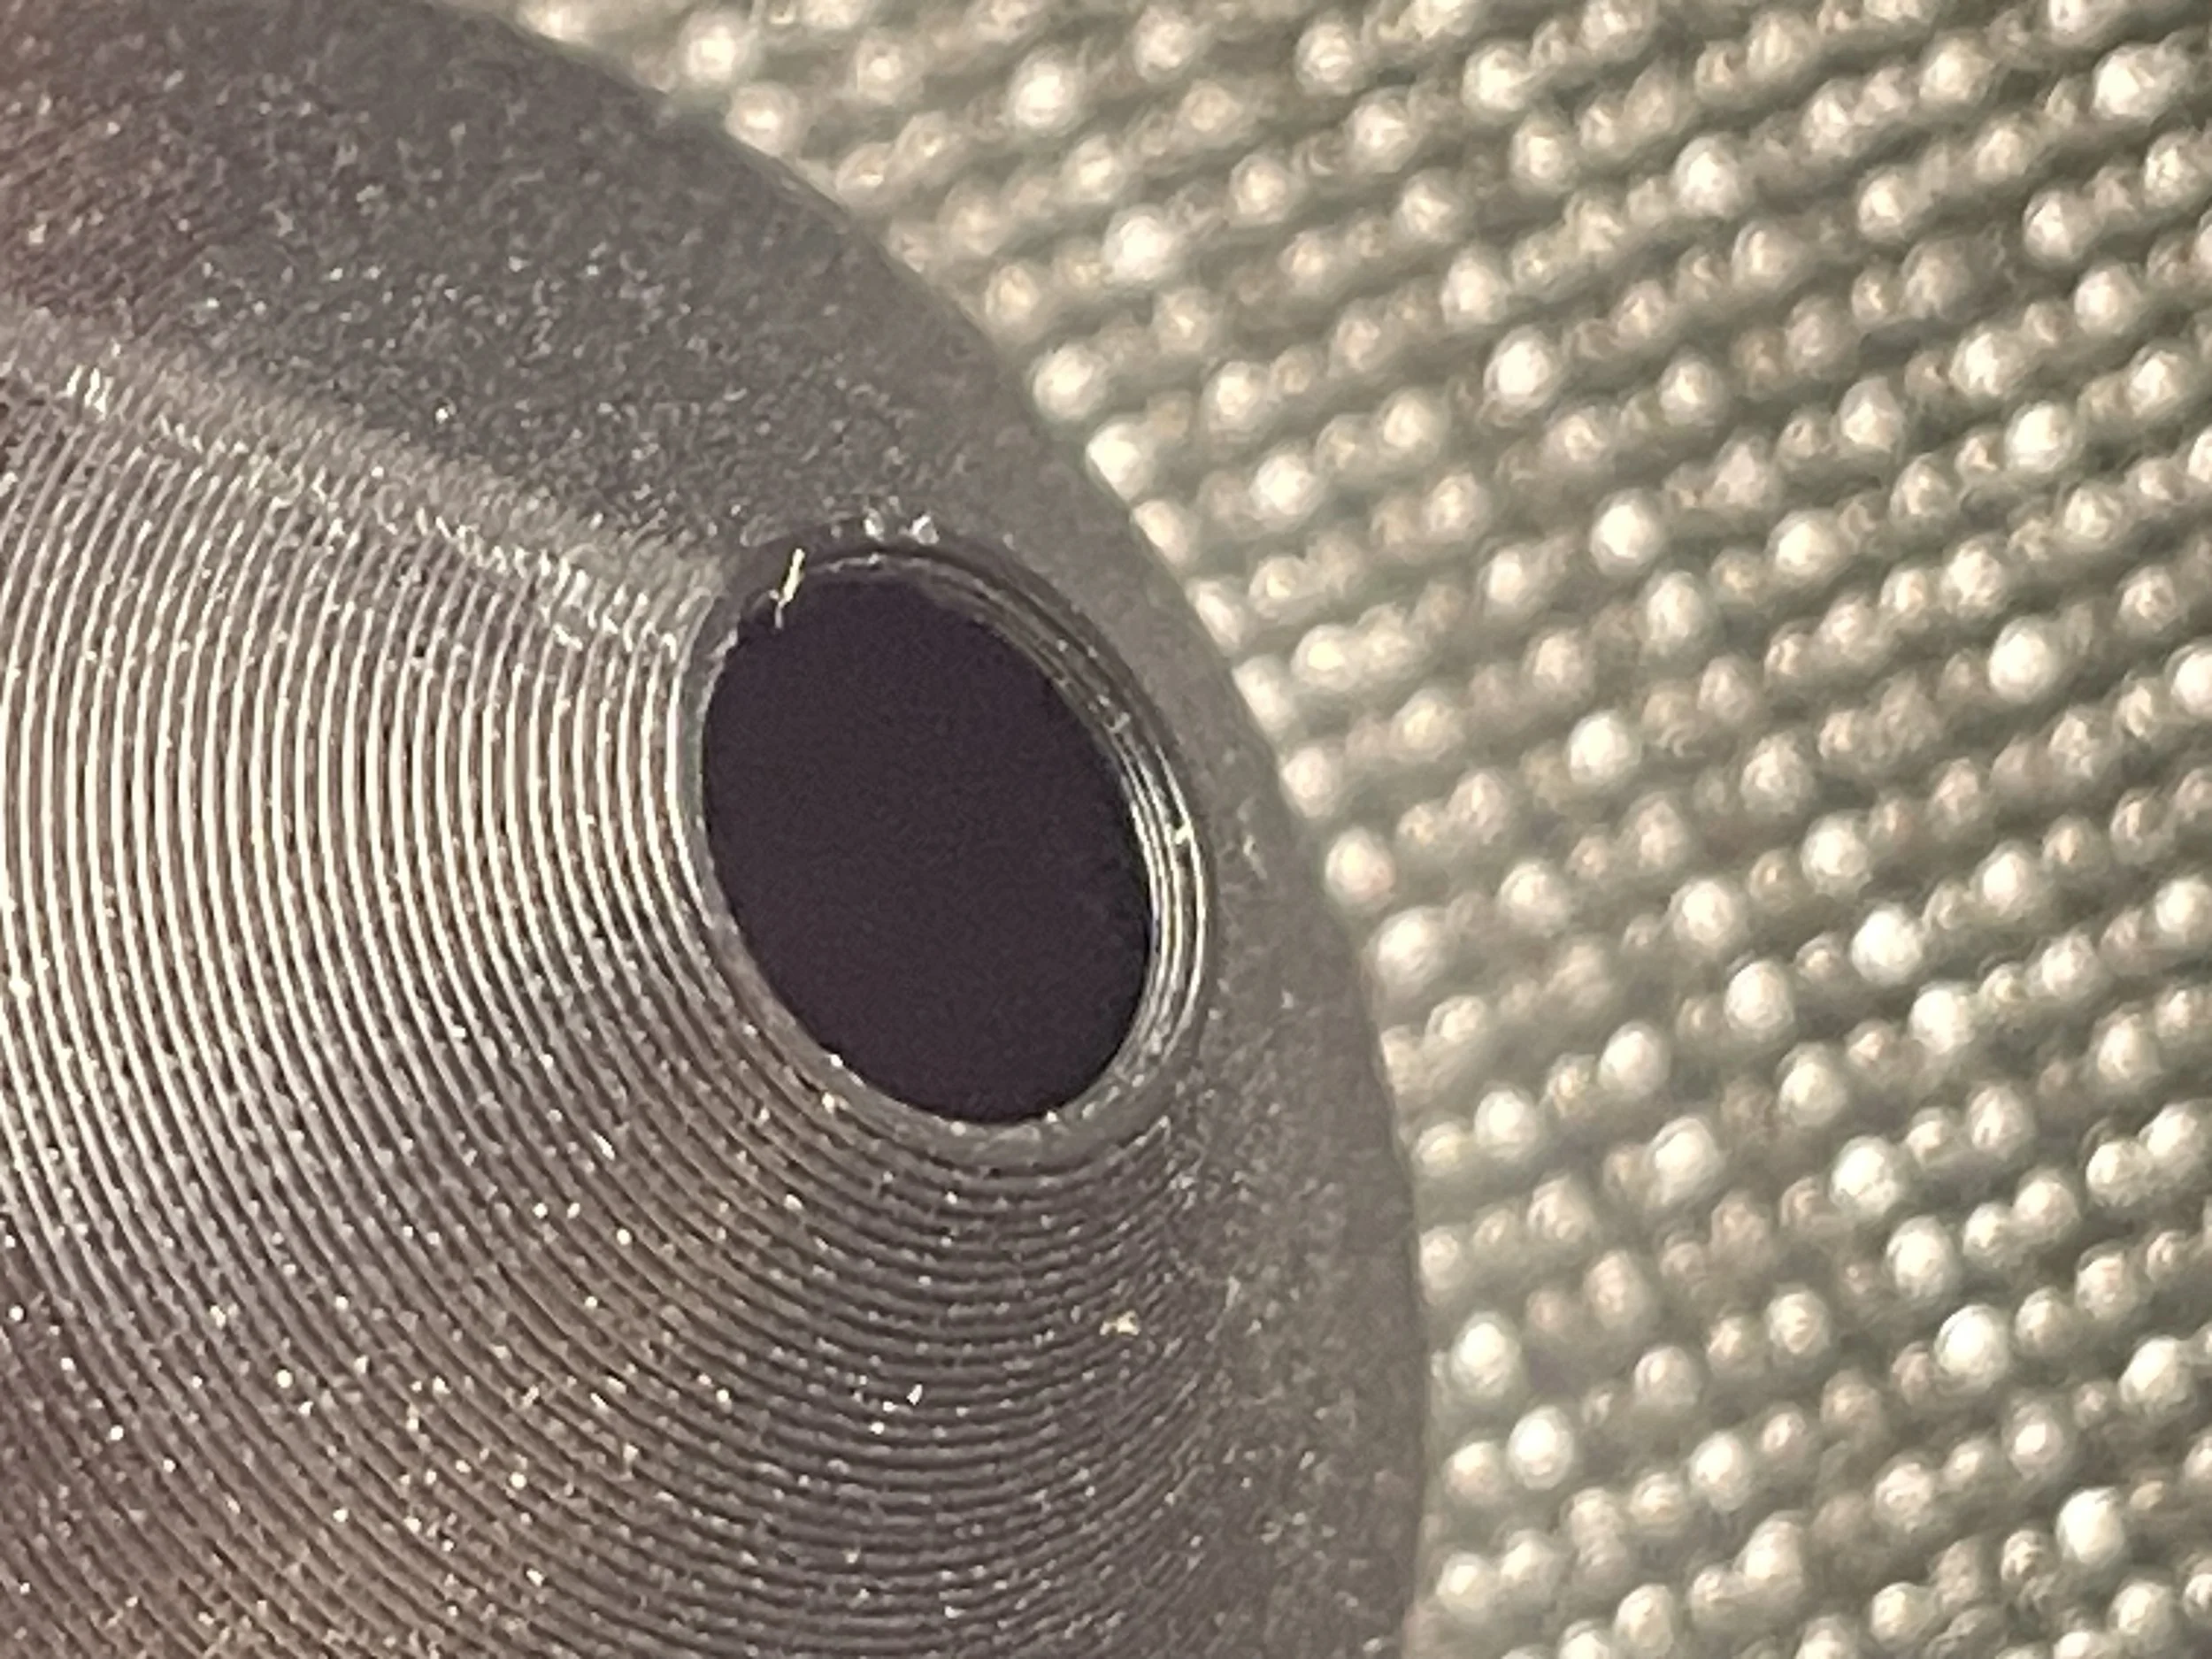
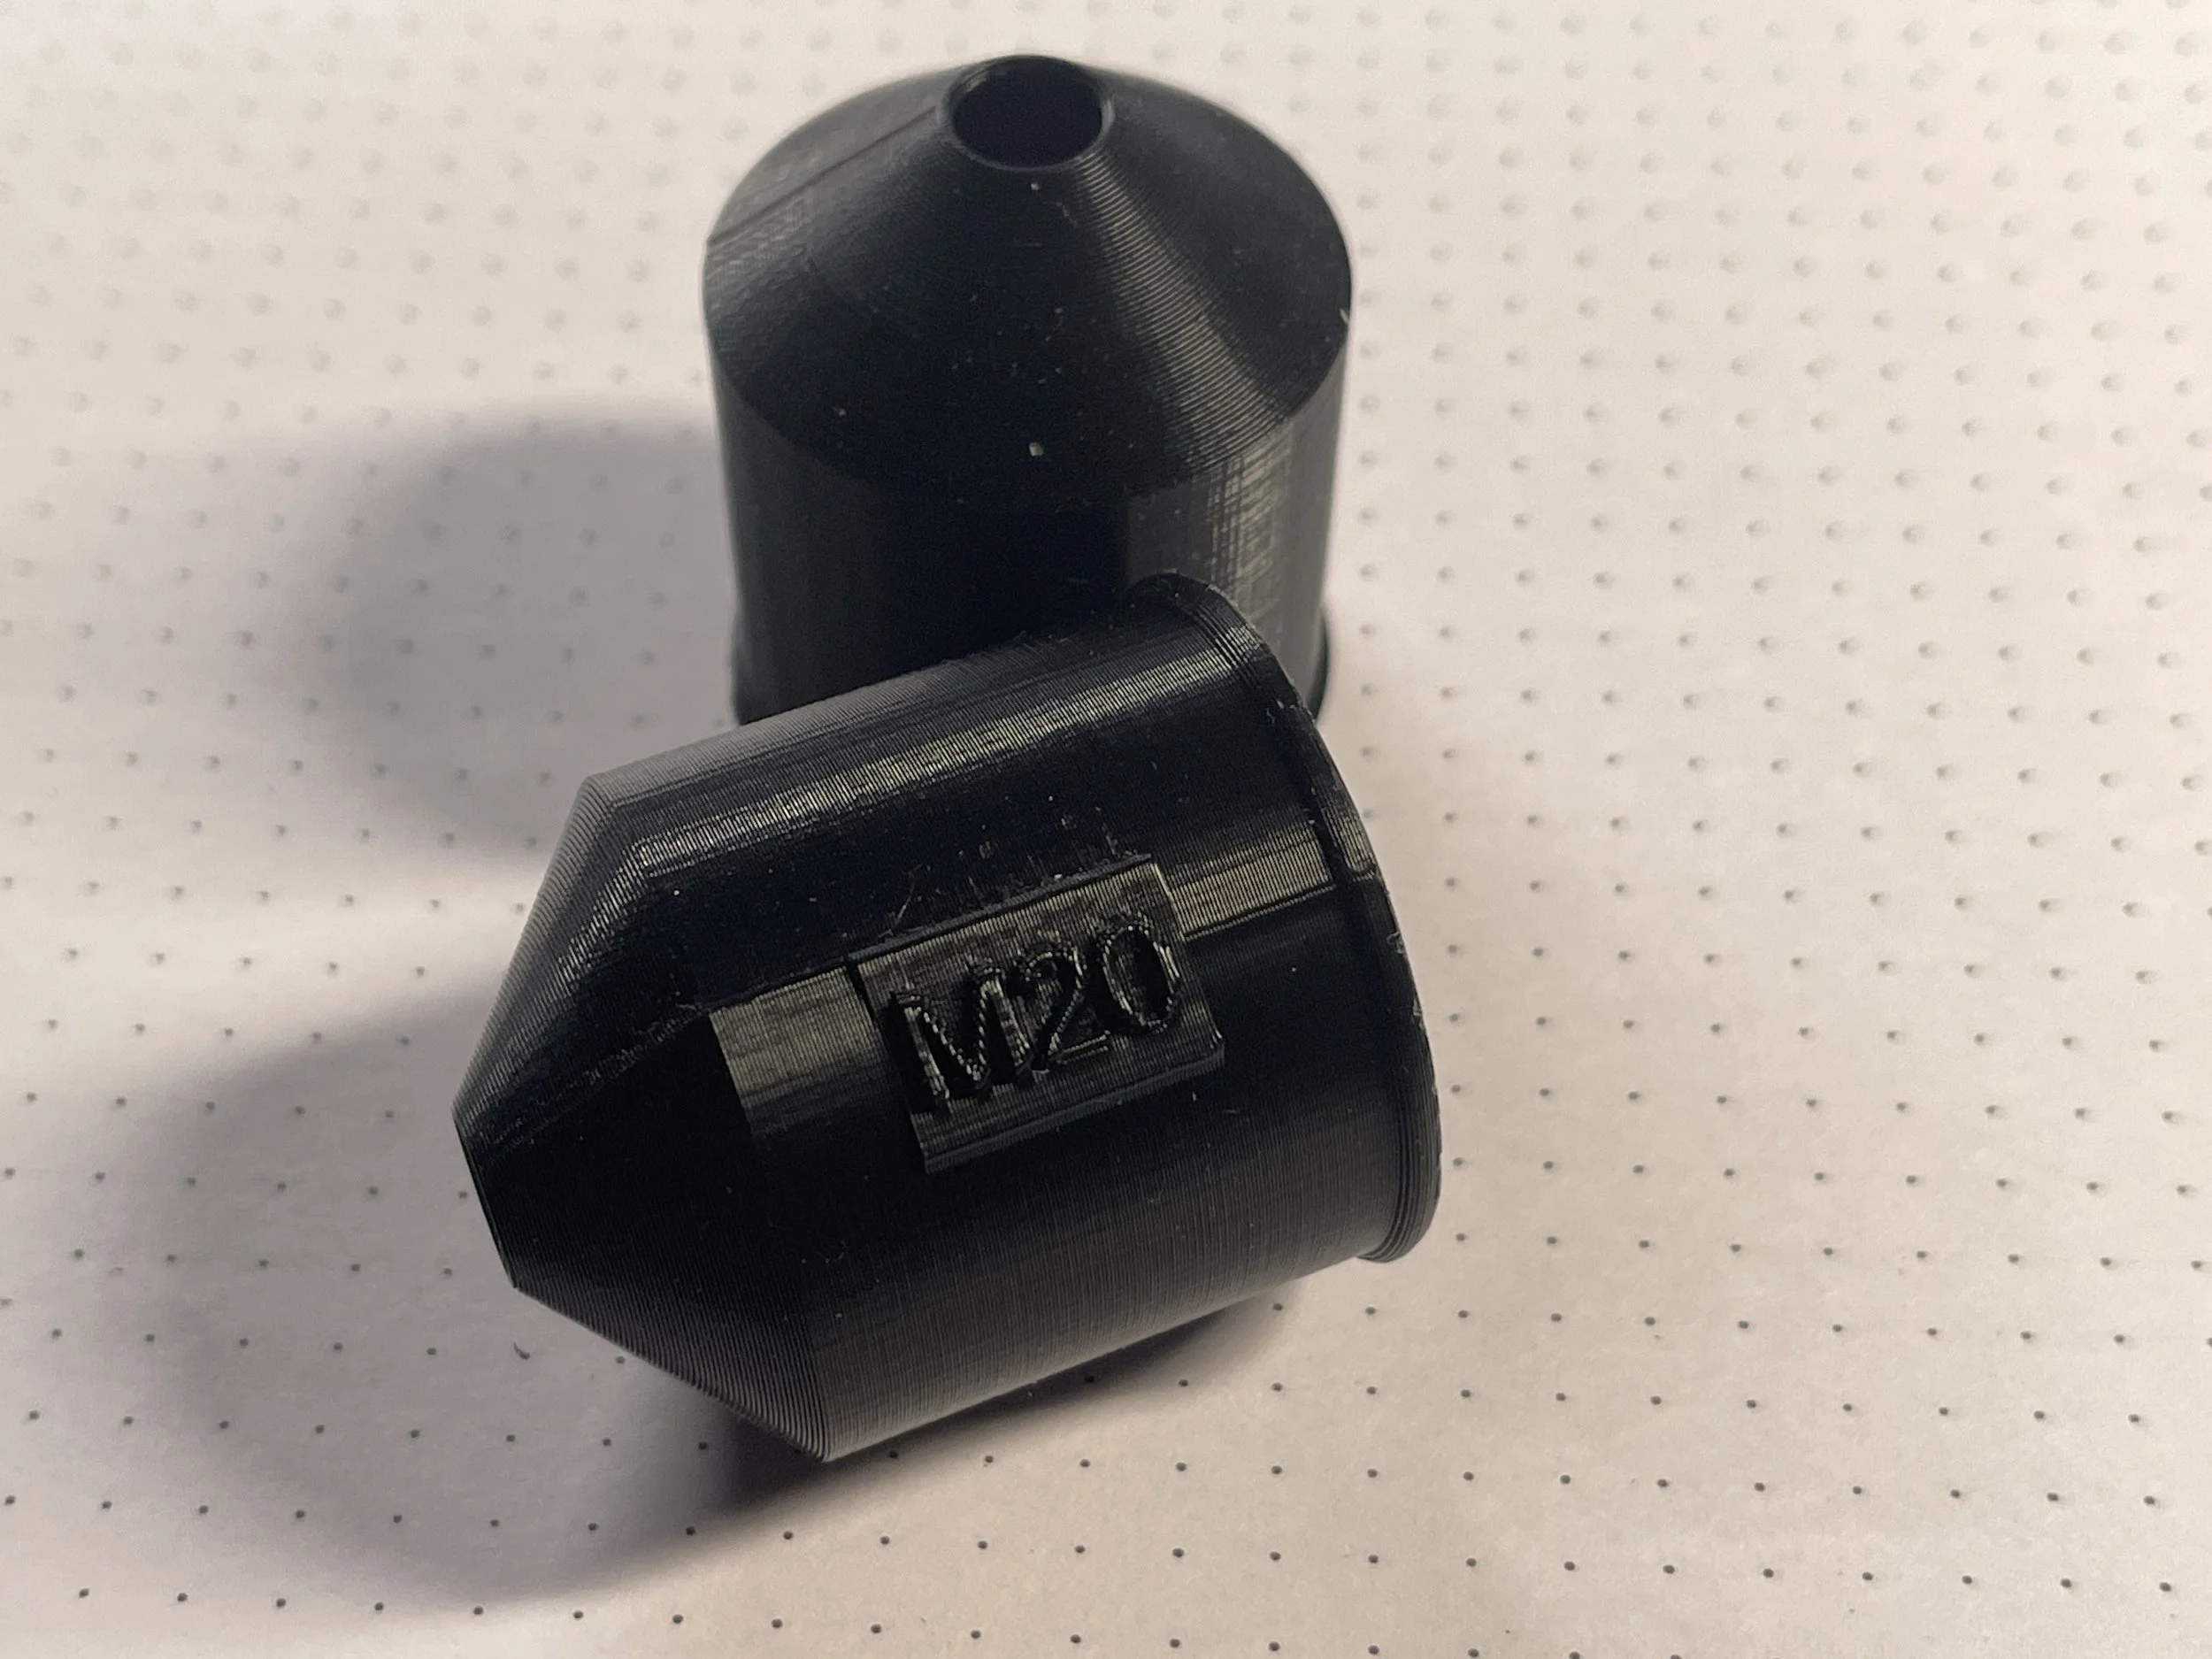
PS I have been meaning to mention that I spent a good part of last week working out the optimal design of a lens hood that is for use with Mitutoyo M-Plan microscope objectives. I have subsequently made sets of these optimized lens hoods for the 5X, 10X, 20X, 50X, and 100X objectives, and which come in a matching box, designed specifically for these hoods.
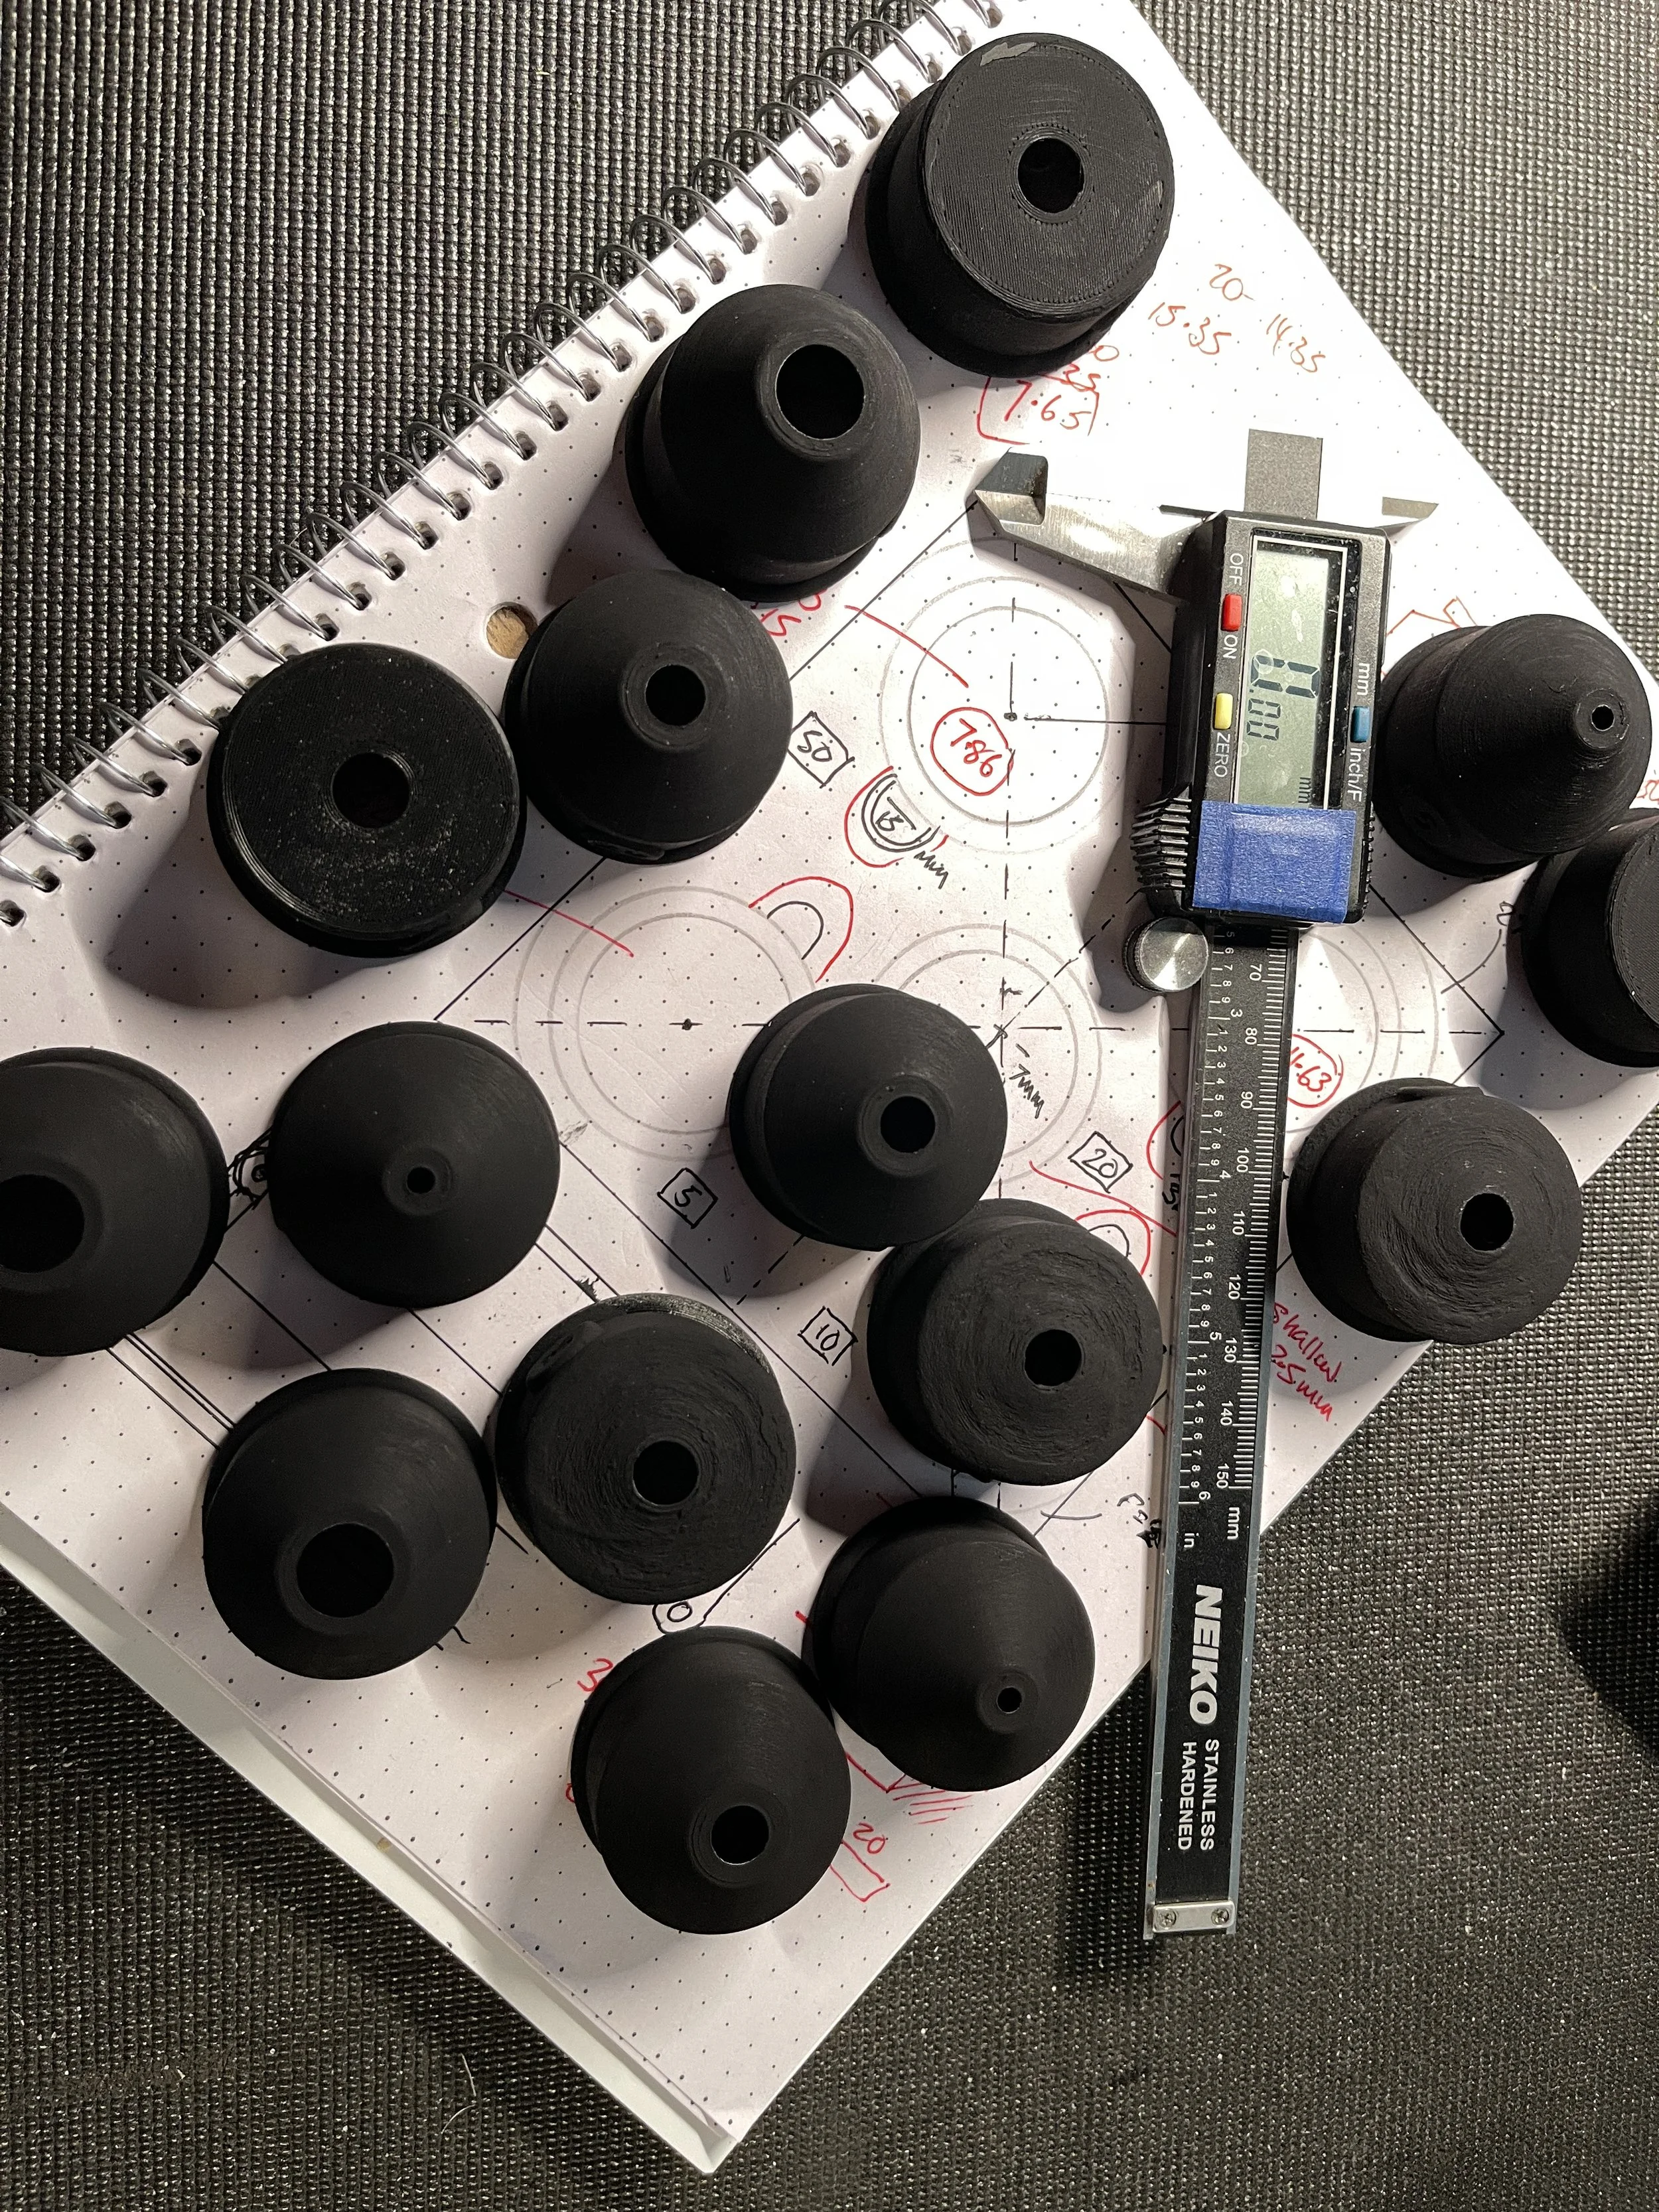
M-Plan APO objective hoods
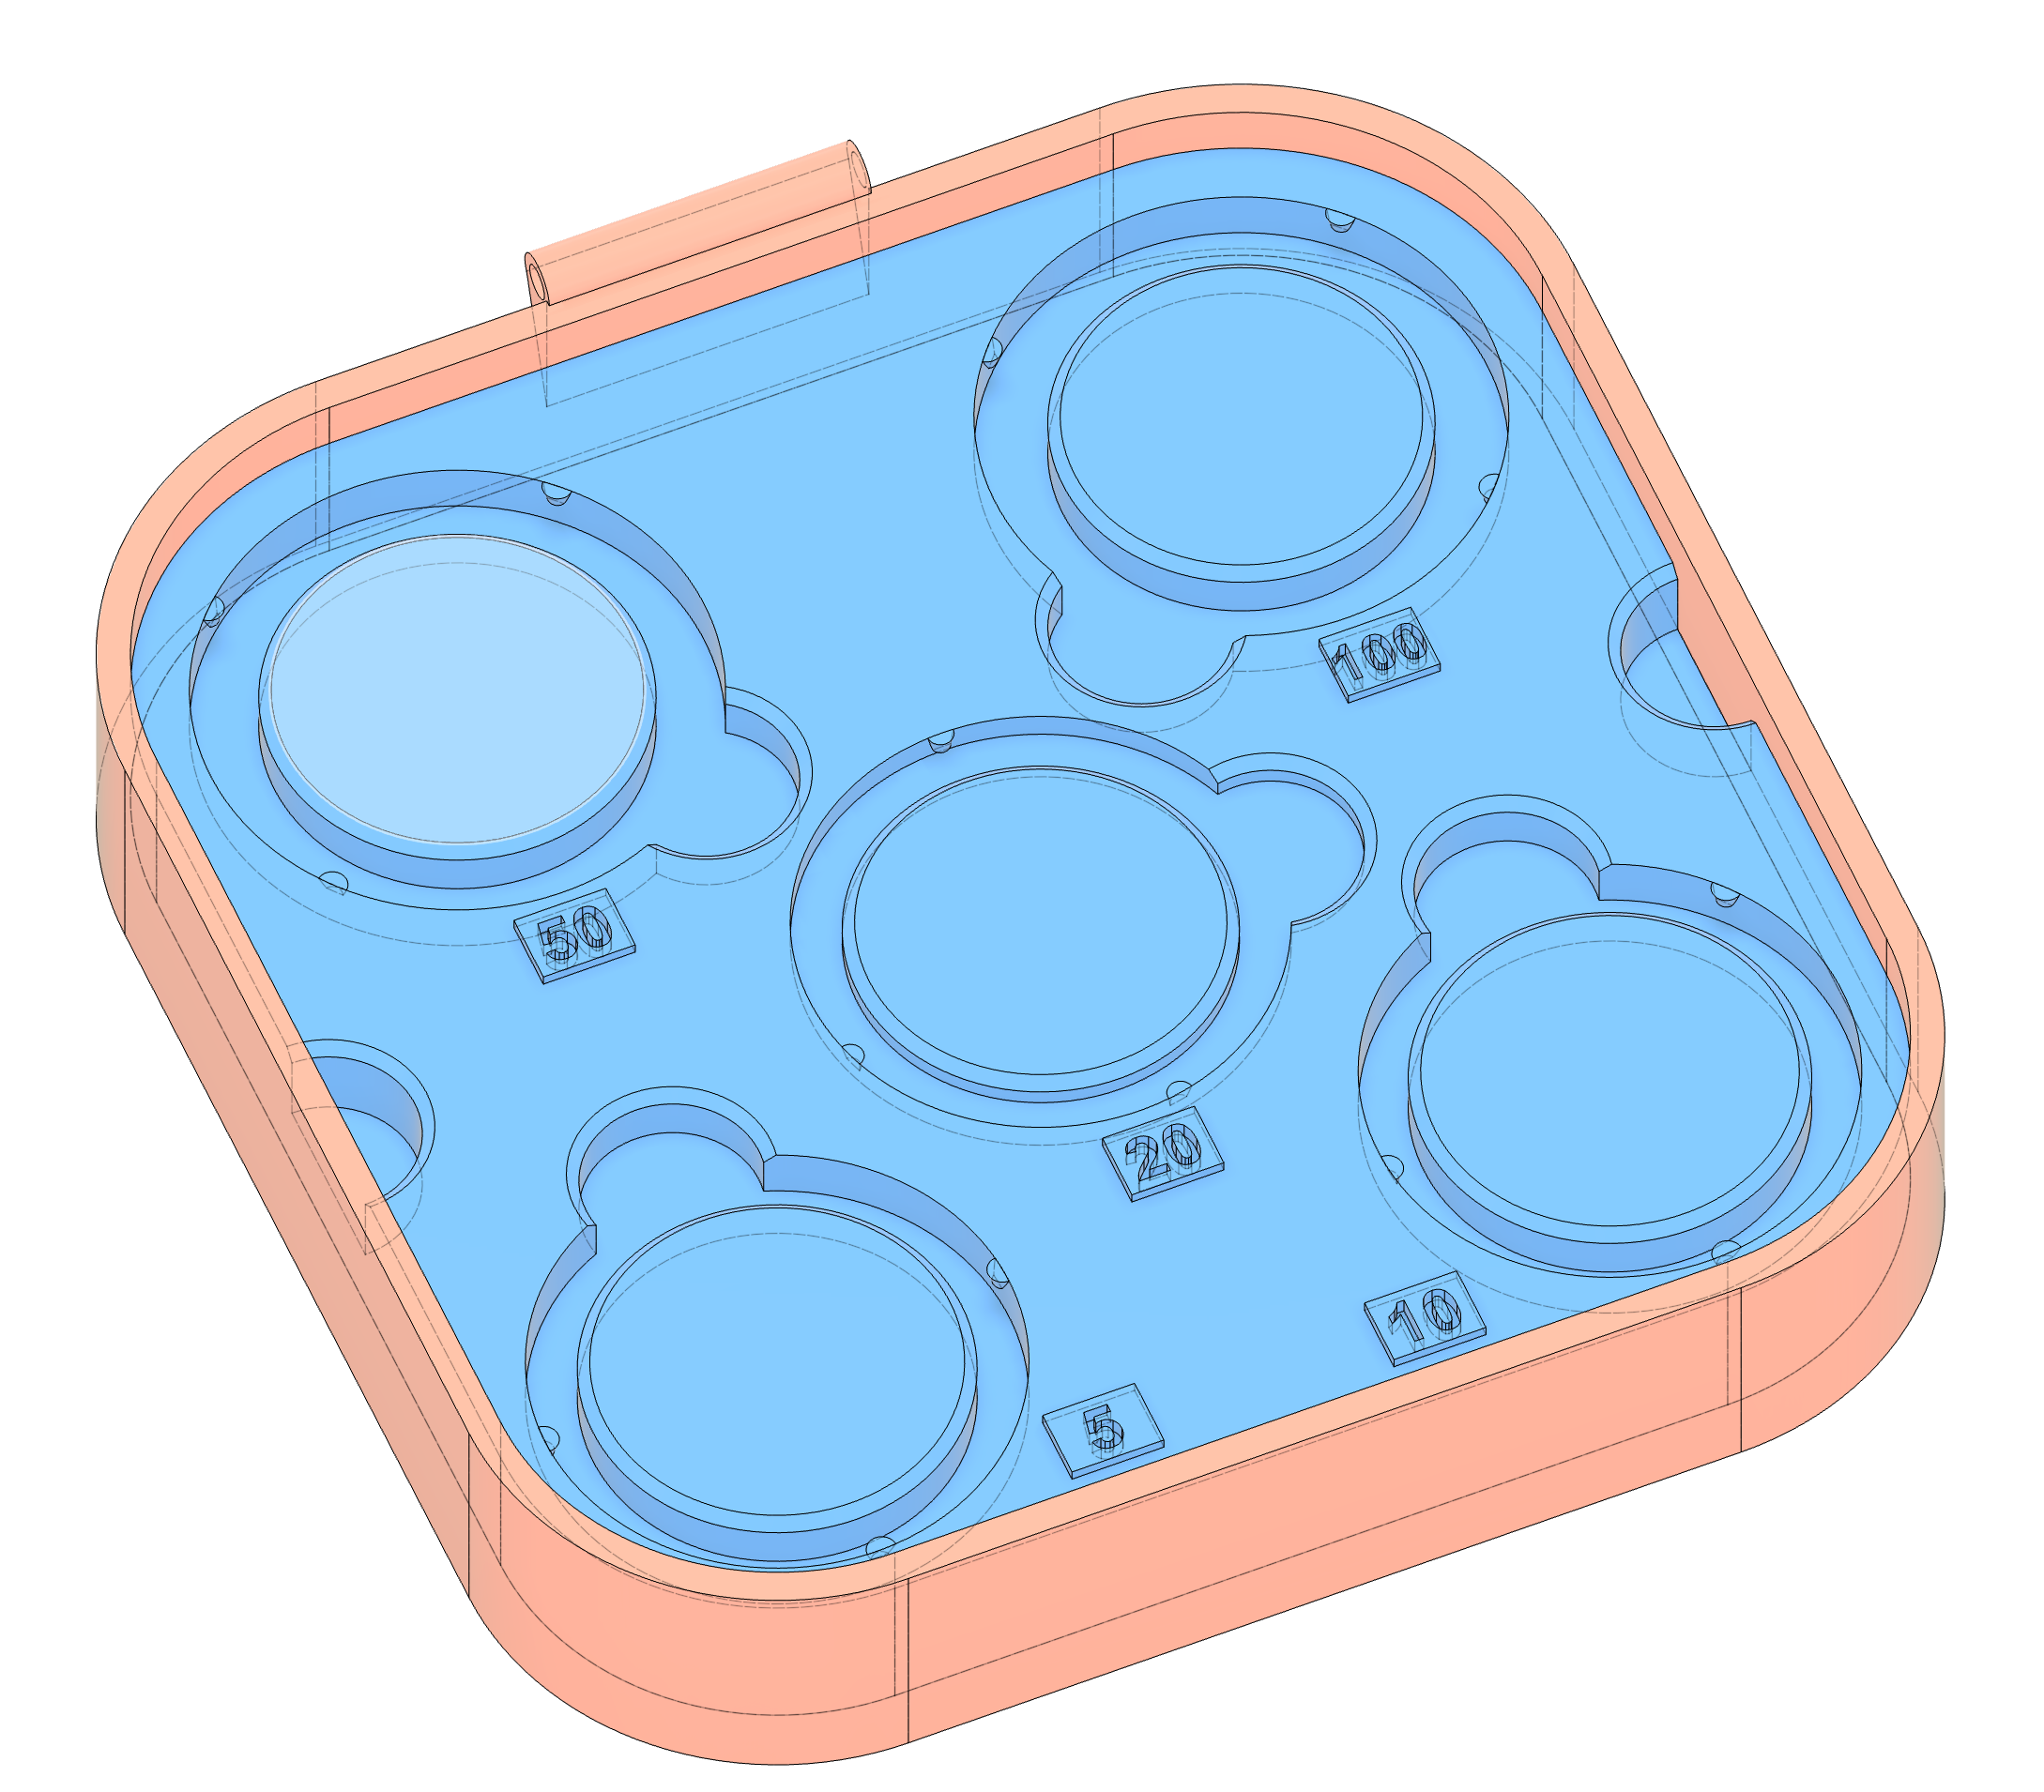
The bottom half of the case for the M-Plan objectives
The pictures show the hoods and the bottom half of the custom case. I am getting a few people to test these prototypes and may be making the sets available for sale in the coming months. If you want to get on the list for a set, use the Walls-app.com messaging center to give me your full name, email and mailing addresses. If I decide to sell these sets, they will be sold on a first come, first served basis. I have not thought about a price yet, but I will put the information on my website and contact anyone who signs up on the list, as soon as the beta testing is done. Each set take 12 hours to print (the sizing has to be perfect to stay in the tiny sweet spot between too much and too little light) and each hood is hand-painted with high end ultra black 3.0 paint.
See you soon,
Allan