

The Objective Lens Hood
/Another week is upon us, and this is going to be another busy one. I am going to get right into the meat of this week’s post and will put all the invitations and scheduling announcements at the end of this article. That is partly because I need to get all this stuff out of my head before it explodes and partly because I want you to read this first part. And why is that? It is because it falls in the category of “one of those things somebody should have told me about when I was little, but didn’t”, and it pertains to optics.
Under the civic center - Mobile, AL
Optics is a scientific discipline, sort of. It concerns itself with the behavior of a relatively narrow band of electromagnetic wavelengths and could, in some circumstances, be confused with some sort of physics. The reality is less clear. Let us say, for the moment, that you want to understand the inner workings of your Nikon D850. You would unquestionably be in a better position to grasp the arcane mechanisms of the mirror assembly, or the instantaneous precision of the autofocus firmware, if you were the holder of a doctorate-level degree in mechanical engineering, electrical engineering, or both. But to understand optics at a correspondingly advanced level, you should know several good card tricks, have read most of Douglas Adams, get right at least half the answers to the London Times’ Cryptic Crossword every day, and be willing to concede that Flat Earthers may be onto something. An advanced degree may come in handy from time to time, but isn’t mandatory.

A lighthouse in winter
On that basis, I consider myself 75%-qualified to talk, in vague generalities, about the use of microscope objective lens hoods in macro photography. I have decided to wade into this treacherous quagmire of quasi-optical speculation, random approximation, and dubious formulae, for one sole reason - because I have just spent three days trying to figure out the truth of objective lens hoods and misery loves company.
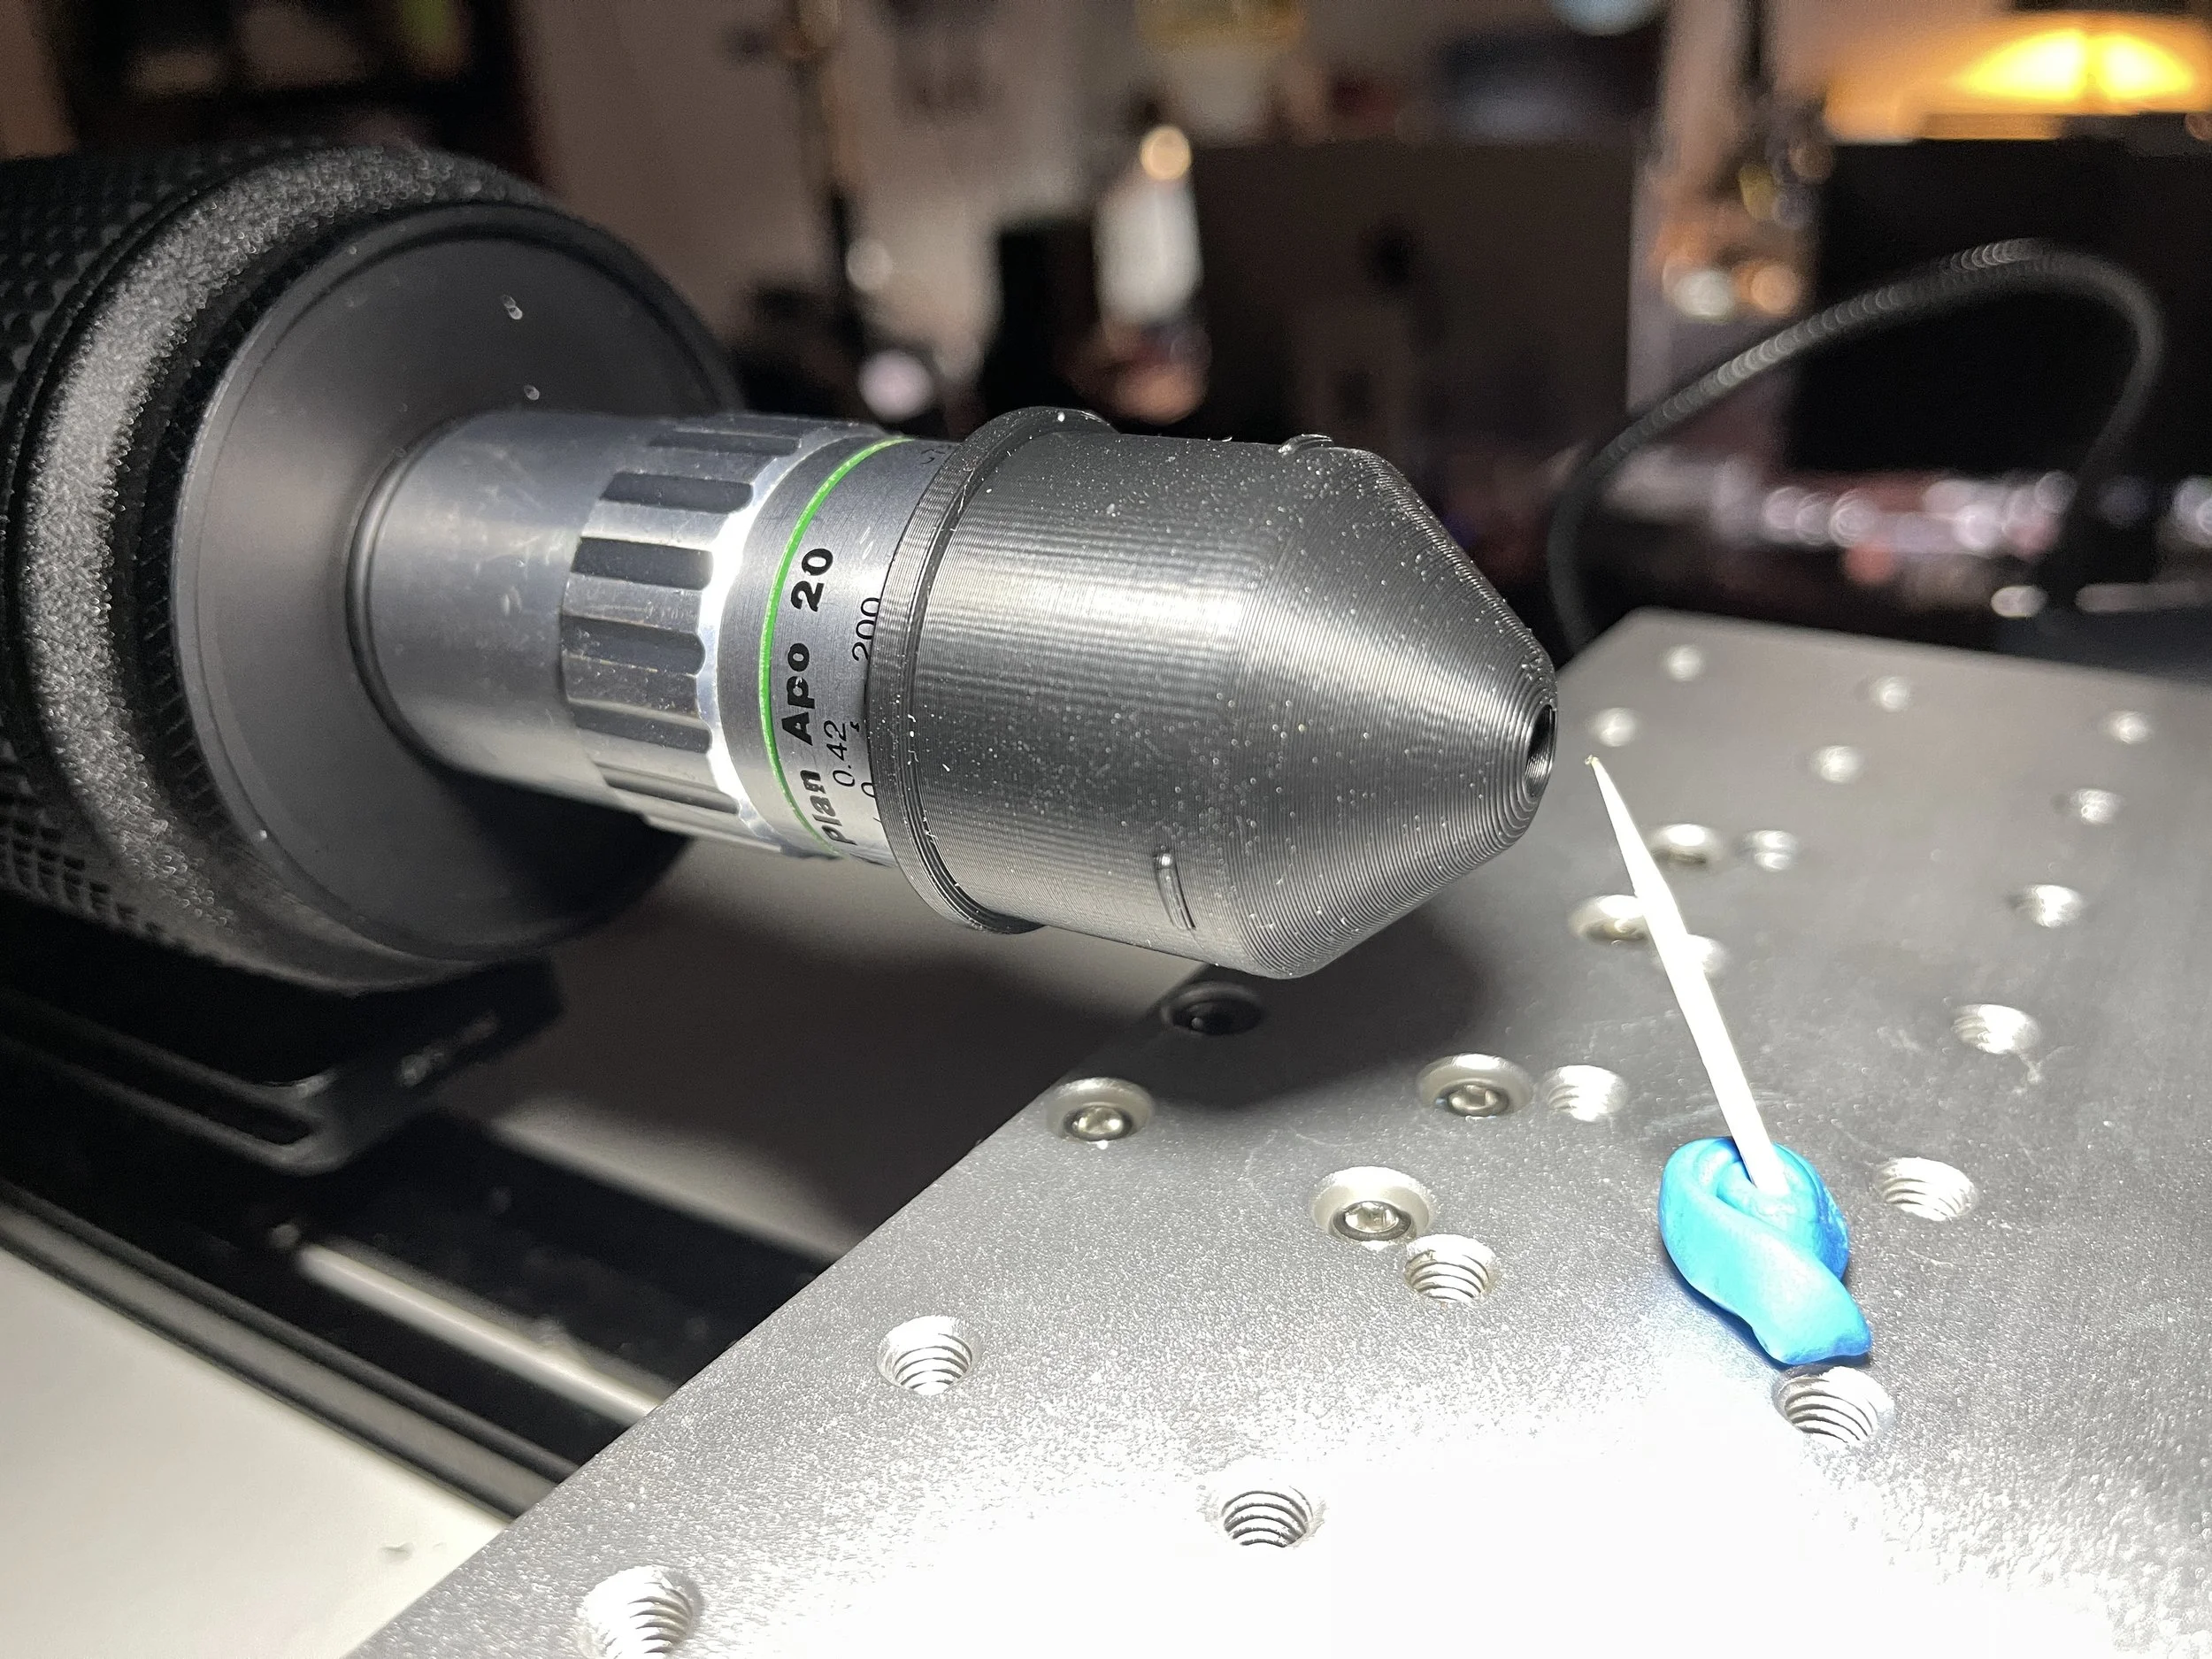
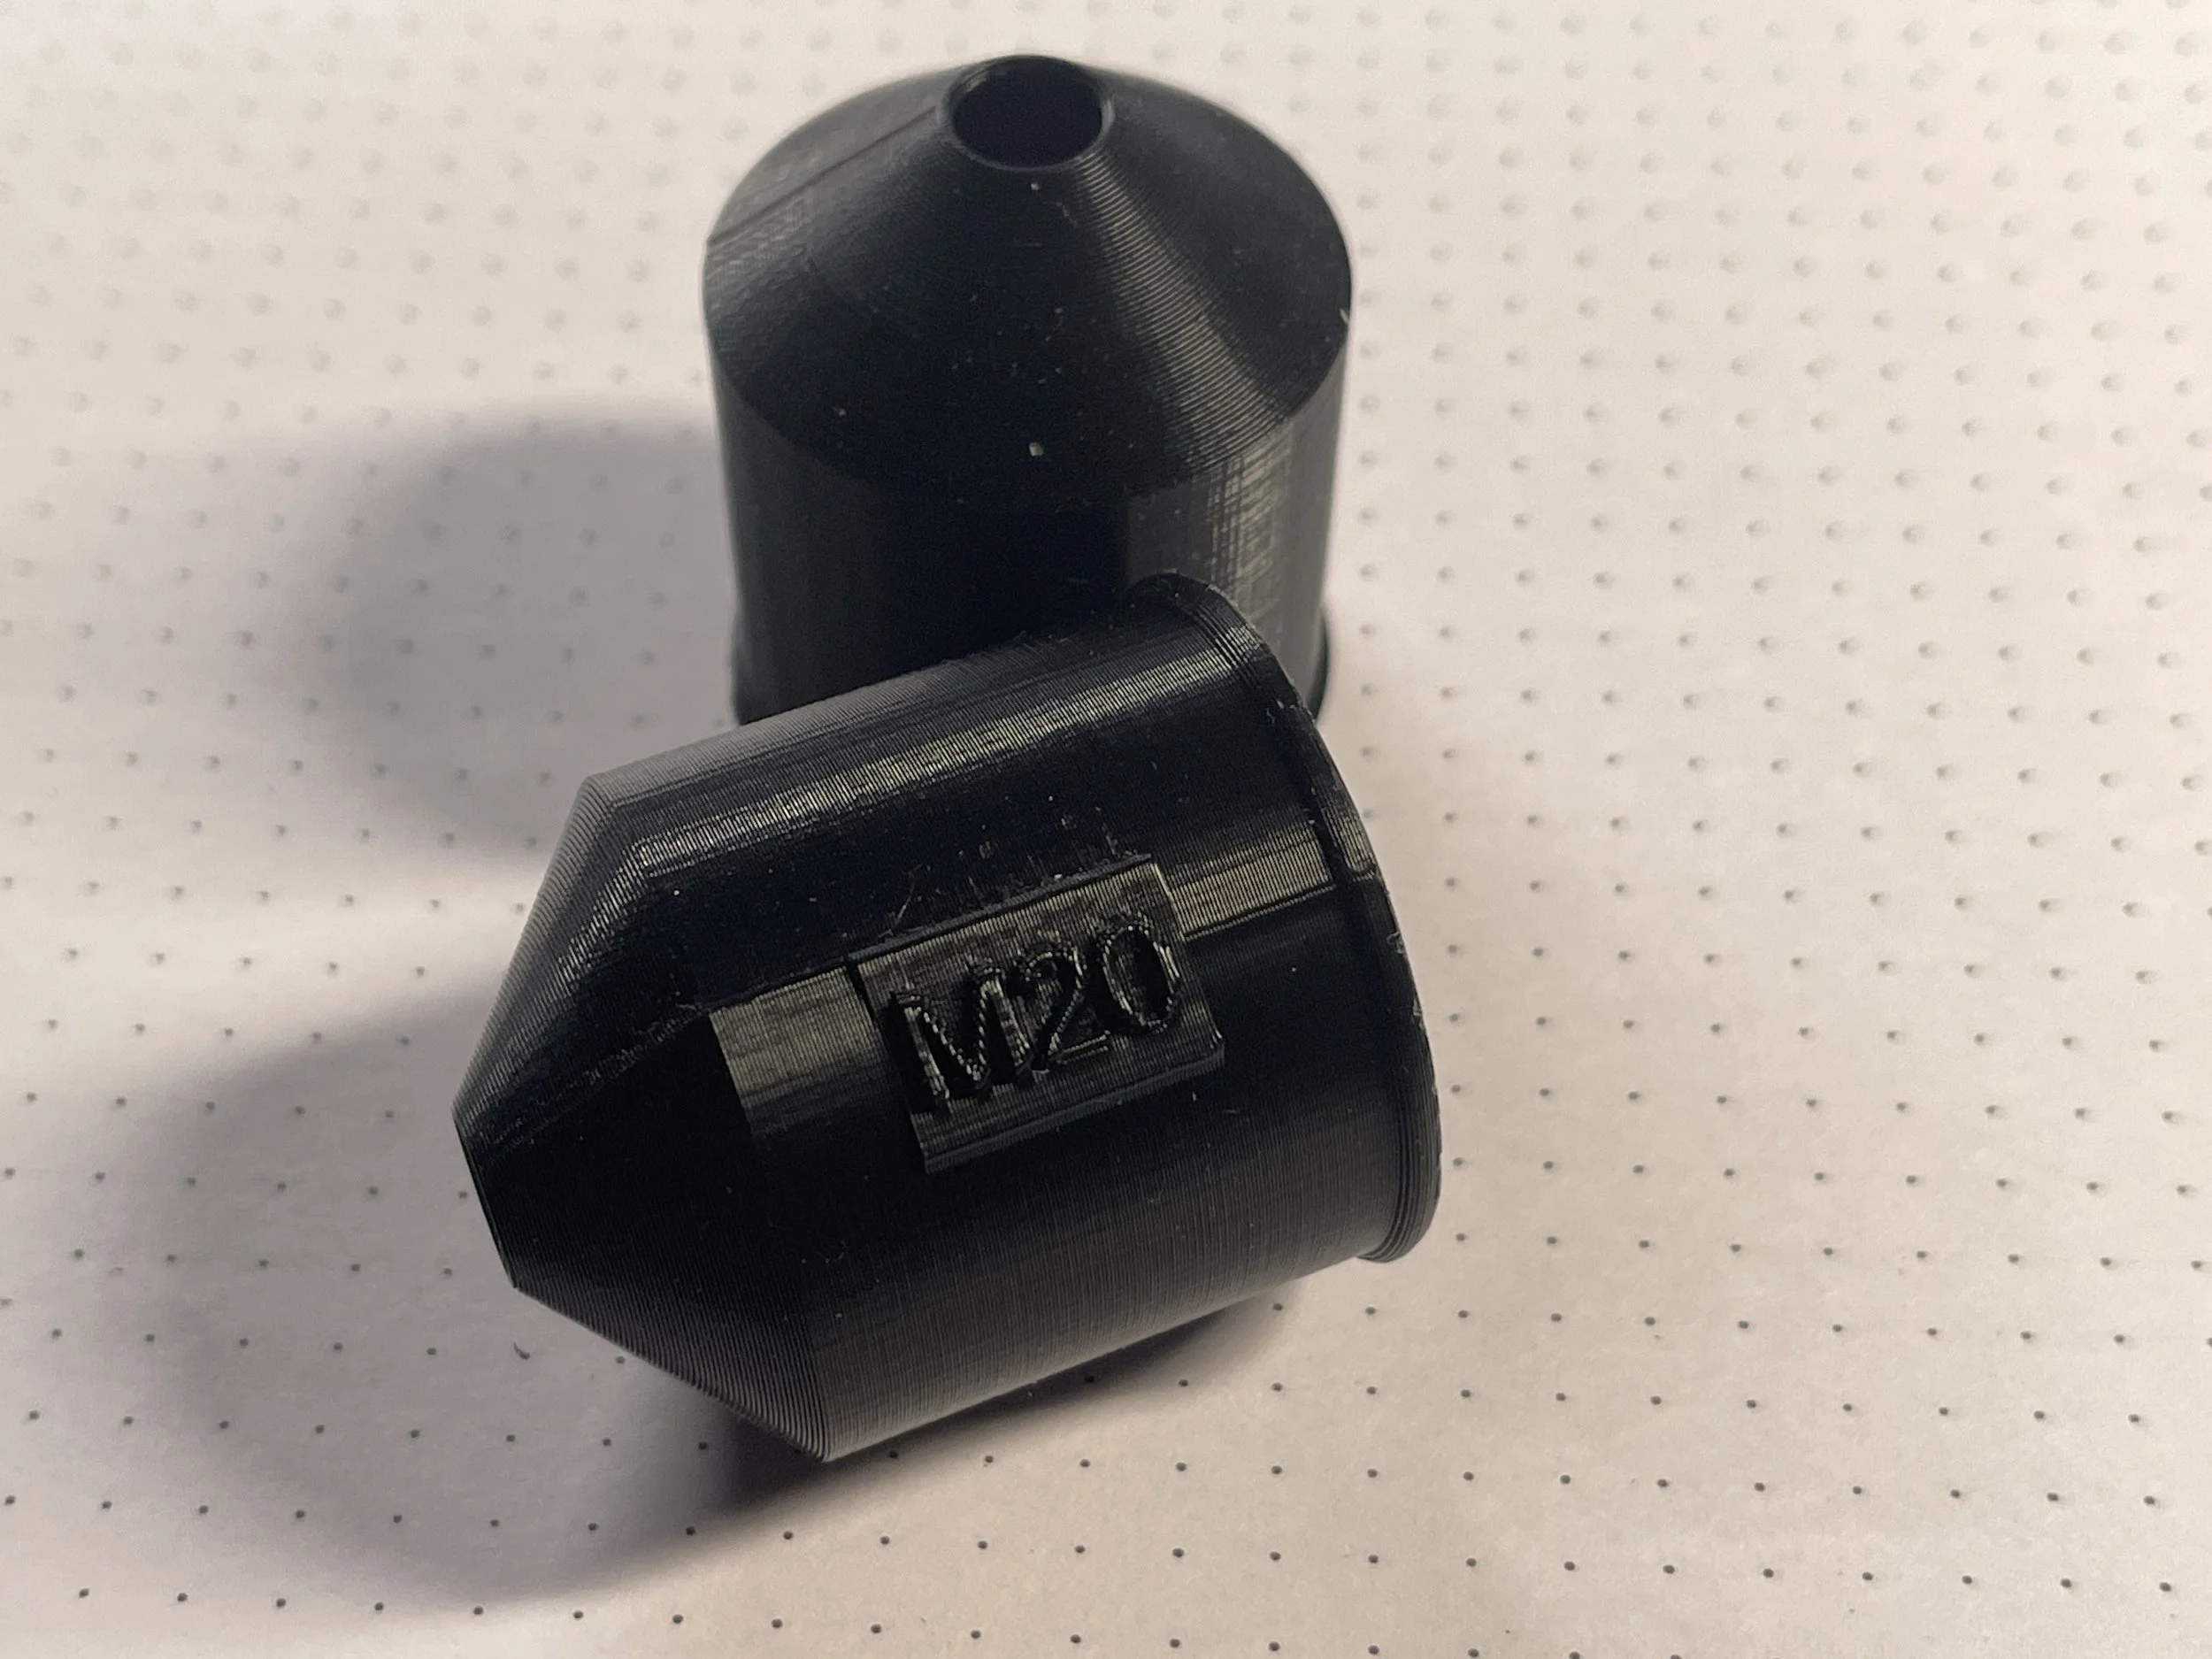
20X hood in action
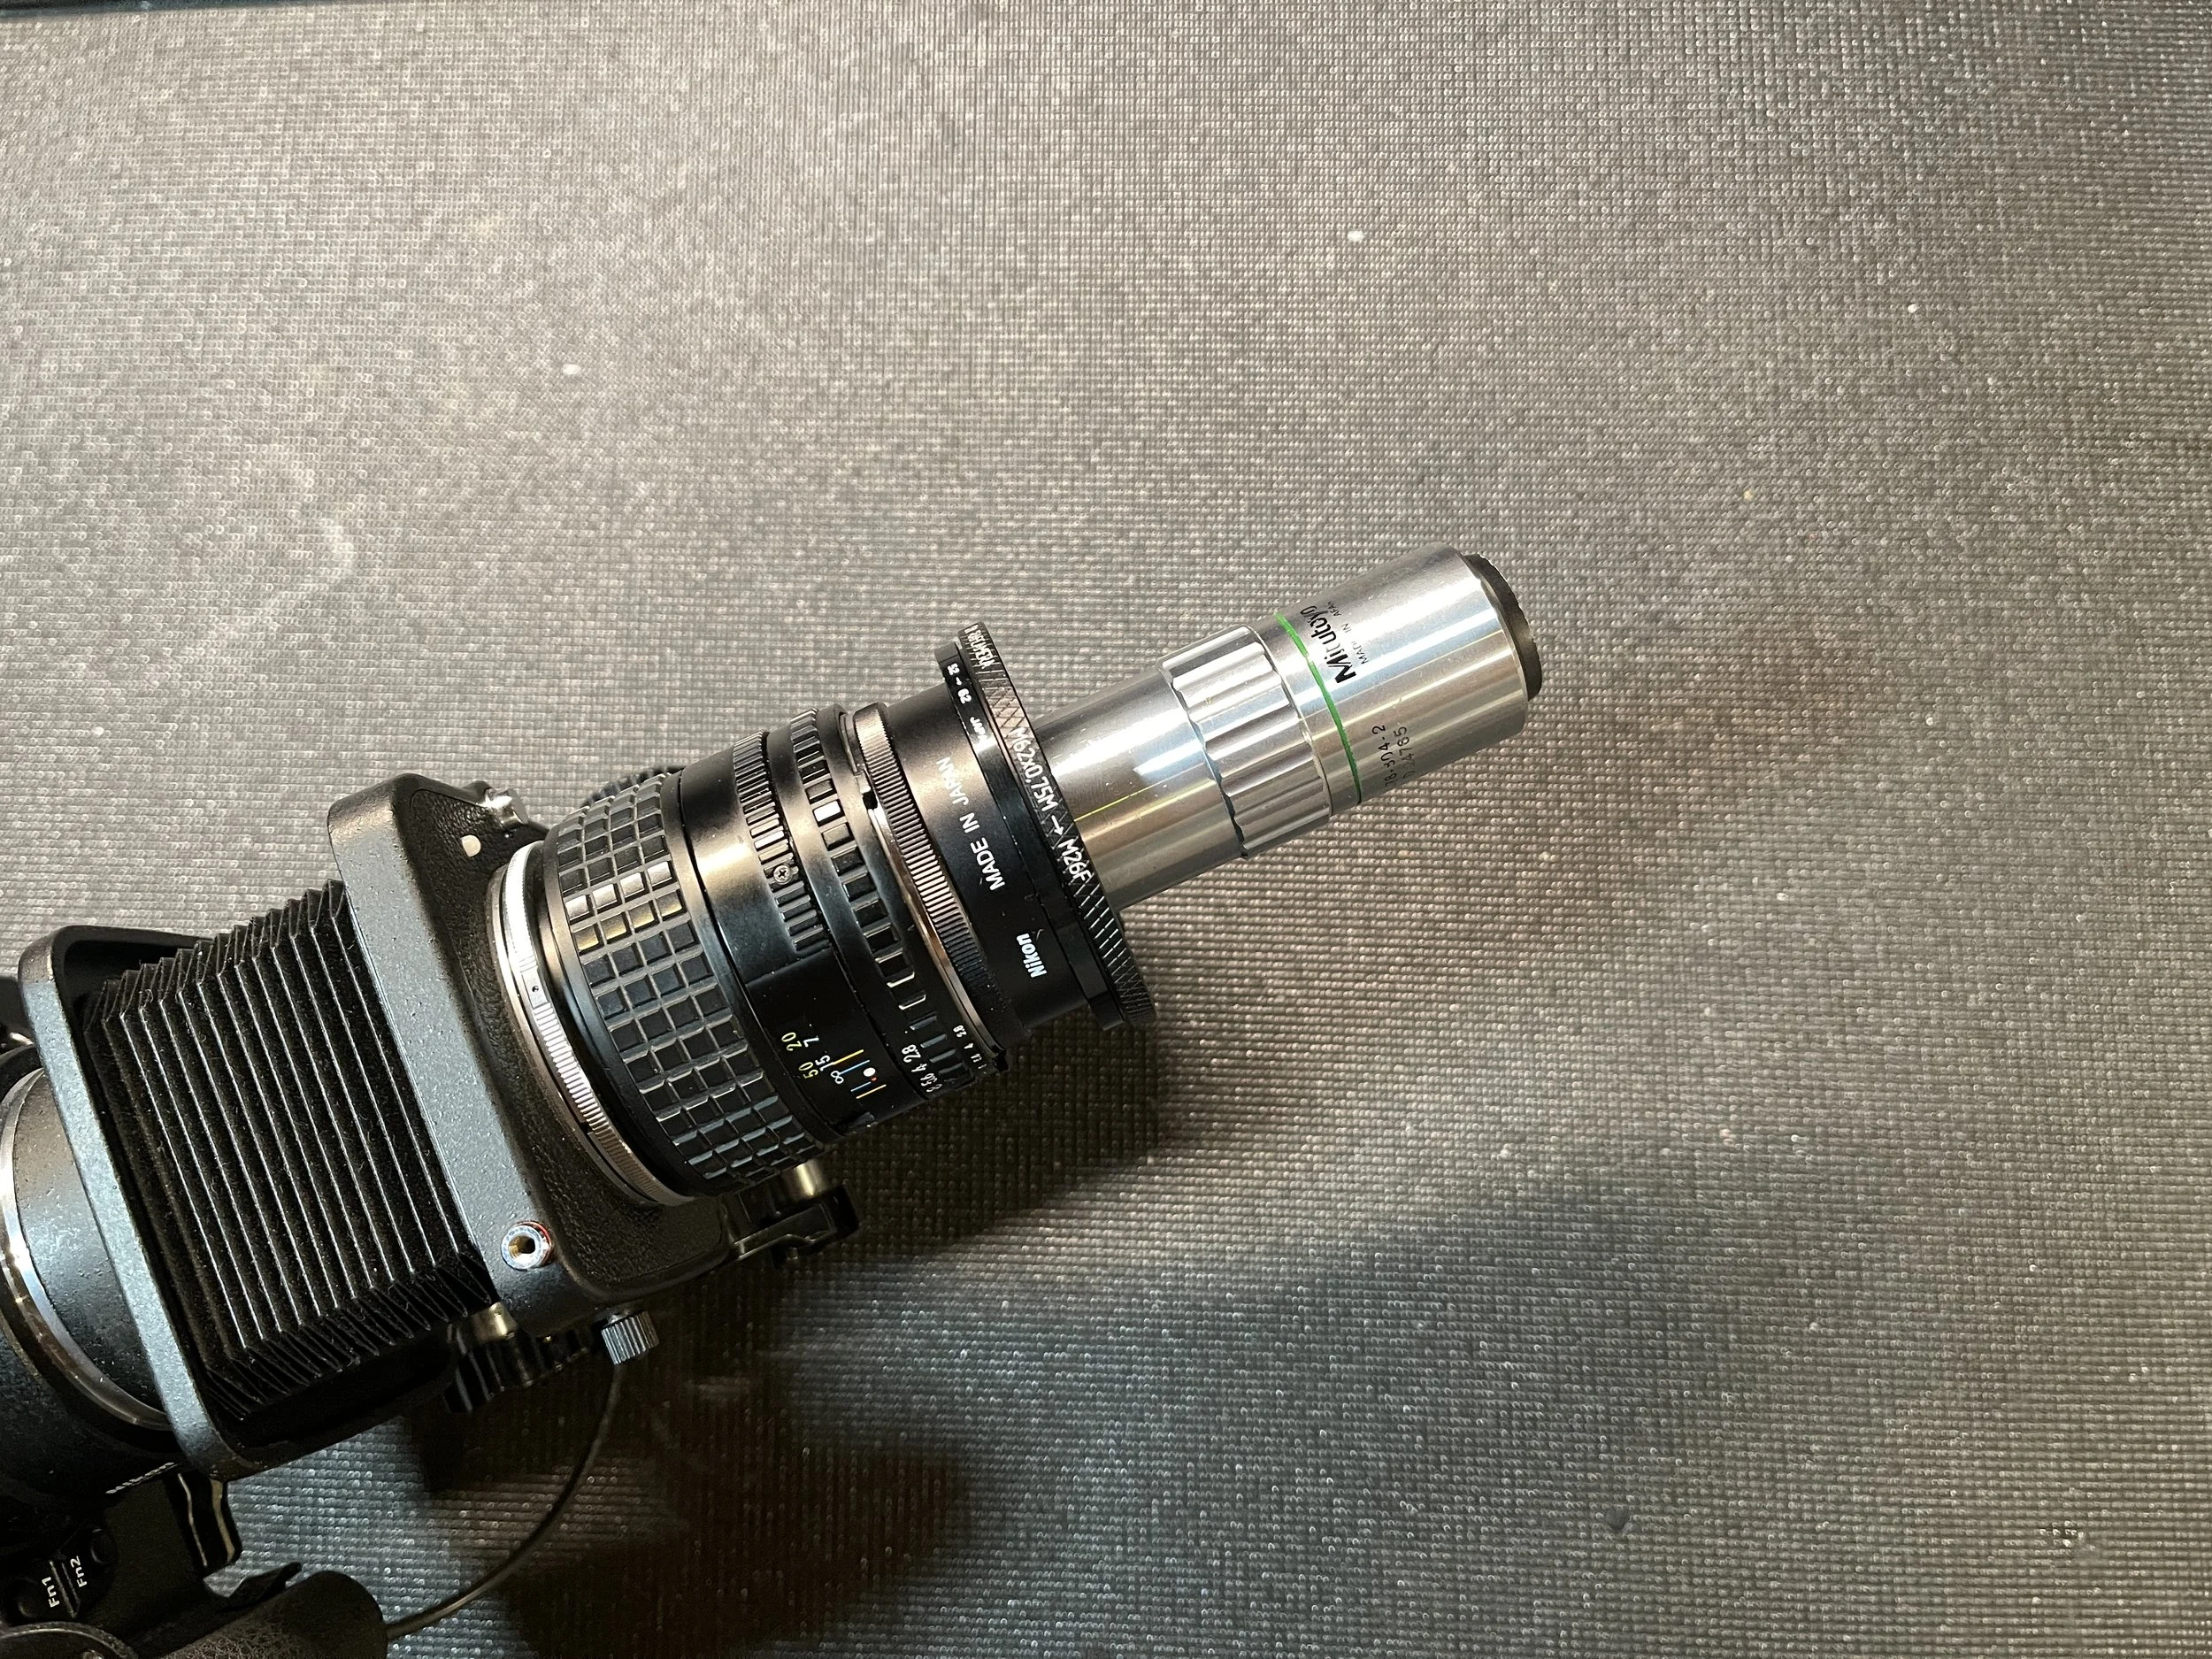
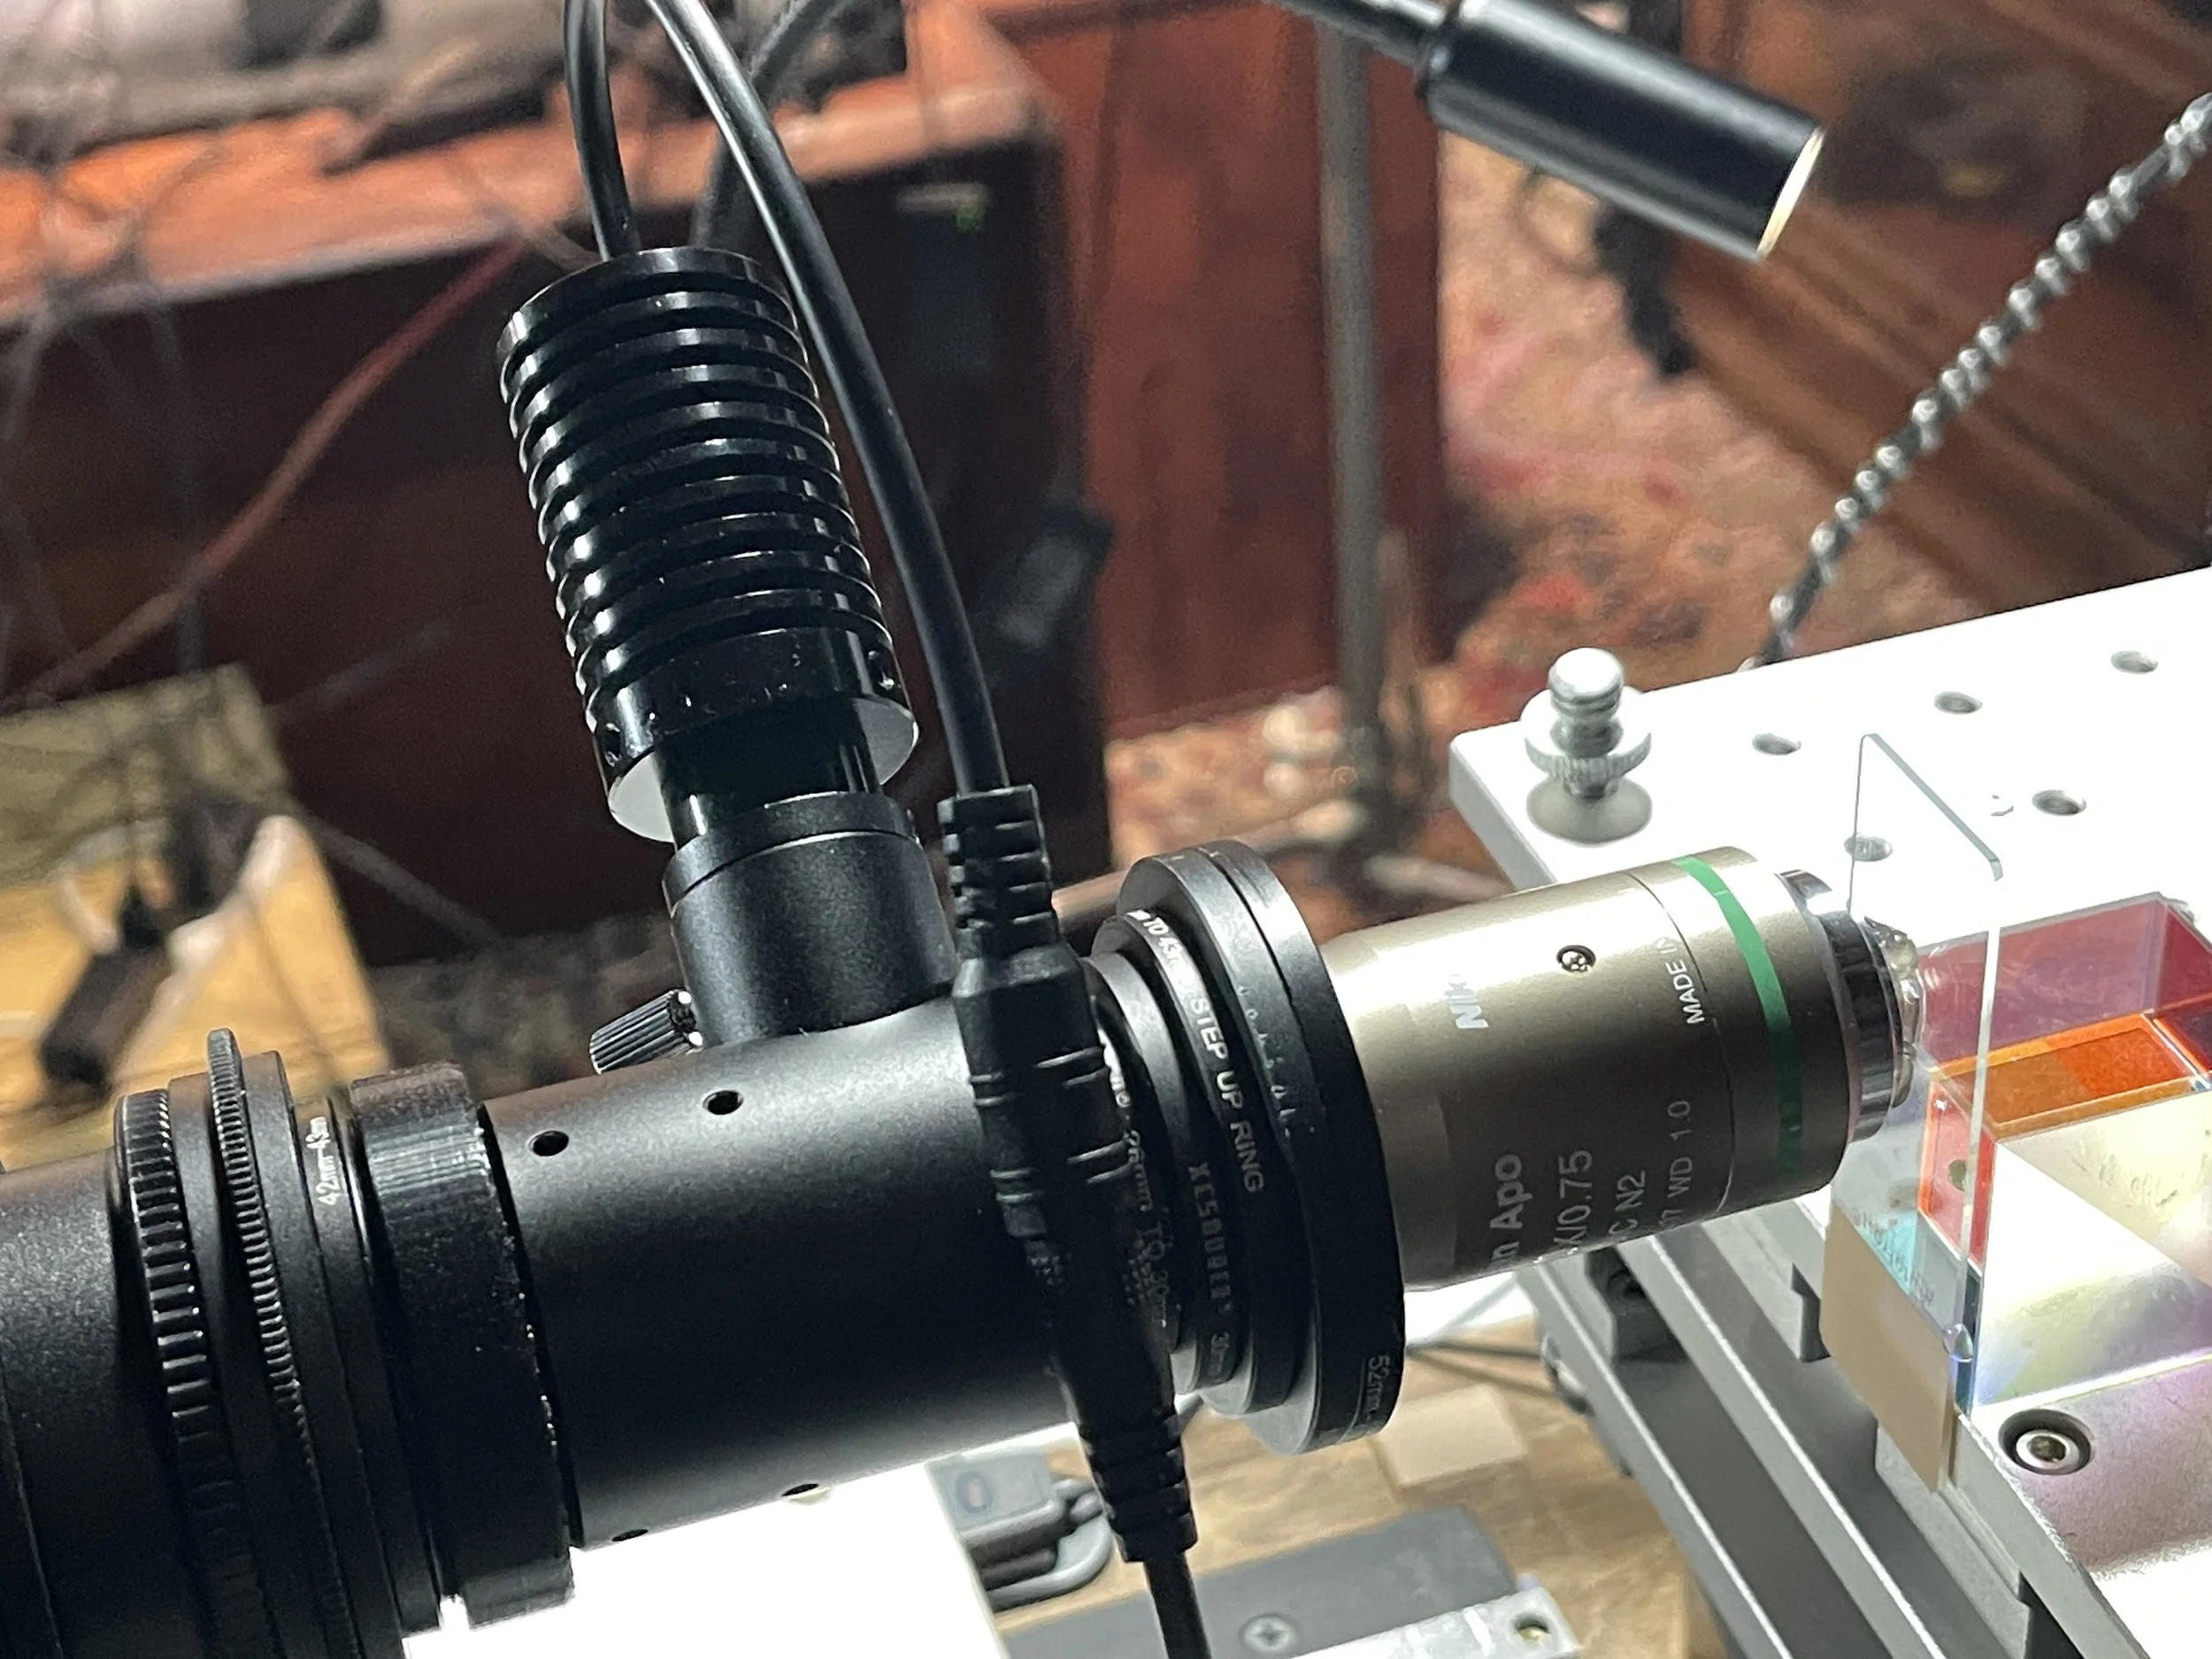
If you are a macro photographer and fortunate enough to find yourself the owner-operator of a 3D printing machine, then you have already, or soon will, attempt to print a lens hood for a microscope objective. You will do this because you heard someone like me extolling the virtues of such an accessory, while tossing out terms like, “off-axis light”. “Cone of acceptance”, and “numeric aperture. In all likelihood you will design your lens hood lot look pretty similar to ones you have seen on YouTube, and give little or no thought to trivial considerations like, “how big should the hole be?” Or “how long should I make this thing?”. I know this because that is how I came up with my last ten hood designs.
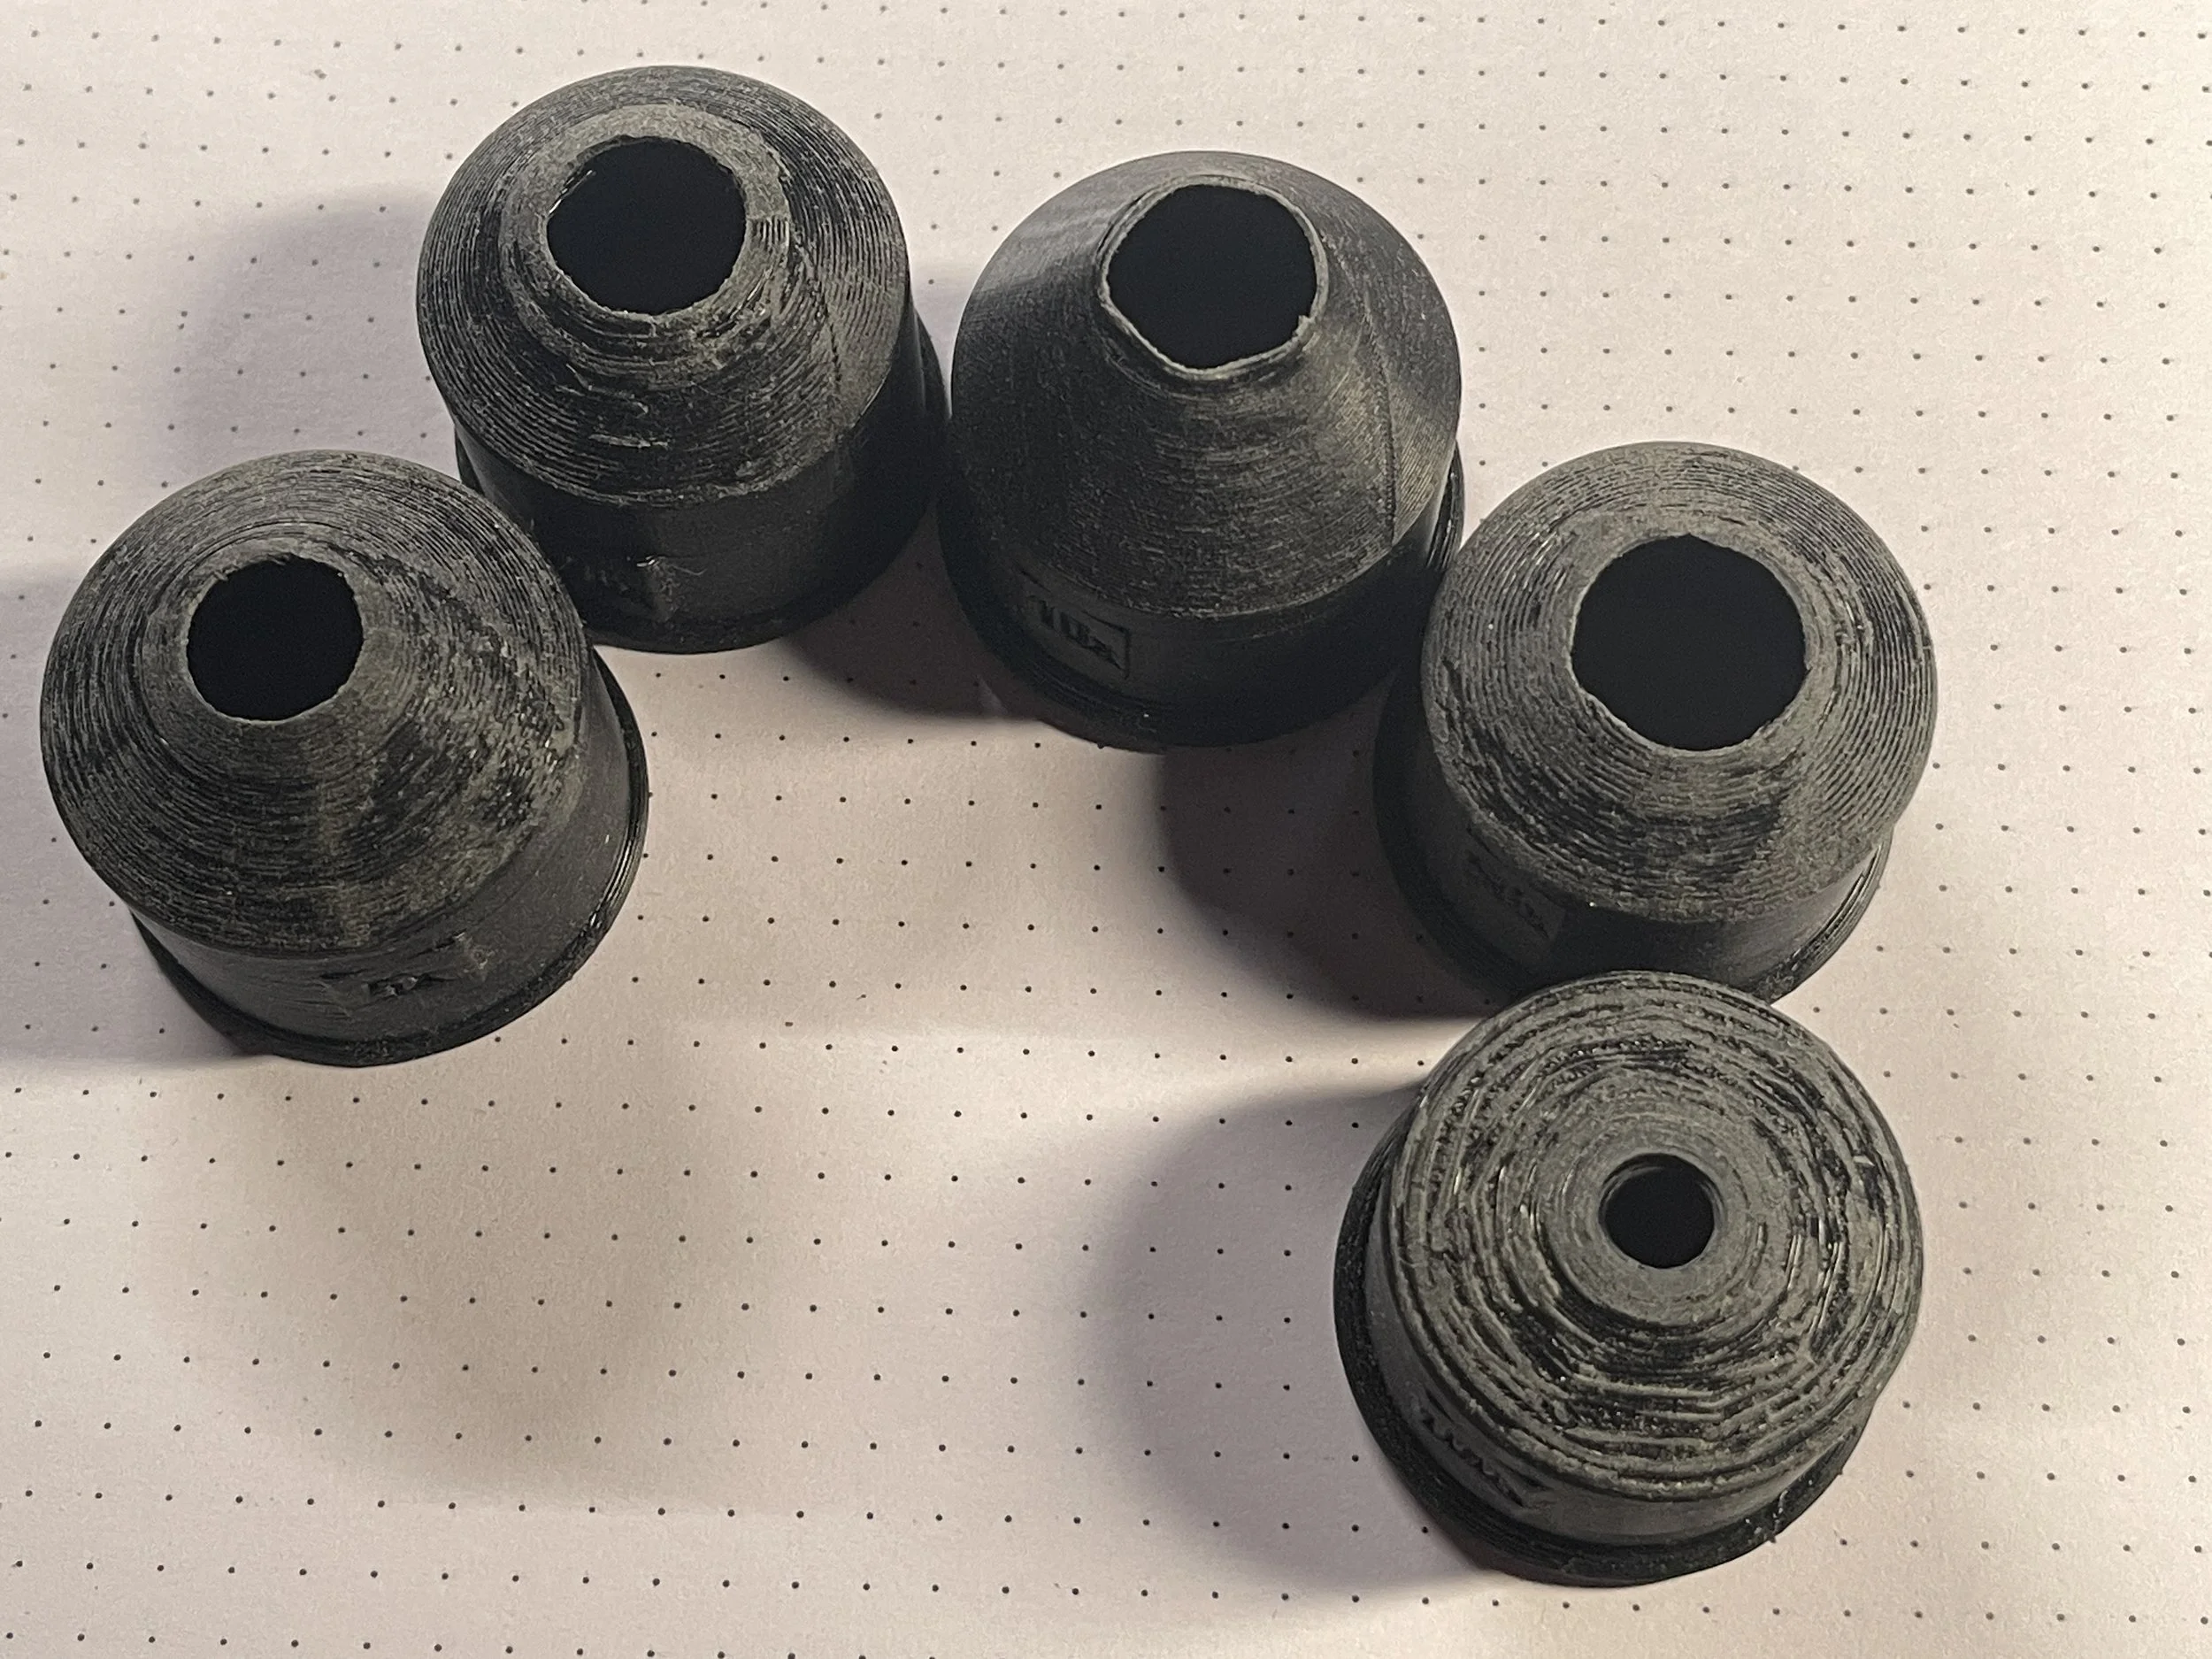
5-100X
But this time it was different. I was asked by a friend to print up a full set of Mitutoyo M-Plan objective hoods, a matched set for the 5x, 10x, 20x, 50x, and 100x apochromats. I am usually asked to make a hood for a single objective, usually a 5x or 10x, and under those circumstances my “that looks about right” approach to hood design seemed sufficient. This was a different matter and it got me thinking about the physical characteristics of a properly designed hood.
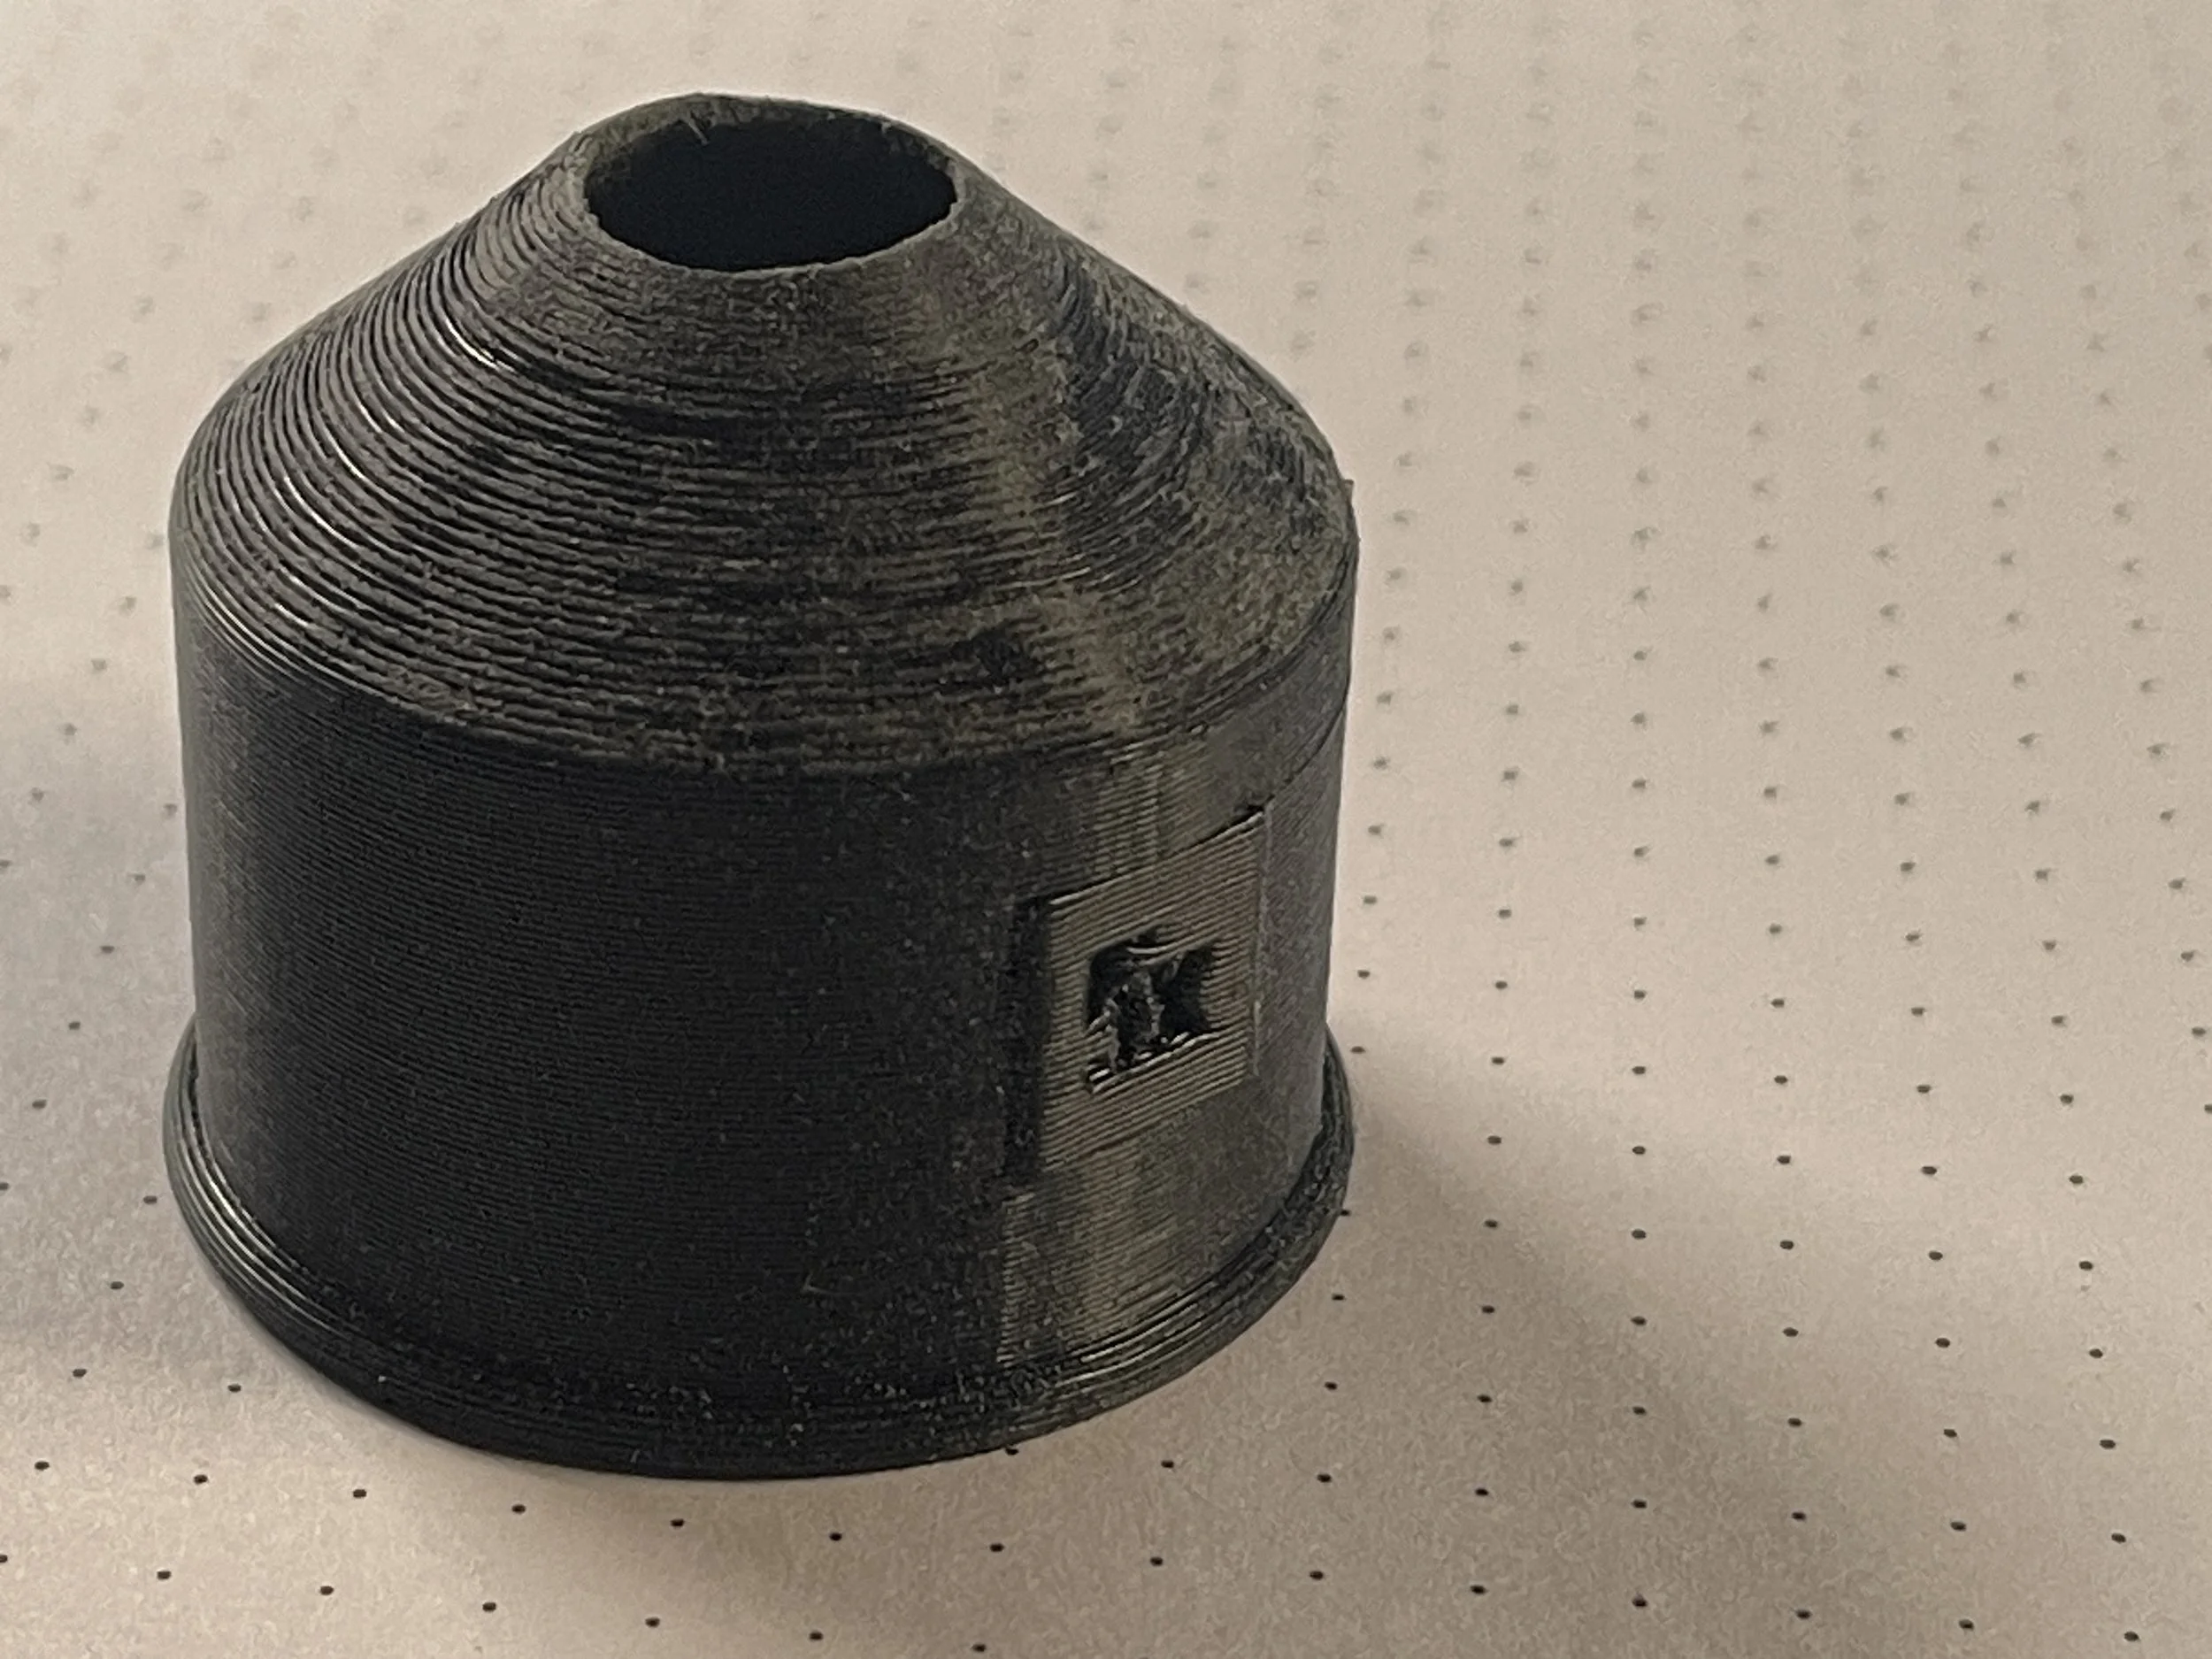
5X prototype
What, for example, is the purpose of an objective hood? The hood is used to prevent light that is not needed to form the image of our subject from entering the lens. The idea is to block ANY light that doesn’t belong in the optical train and therefor does not contribute to the photograph, from entering the lens, while also ensuring that NONE of the light that does form the image is prevented from doing so, Why? When this off-axis light does make it into the lens it will bounce around, willy-nilly, eventually interfering with the light that forms the image and and diluting its contrast to leave a soft and slightly blurry picture at the sensor.
It should not take a Feynman-sized leap to appreciate that designing a system that is described by a term like, “just enough to cause A, without causing B”, requires that we find the precise coordinates at which these conditions are met. We should begin, then, by identifying and defining our goals and I would propose three:
To create an obstruction to the passage of all off-axis light
To ensure that #1 does not impinge on any “image light”, while also ensuring that
There is sufficient physical space to properly light the subject.
20X with no hood
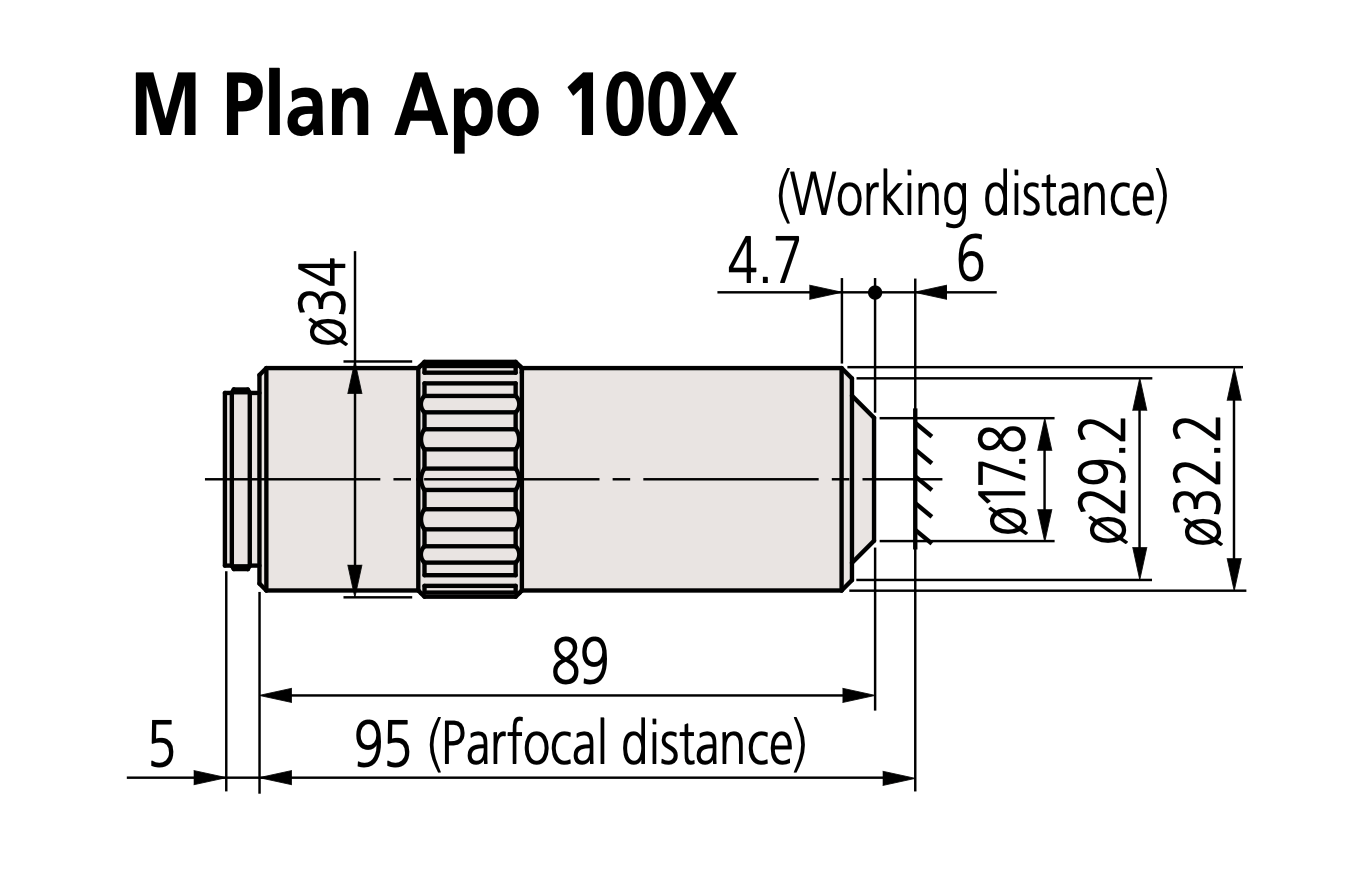
Examining these basic ideas we can quickly see that the factors influencing the ideal size and accurate positioning of the hole in the lens hood include the Numeric Aperture (NA), which defines the “cone of acceptance” and the size and position of the hood’s opening in relation to the lens and the subject.
No lens hood with axial lighting
When we are in “object space” (in front of the lens), a vignette forms when the material of the lens hood protrudes into the acceptance cone of light. The cone is defined by the NA of the objective. Assuming we are working in an air environment, we can further assume that the index of refraction, n is 1.0. The half angle of the light cone can be expressed:
ϴ = arcsin (NA)
The distance between the front element of the objective and the subject is known as the working distance and this can be further subdivided into the distance between objective and lens hood aperture (the Standoff - or s) and distance from the hood opening and the subject, the Clearance, or c.. At distance “s” from the front of the lens, the radius of the marginal rays can be expressed:
Image Radius (r) = s x TAN(ϴ)
And from that we can determine the minimum size of the opening in the lens hood, at that plane, and we can write that as follows:
Diameter of opening (d) = 2 x s x TAN(ϴ)
It is recommended that we add a margin of 1.0mm to allow for any manufacturing or assembly inaccuracies, which we call “m”, making the formula:
D = 2 x s x TAN(ϴ) + m
As you can see, we need to decide on a value for “c” if we are to calculate the value for “s”. “C” is the amount of linear space you need to be able to light the subject. This is obviously a subjective matter, but I can tell you what I use for oblique lighting:
At 5X, c = 20mm
At 10X, c = 15mm
At 20X, c = 10mm
At 50X, c = 5mm, and
At 100X, c = 3mm
Now if we do all the math, this what we get:

mitutoyo hood dimensions
And that, in a nutshell, is all you need to know to make a perfect set of lens hoods for your Mitutoyo… almost.
Other design considerations include the following:
make sure the “lip” of each hood sits right at “s” to preserve space for lighting
Keep wall thickness down to 1.5mm if possible - the wider the OD of the hood, the more light it will tend to block
Carefully flock the inside surfaces and use sprayed-on ultra black paint if you prefer
It is very hard to print an edge sharp enough to really avoid reflected light from the flat edge of the hood, so I print the hood aperture a little thicker and use gentle hand-sanding to reduce it to a knife-edge
Add a few internal baffles by making annular grooves 0.33mm deep and 0.6mm apart
Use only cool LEDs to prevent melting your hood.
Remember that your printed hoods will contract a tiny amount, so plan for this by increasing the diameter of the hood barrel by 0.2mm before adding a slip-fit tolerance - print test rings to make sure you have the size dialed in before printing a whole run of hoods.
early prototype with thick lipped aperture
Some other cool stuff I am working on include adding tiny magnets to the barrel of the hood, allowing for a looser fit, while holding the hood firmly on a vertical rig, and some other printing materials for “tighter” prints and a sharper annulus edge. I am also trying diffusers attached to the hood barrel for a compact and flexible final diffusion layer.

A final word of caution - if you ever use water/glycerine as a subject medium, be sure to recompute your ϴ as it will change with the new value for n.
One thing that really surprised me, though it should not have, was that the shape of each hood was significantly different at each iteration, and the size of the annulus seemed to be unrelated to any other variable and changed, it seemed, randomly with each new hood. This is, of course, because of the subjective assignment of Standoff to Clearance ratios at each NA. I have tested the hood for which I own an objective. Which is to say, you will need to do your own 50X and 100X evaluations (or lend me yours for the testing).
So there you have it - not only do you know how to make the perfect lens hood for any objective, but you also know why. And if that’s not worth a spirited “Bob’s yer uncle!”, then nothing is!
*************

Shall we take a look at what is in the works for the coming week? Tuesday kicks things off with an 8PM Macro Talk on YouTube, where the topic will be Macro Video. This is something I am getting more and more excited about and I want to tall you about what I have been up to in the realm of video and suggest a few things you might want to try to get a taste of this exciting discipline. https://youtube.com/live/ylenxujEDMI?feature=share

On Thursday at 2pm, Macro Talk Too will consider the Pause Paradox and how taking a break can be just the ticket for restoring our passion for, and reenergizing our progress in, macro photography. We have talked about this before, but in todays stream I am taking a very different approach and will suggest some very specific alternatives to macro photography that I have found to be particularly helpful as pathways to to improving your macro photography while, at the same time, taking a well earned break from it. These recommendations are going to surprise you! https://youtube.com/live/7YAGg5dnn8s?feature=share

On Saturday, at 10AM I will be meeting for two hours with my friends and supporters over on Patreon. I do this Zoom call (we call it a Pzoom) twice in the month (and sometimes three times in the same month!) and it is a time for you to have my undivided attention for whatever you would like to do.

No two Pzoom meetings are the same - sometimes we will have a special guest but usually it is just us and we spend the time talking about photography, and anything else that needs our attention. I really enjoy this face to face meetings, where I get to hear what you have to say. My Patreon Supporters share their triumphs and their challenges, show off their incredible macro rigs, present their favorite images, all while picking up great tips and pointers from their fellow enthusiasts. It is a great opportunity to meet and get to know other talented people, discover new corners of closeup photography, give me welcomed feedback about our group and about the channel, and just relax around friends. I do these meetings as one of the ways I say thank you to the people who support my work. This channel and everything I do here could not exist without this wonderful group of women and men whose monthly contributions keep the doors open and the lights on. If you would like to become part of the inner circle, please visit www.Patreon.com/allanwallsphotography to find out how.

Another one of my favorite things to do at the weekend is to hang out with my friends over at the Tangent - another Zoom get together where we talk about the thrilling world of 3D modeling and printing. A lot of our discussion focuses on how to use the awesome Fusion 360 CAD/CAM software to take ideas that exist only in our imaginations and turn them into real, working tools for our photographic adventures. If you have ever thought, “I wish someone would invent a thing that could do this for for me!”, then you owe it to yourself to join Tangent (Larry Strunk) and me, as we take you on a journey of discovery aboard HMS Fusion 360. It does not cost a penny and you don’t need to have a 3D printer to get a ton of useful information from the discussion. This all happens at 12:30 until 2:00pm, this Saturday. Your invitation is here… Allan Walls is inviting you to a scheduled Zoom meeting.
Topic: Allan Walls’ Tangent with Larry Strunk
Time: Sep 27, 2025 12:30 PM Central Time (US and Canada)
Join Zoom Meeting
https://us02web.zoom.us/j/6916802815?pwd=TS9tZi9ZL1NXeVUvOUF4eTg5YjdlZz09&omn=84839483744
Meeting ID: 691 680 2815
Passcode: 678122
Join instructions
https://us02web.zoom.us/meetings/84839483744/invitations?signature=KRKtgwWSl0Qs9VwHJs2YVKZid1n6QXmG7CMK2ngdoDE
A word (another word is more accurate) about microscope conversions and crystal viewers - I know that I am overdue in getting price lists to those of you who have enquired about purchasing one of these tools, and I do apologize for that, but I have been having a very hard time finding moments in which I am not working on active channel projects, or maintaining my aging infrastructure, or doing any of the countless tasks that come with running a YouTube channel (even a very small one). But I am making progress and have the documents in review right now. As soon as they are ready to go I will publish them and send them to those who have made their interest known to me. One reason for the delay is that I am also using this opportunity to change a few long-standing practices here at the channel, and all that takes time. Please hang tight - it won’t be much longer.
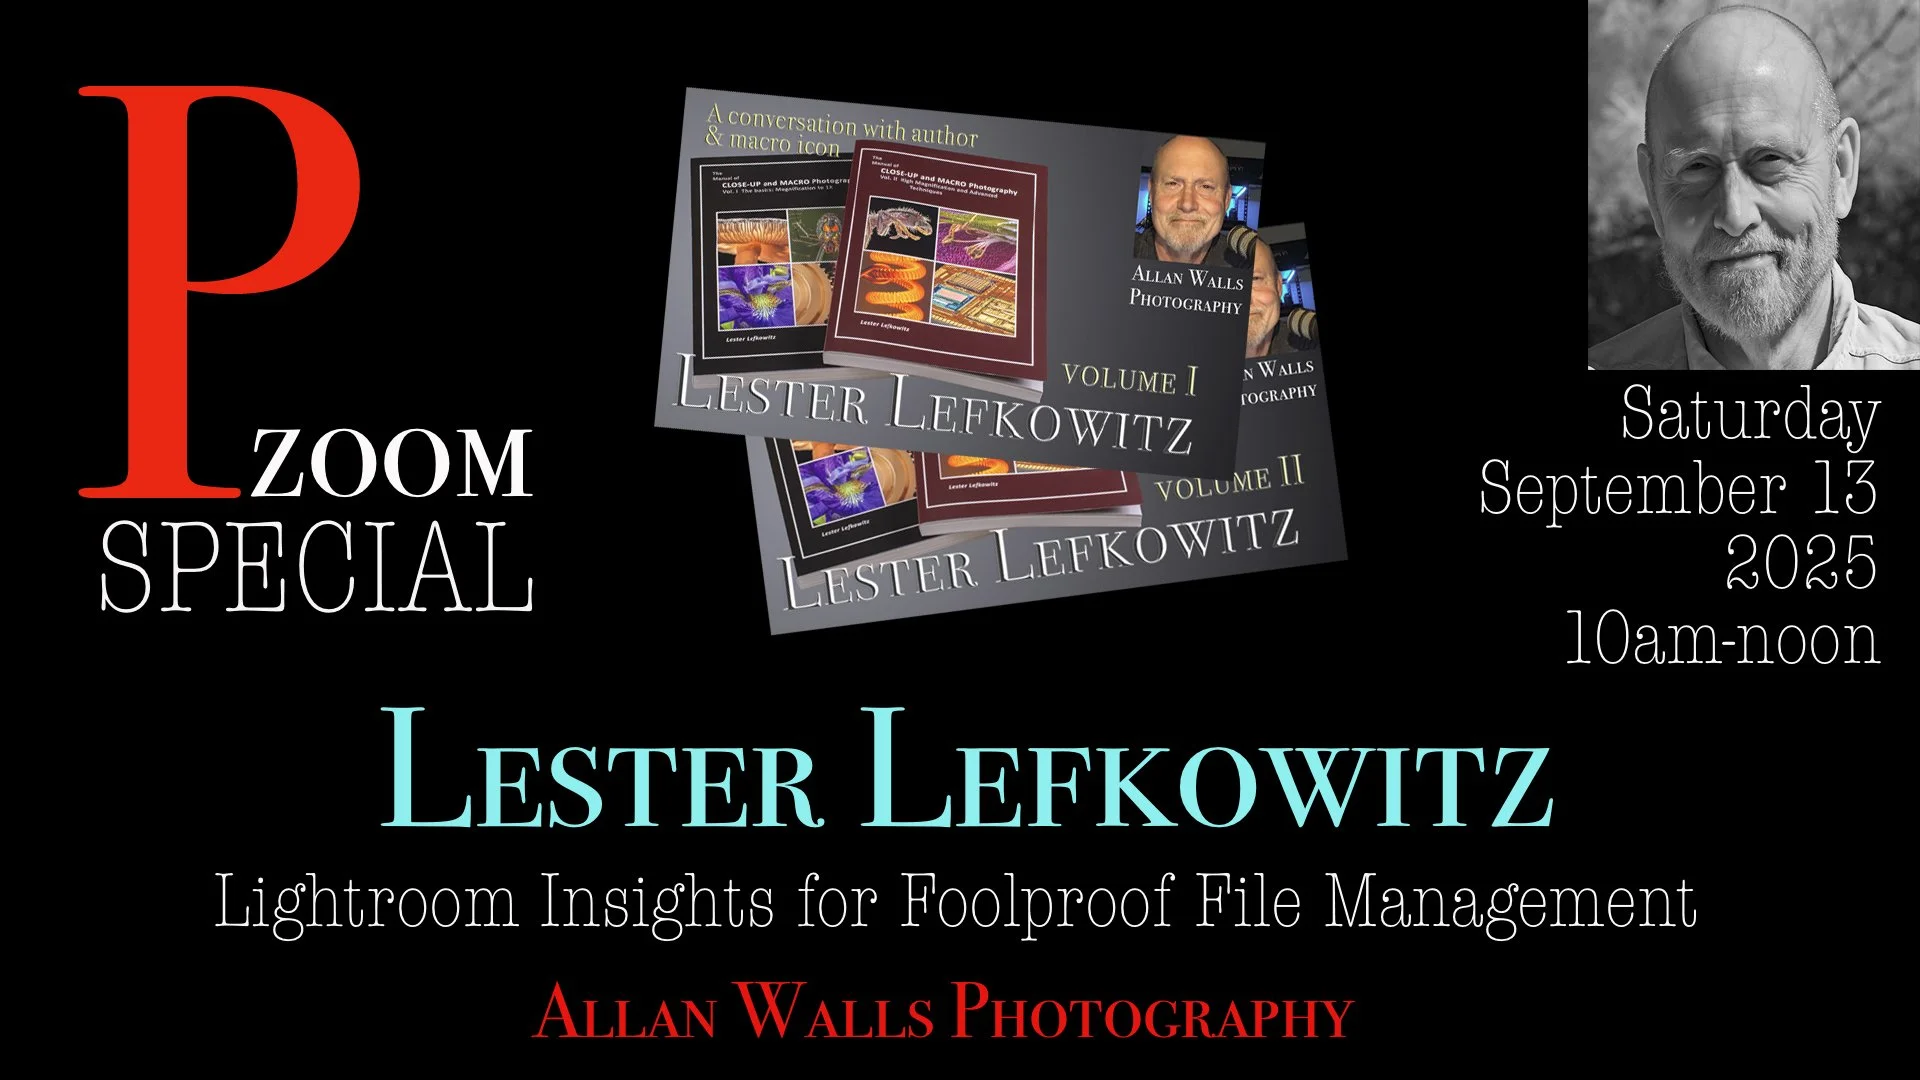
And finally, one of those tasks that has kept me away for writing policy and price list documents has been preparing a video for release this week. In just a couple of days I will be publishing the incredible presentation made during last week’s Pzoom meeting by friend of the channel, Lester Lefkowitz, where he talks about Lightroom and his system for foolproof file management, and about a hundred other things - all pure Lester! It was a long and hugely entertaining meeting and I am going to share every moment of the event with you this week - you can expect to see the video released by Wednesday! Don’t miss it.
I had better get in high gear if all of this will be ready to go on schedule over the coming week. I hope to see you there!
Allan