
Welcome to the Cage Project!
Welcome to the temporary launch page for the Cage Project. This is your chance to show off your ingenuity to macro photographers everywhere!

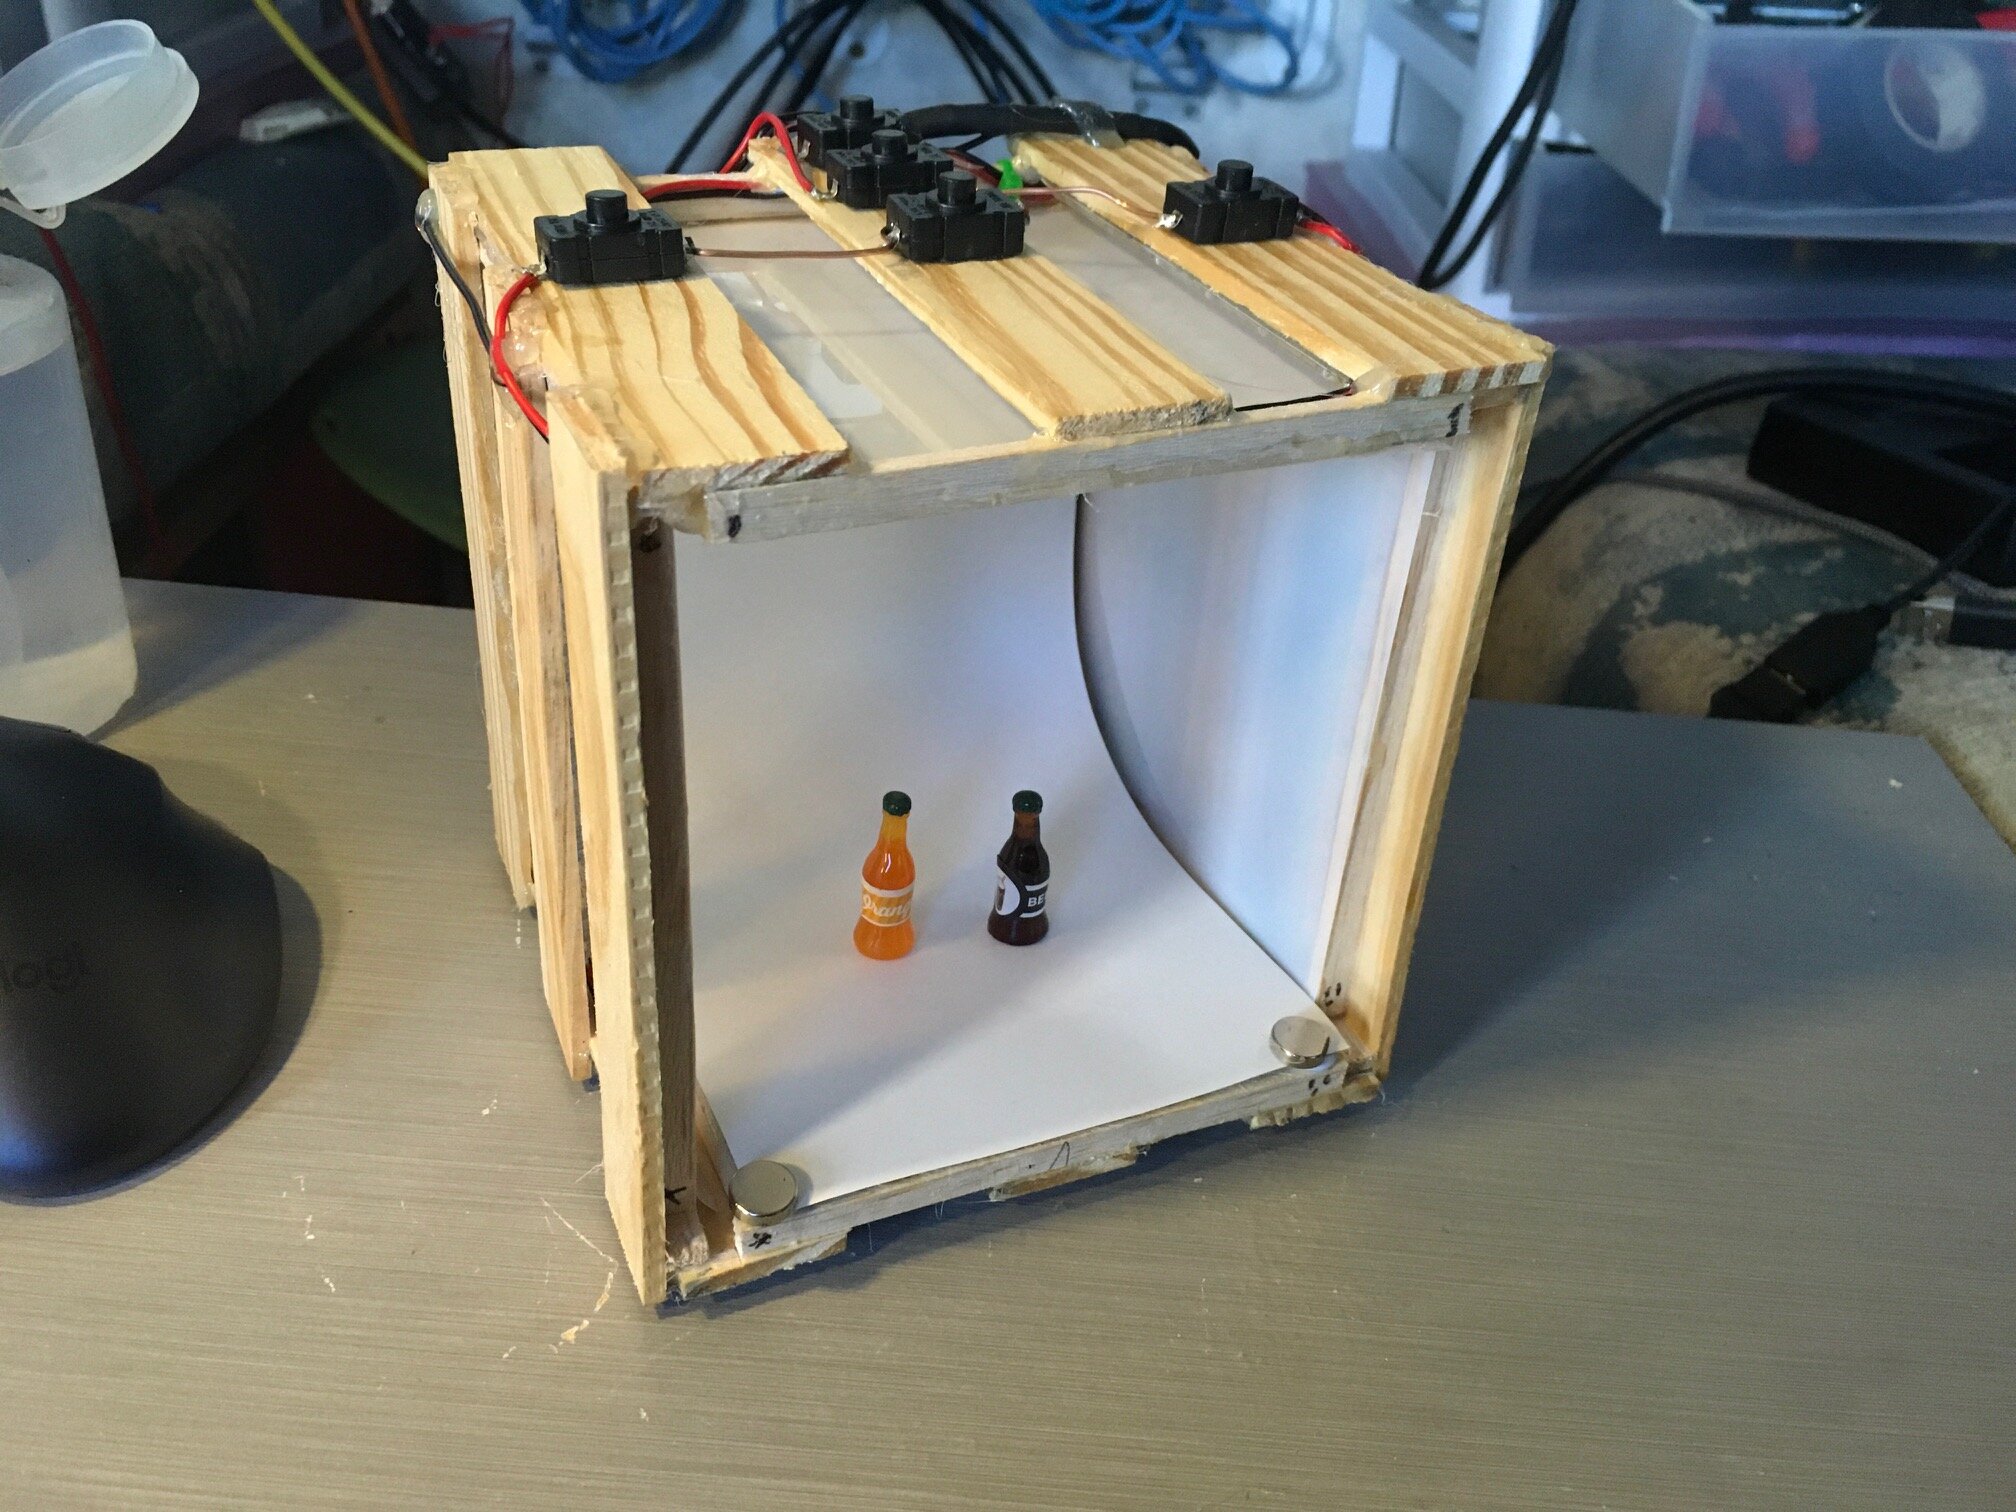
The Walls Basic
Here is the idea… I would like to bring together as many of your awesome macro lighting cage ideas as possible. No matter how insignificant you might consider your improvements, they aren’t, and they count. If you have built a cage since watching one of the macro cage videos on my YouTube channel, you qualify as a contributor. It doesn’t matter if your interpretation of the cage idea was identical to the original, or entirely different - you are welcome.
This will be a collection of short photo-essays, each one describing your particular modifications and improvements to the general idea of a self-contained platform for macro photography. It is not a competition. It will be a free and open resource for other macro photographers, now and in the future, who are looking for new ideas to use in their own cages. So, to that end, each entry should describe - both visually and in words - your version of the cage, and how it differs from the original cage. The more information you provide, the more fully I can show off your creation. Here are some suggestions for what you might want to submit - and don’t worry about layout, fonts, or anything like that - I will format everything for this site.
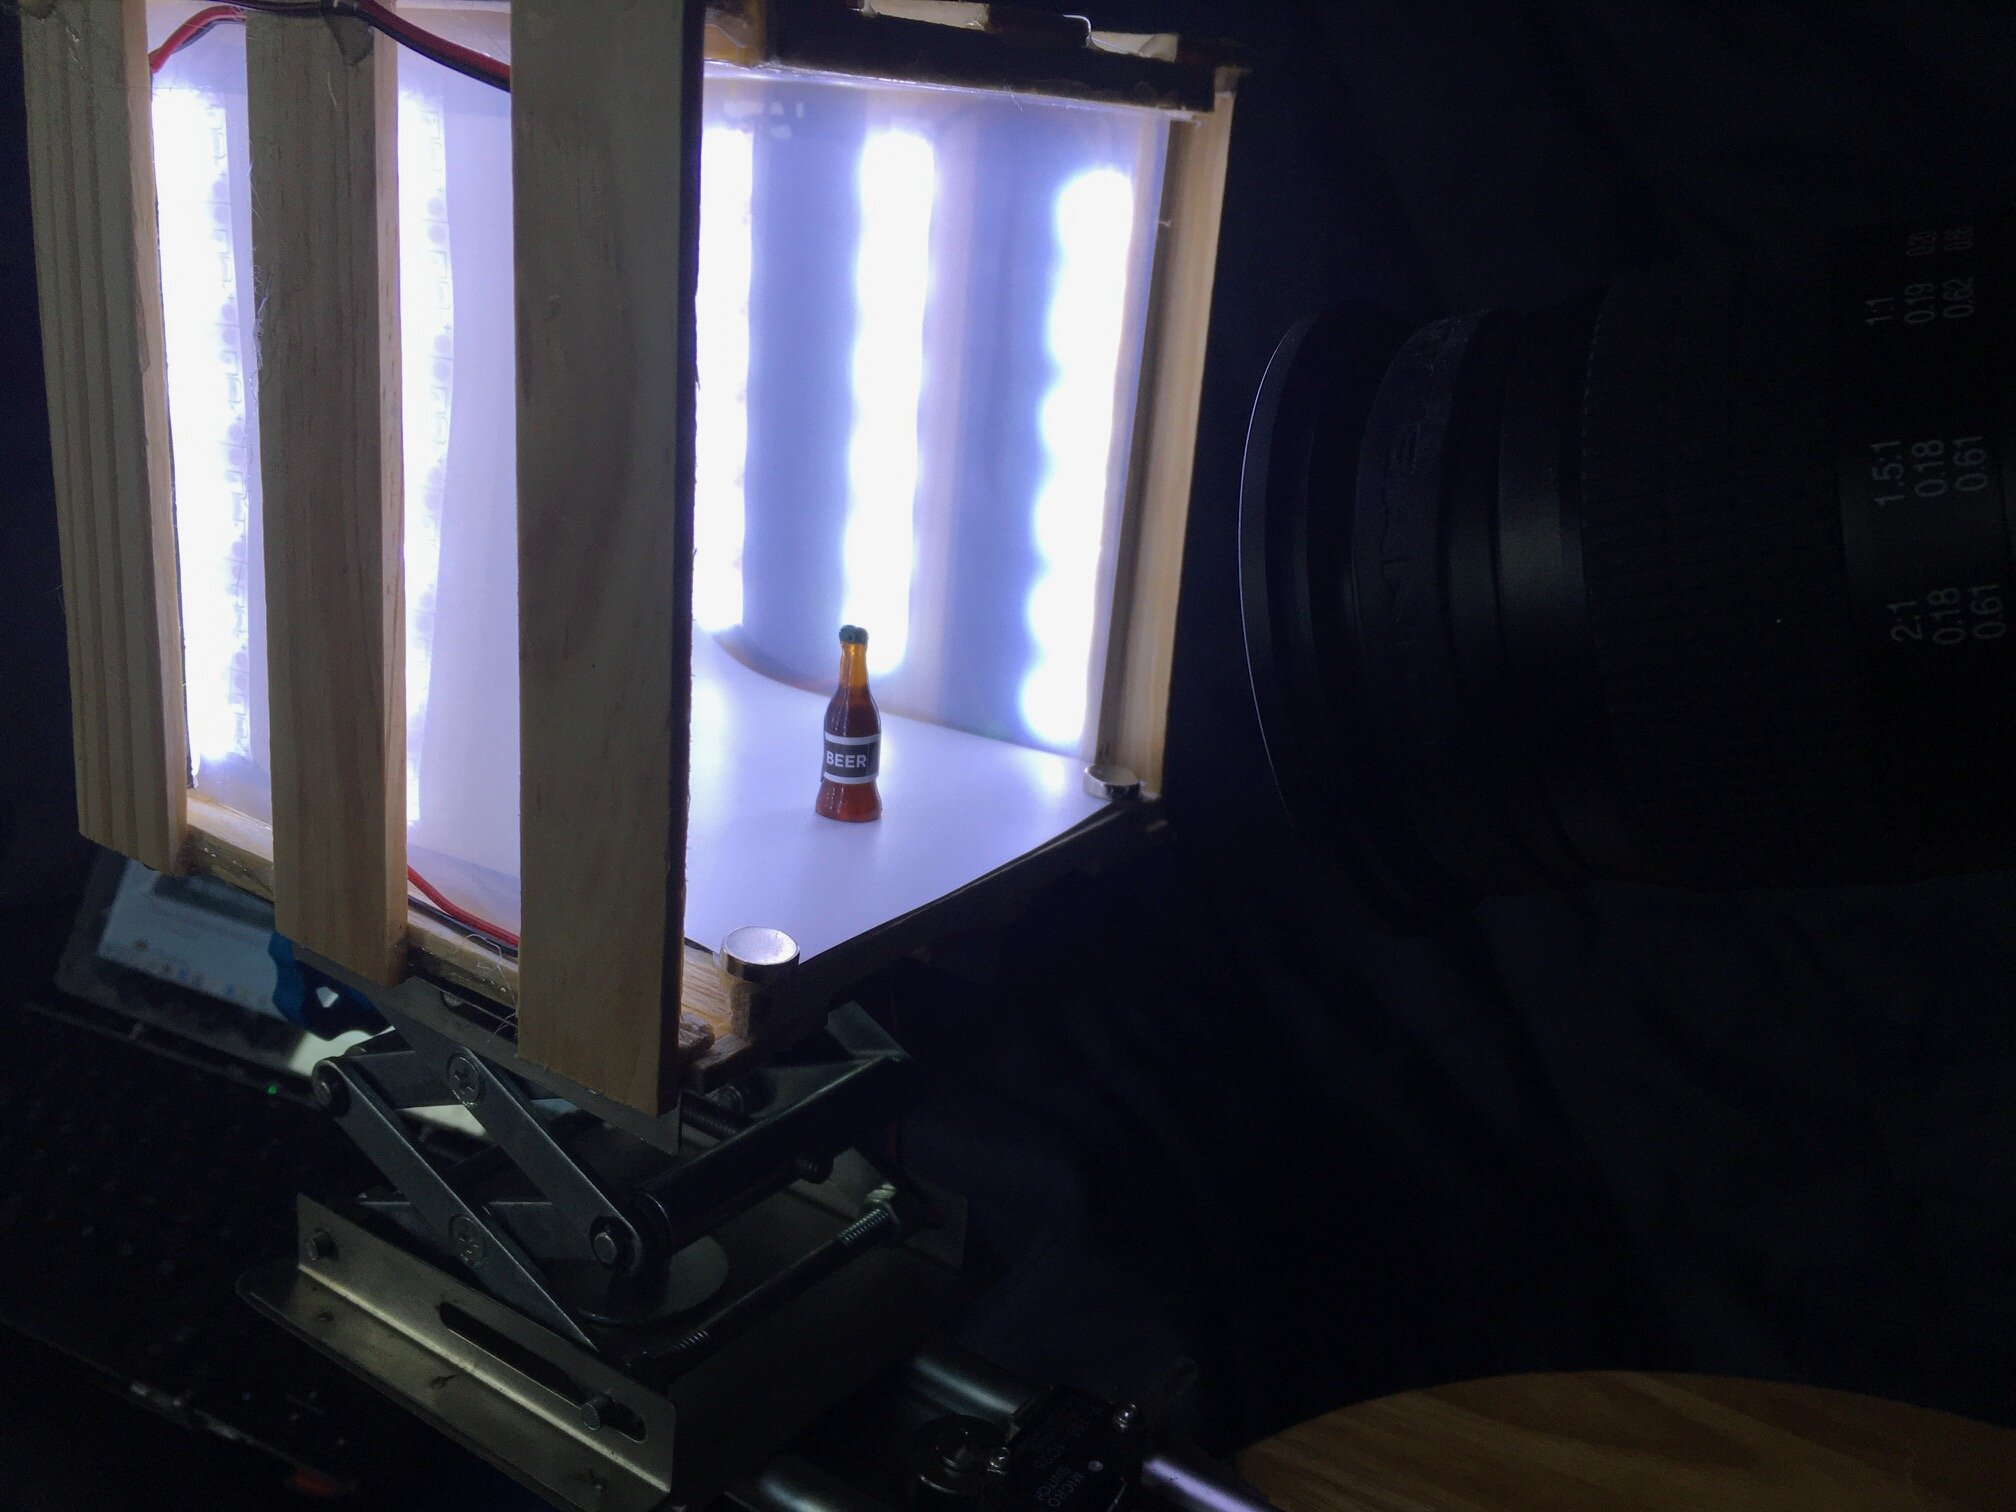
The main photograph - a nice wide view, showing the whole layout (full size JPEGs please!);
The name of your cage;
A few closeup photographs showing off the unique characteristics of your build - labels or captions might help;
A few bullet-point notes about the build, how you use it, what it’s made of, how it’s just what you needed, etc.; and
Anything else that you can think of that will add interest - maybe a couple of your favorite images captured in the cage, or a picture of you building or using it.
That is it! That’s all I need and I will do everything else. Obviously, you will be given full attribution for the design, creation, words, and photography used in your section of the piece. As you gather the materials together, as yourself this question… “what would be most helpful to me, if I was the one looking for ideas to use in my macro cage?”
Don’t hesitate to contact me if you have any questions!
The Andy Oxley Project

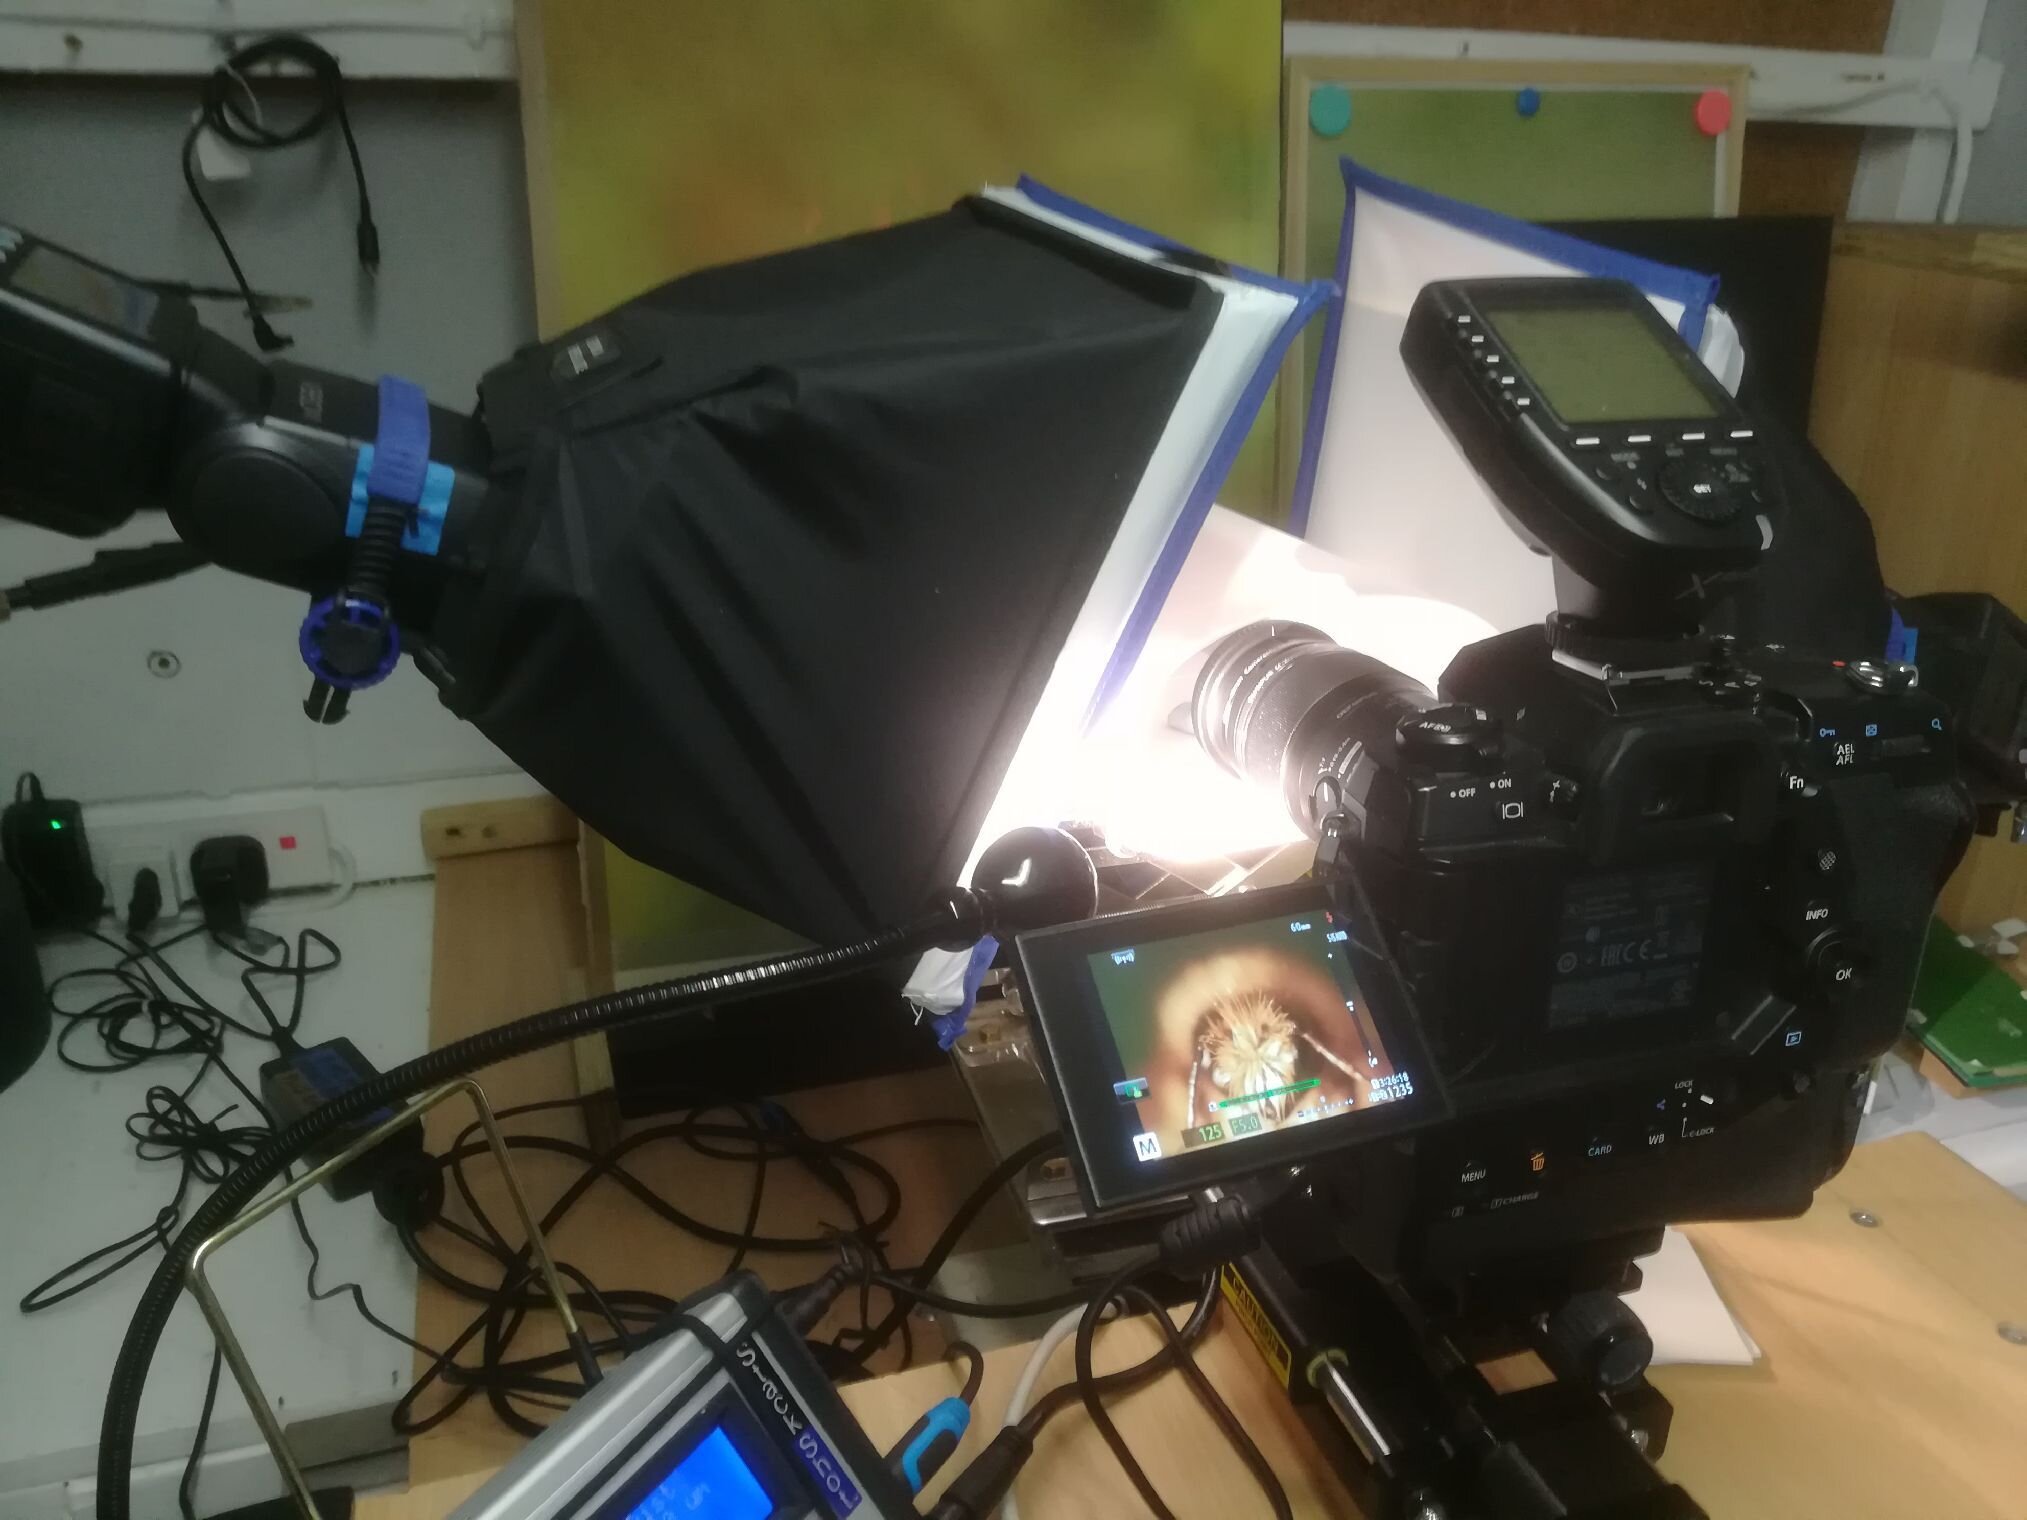
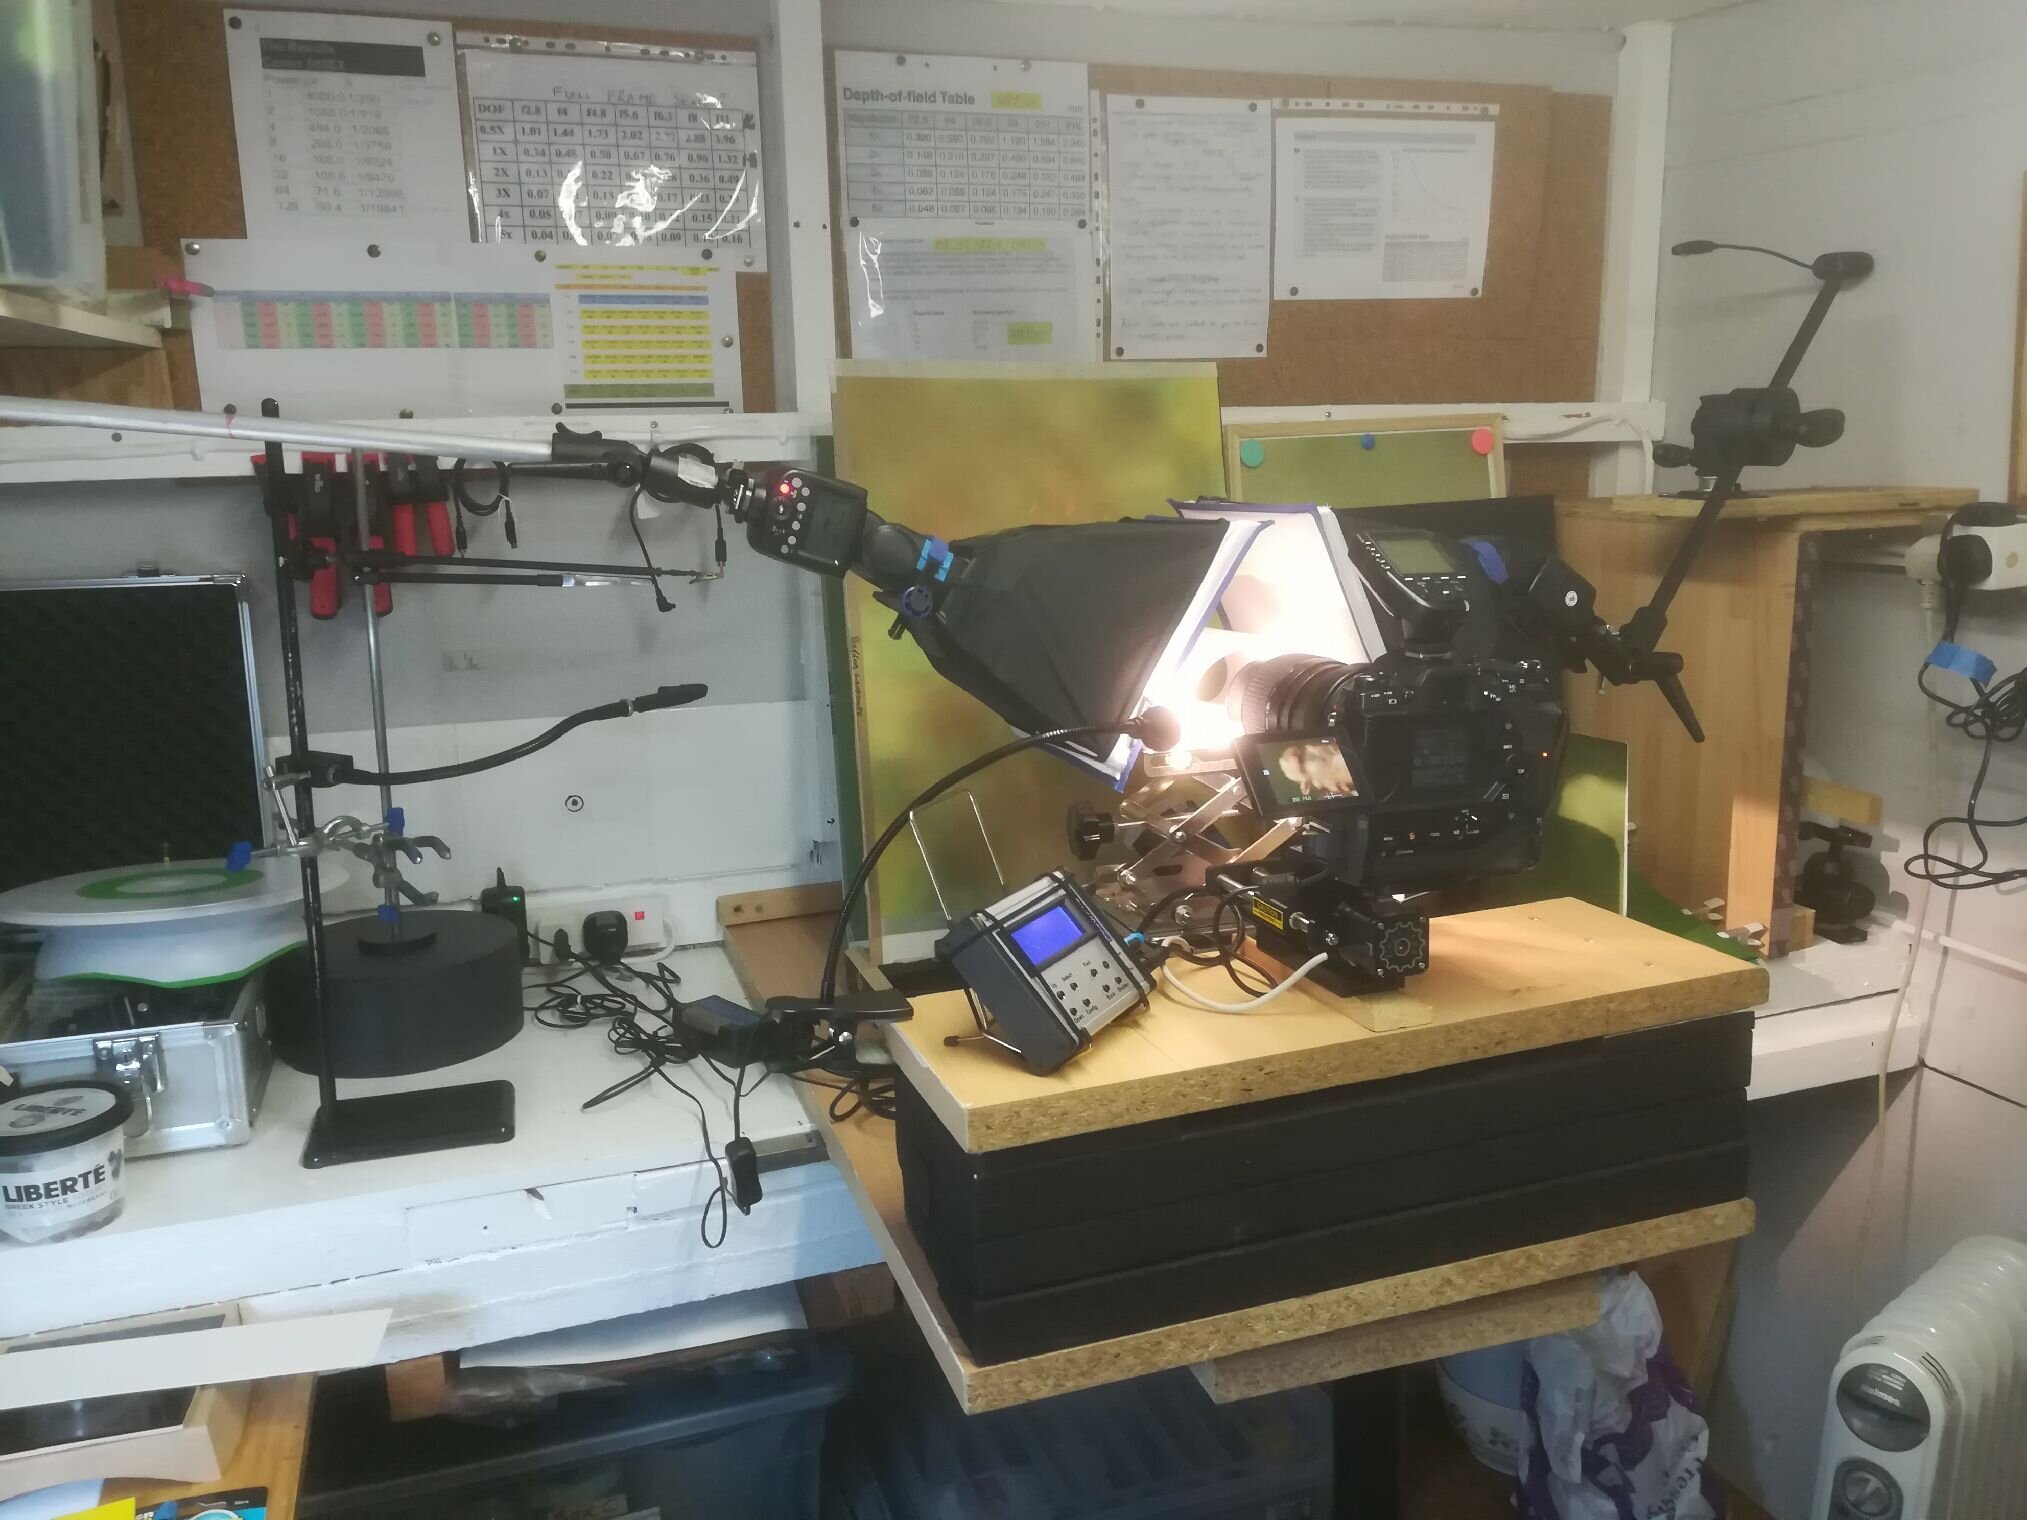
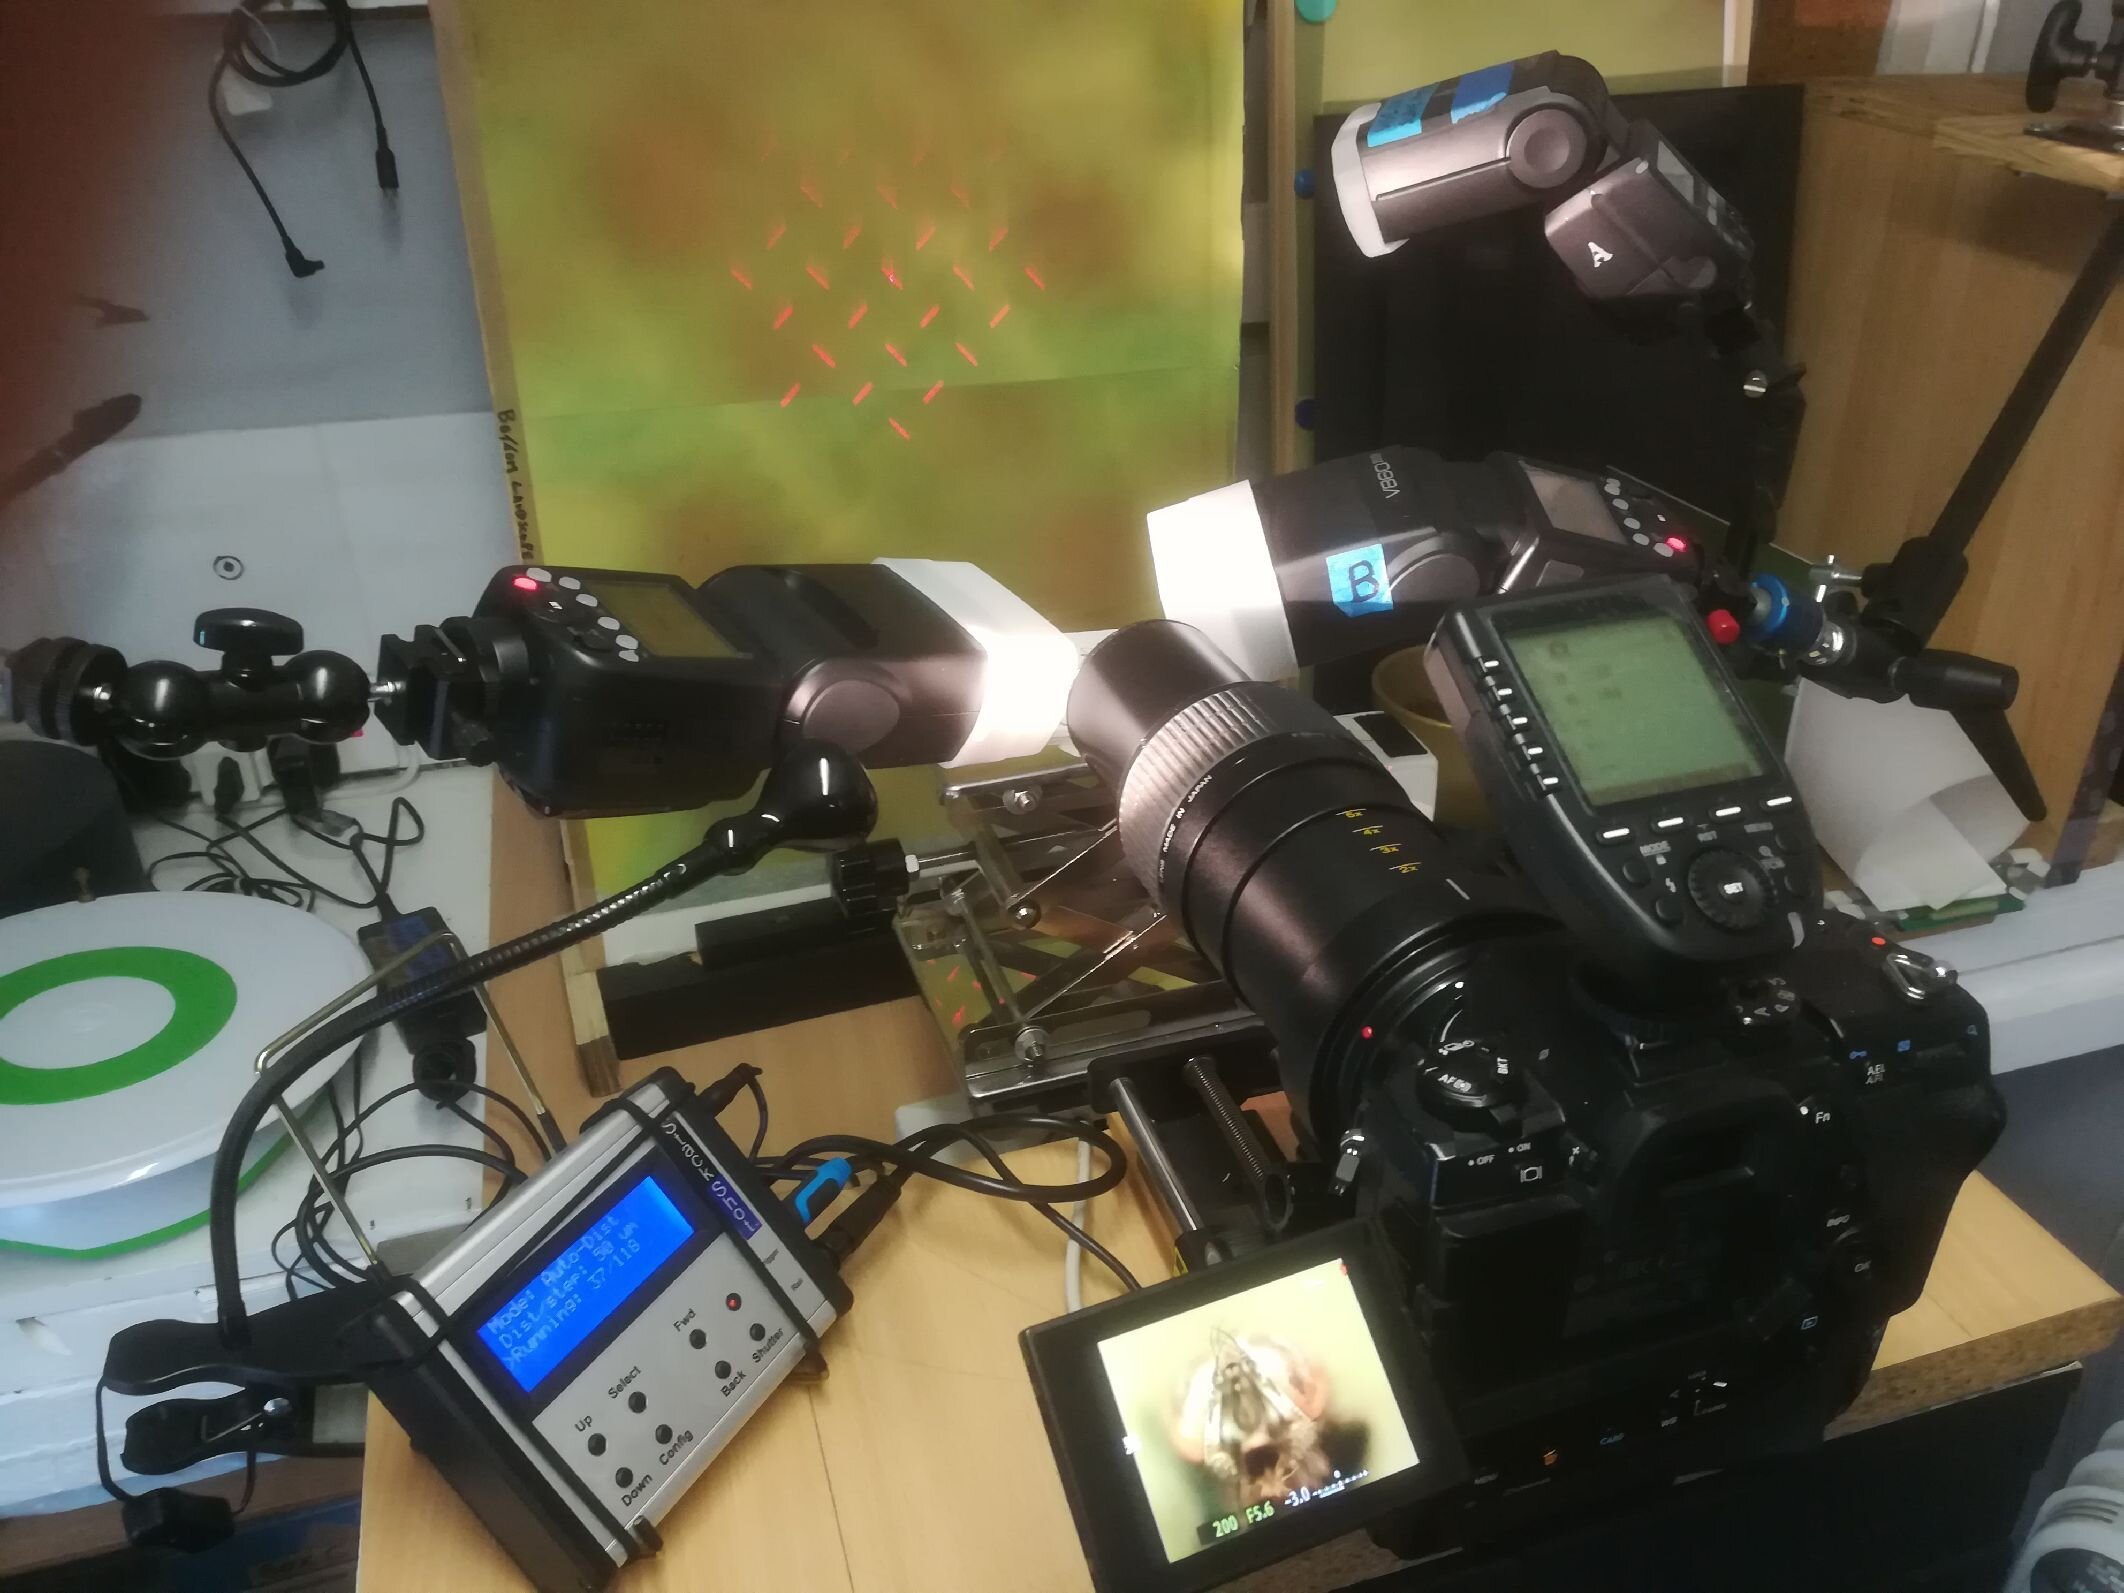
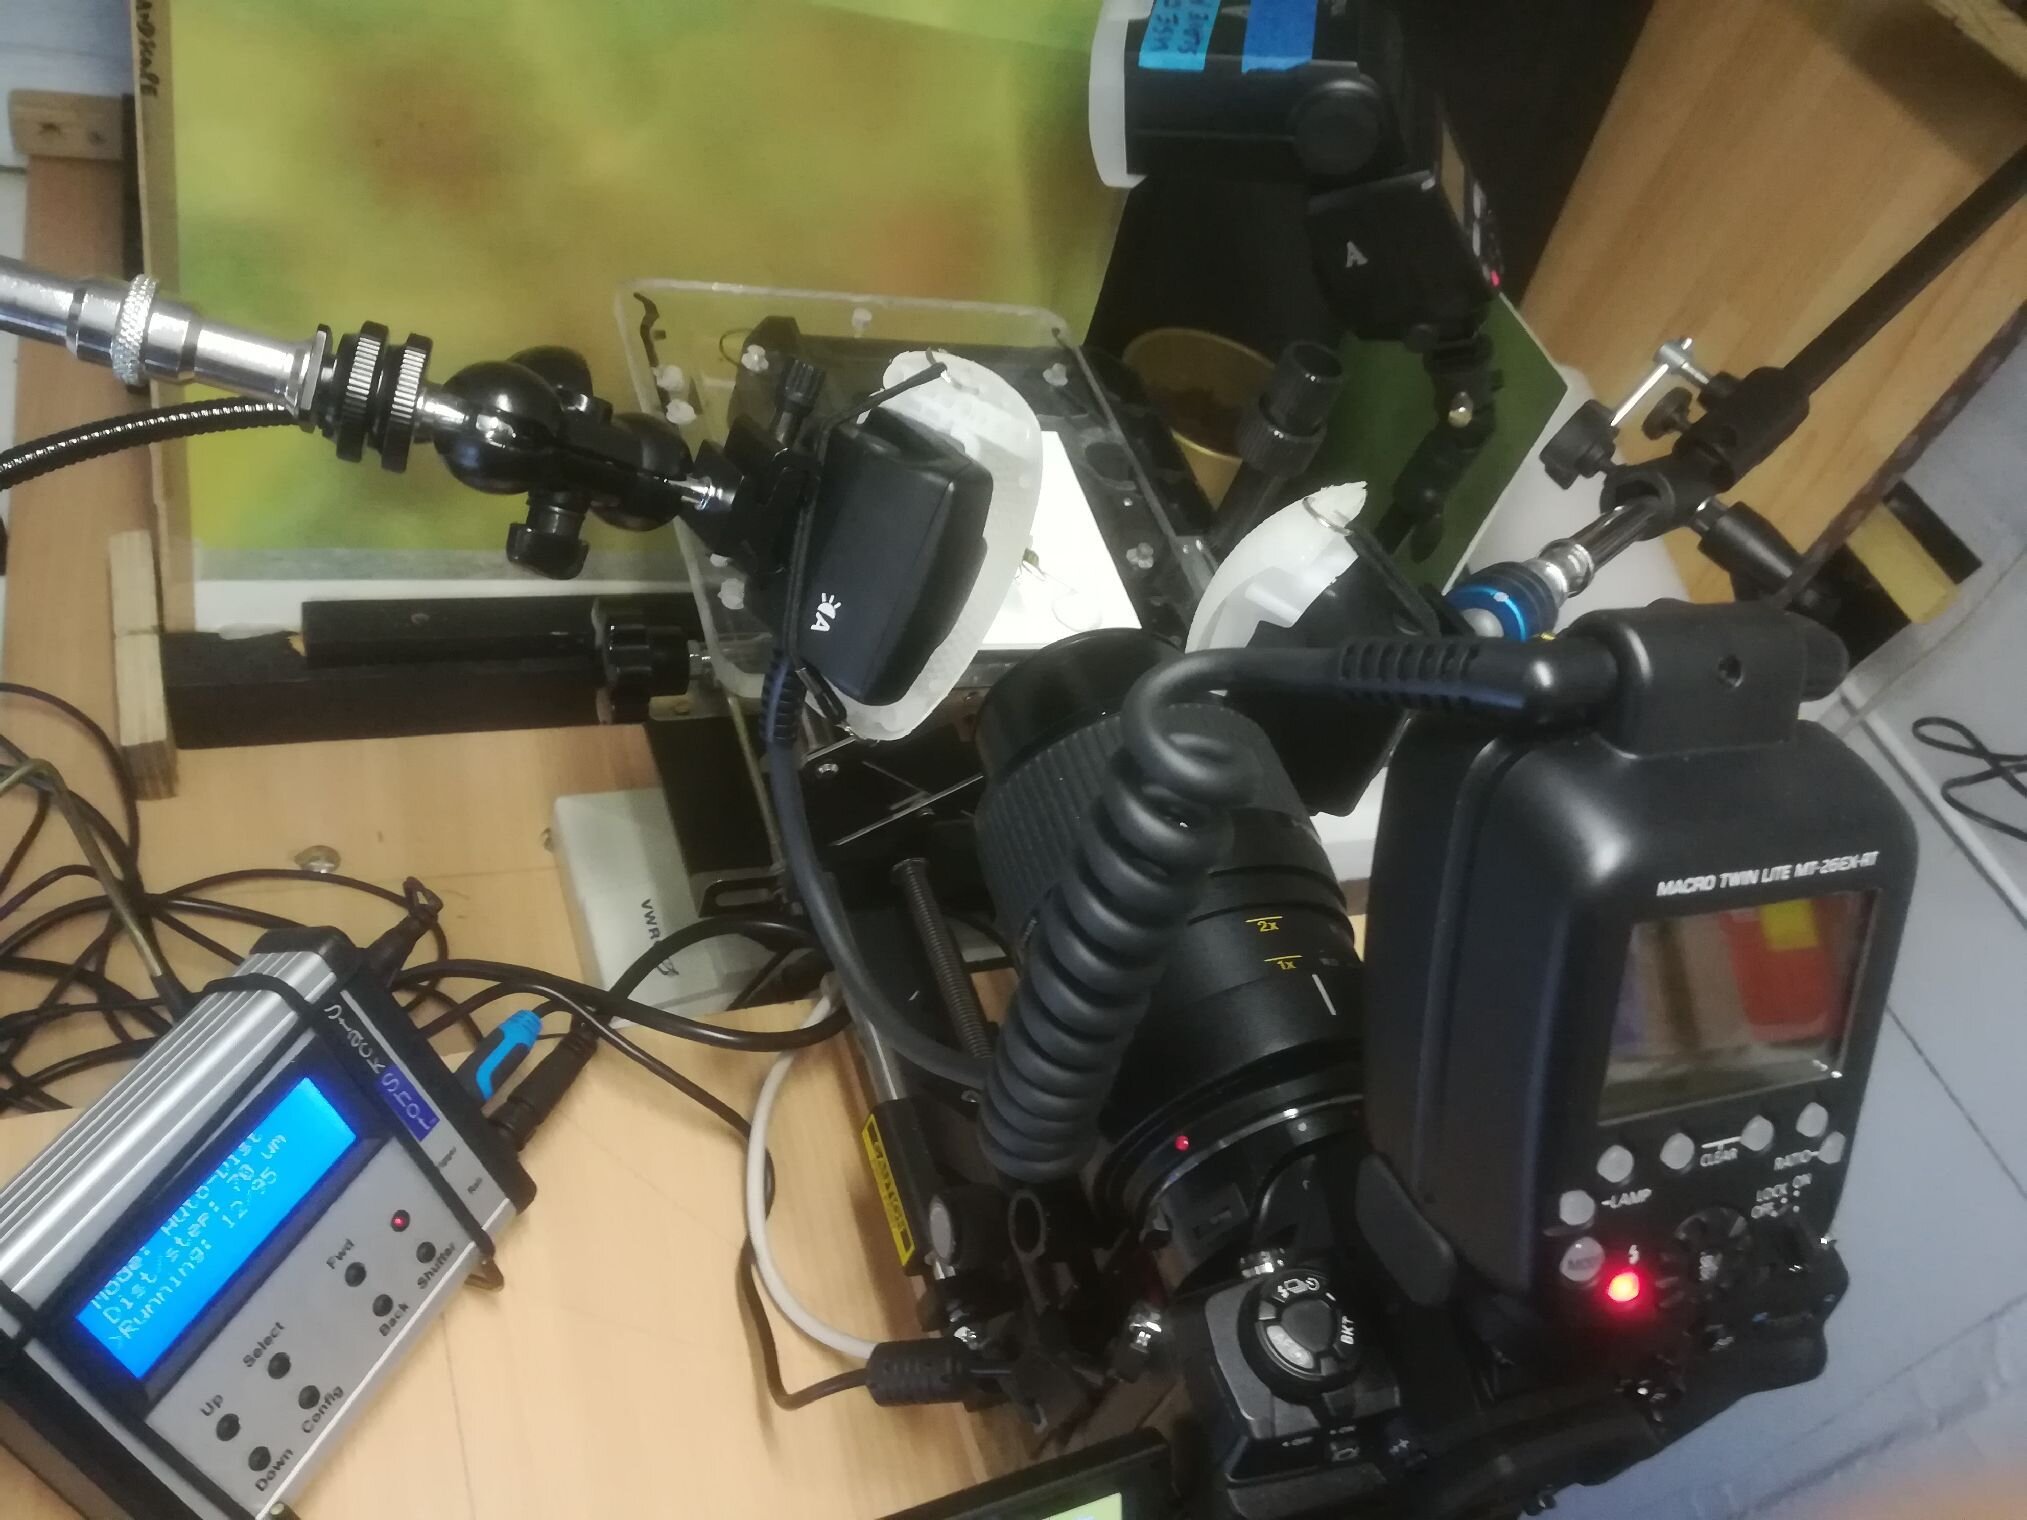
Andy at work
Hi to all,
I am 64yrs old living near Windsor UK, on the verge of retirement. I have been a keen wildlife, aviation and travel photographer for many years but have never tried much macro, until that is, I began to watch Allan Walls on You Tube.
It began in February 2020 when the Covid19 worldwide lockdown was just taking shape. Coincidentally I had severely strained my back which was to take 3 months to heal up. The lockdown and back kept me from my usual habits of wandering around with heavy camera gear, so I was keen to try something I might manage indoors.

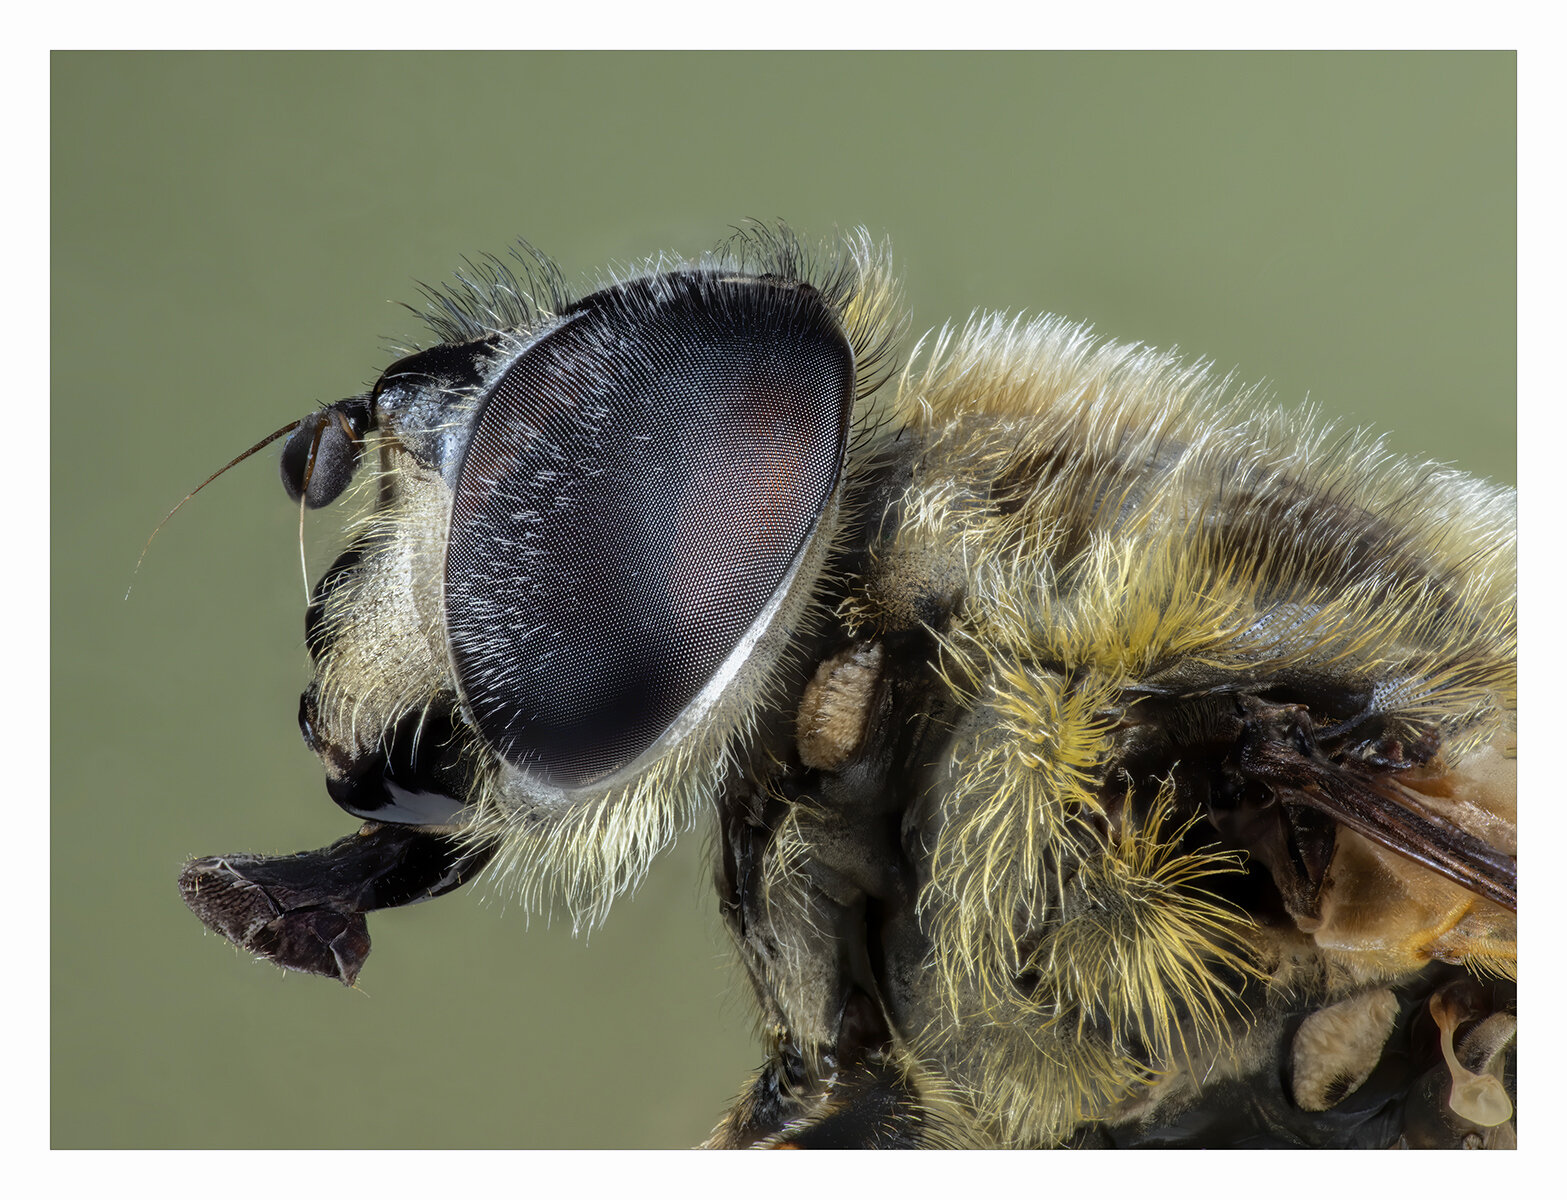
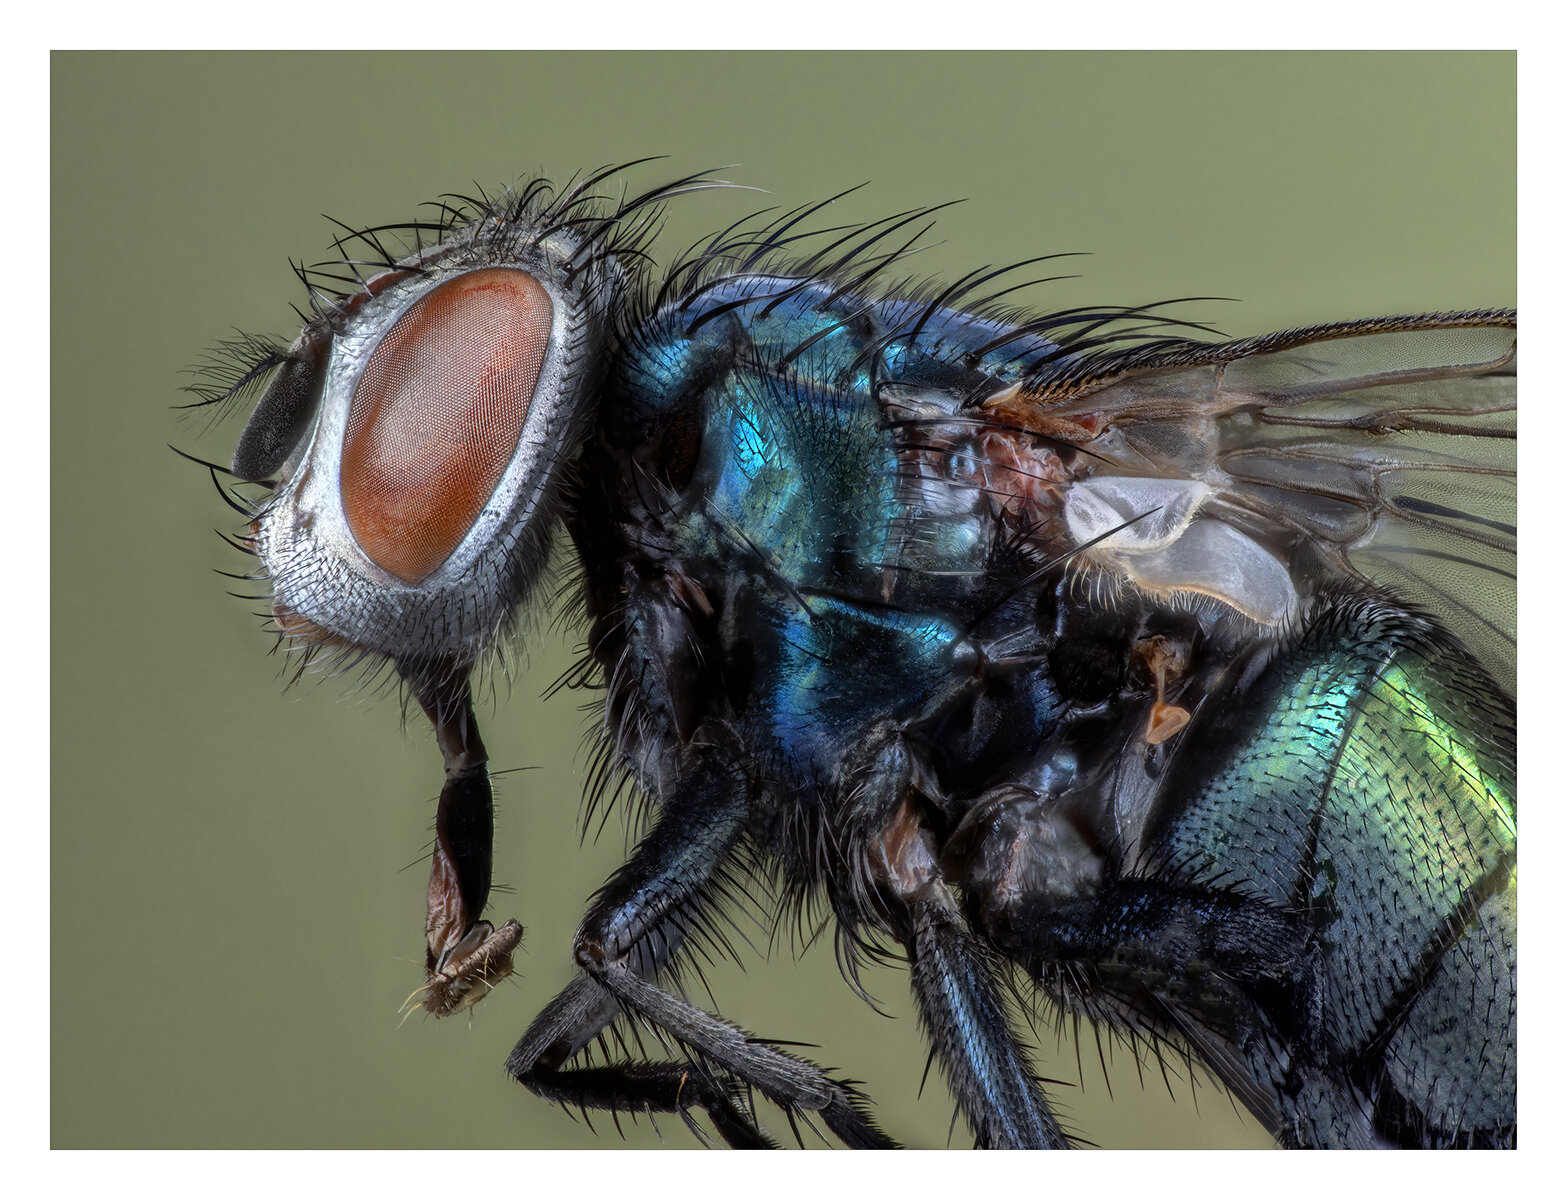
All images courtesy of Andy oxley
Allan’s videos gave me the extreme macro bug, (NB not covid19 as we have never met).
I began to design and build my macro cage, I only had one fag packet, so it had to be simple.
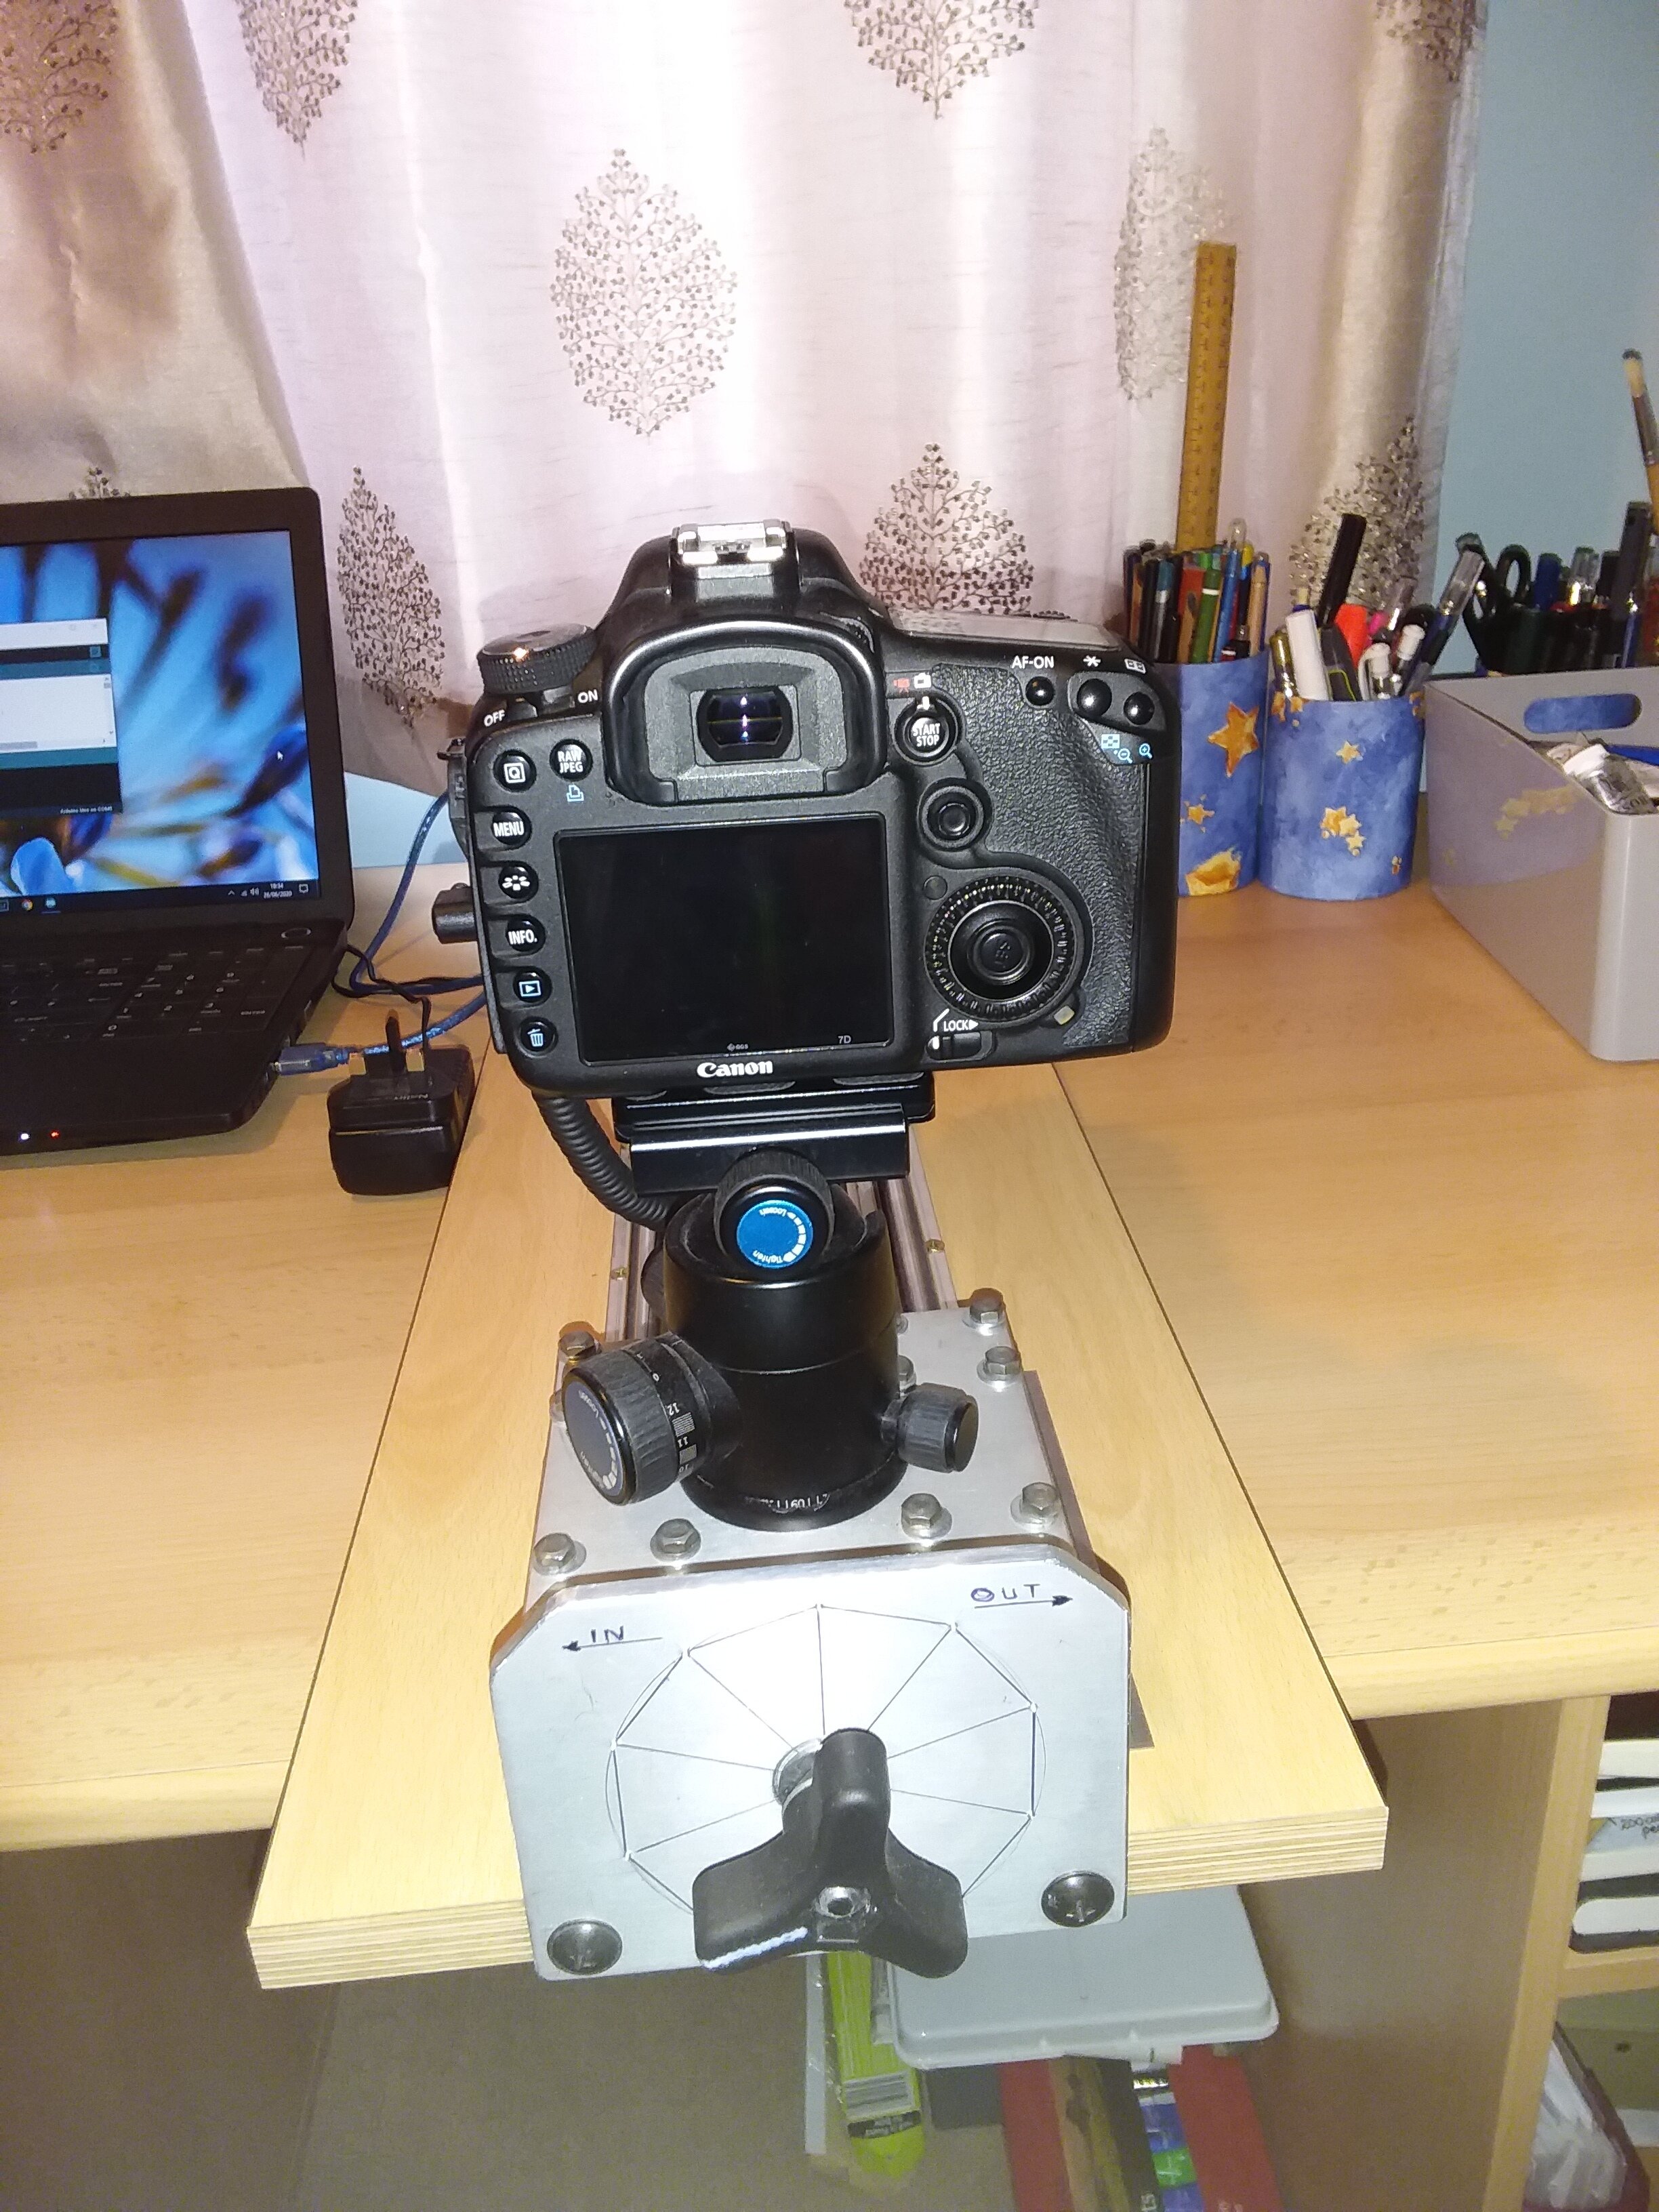
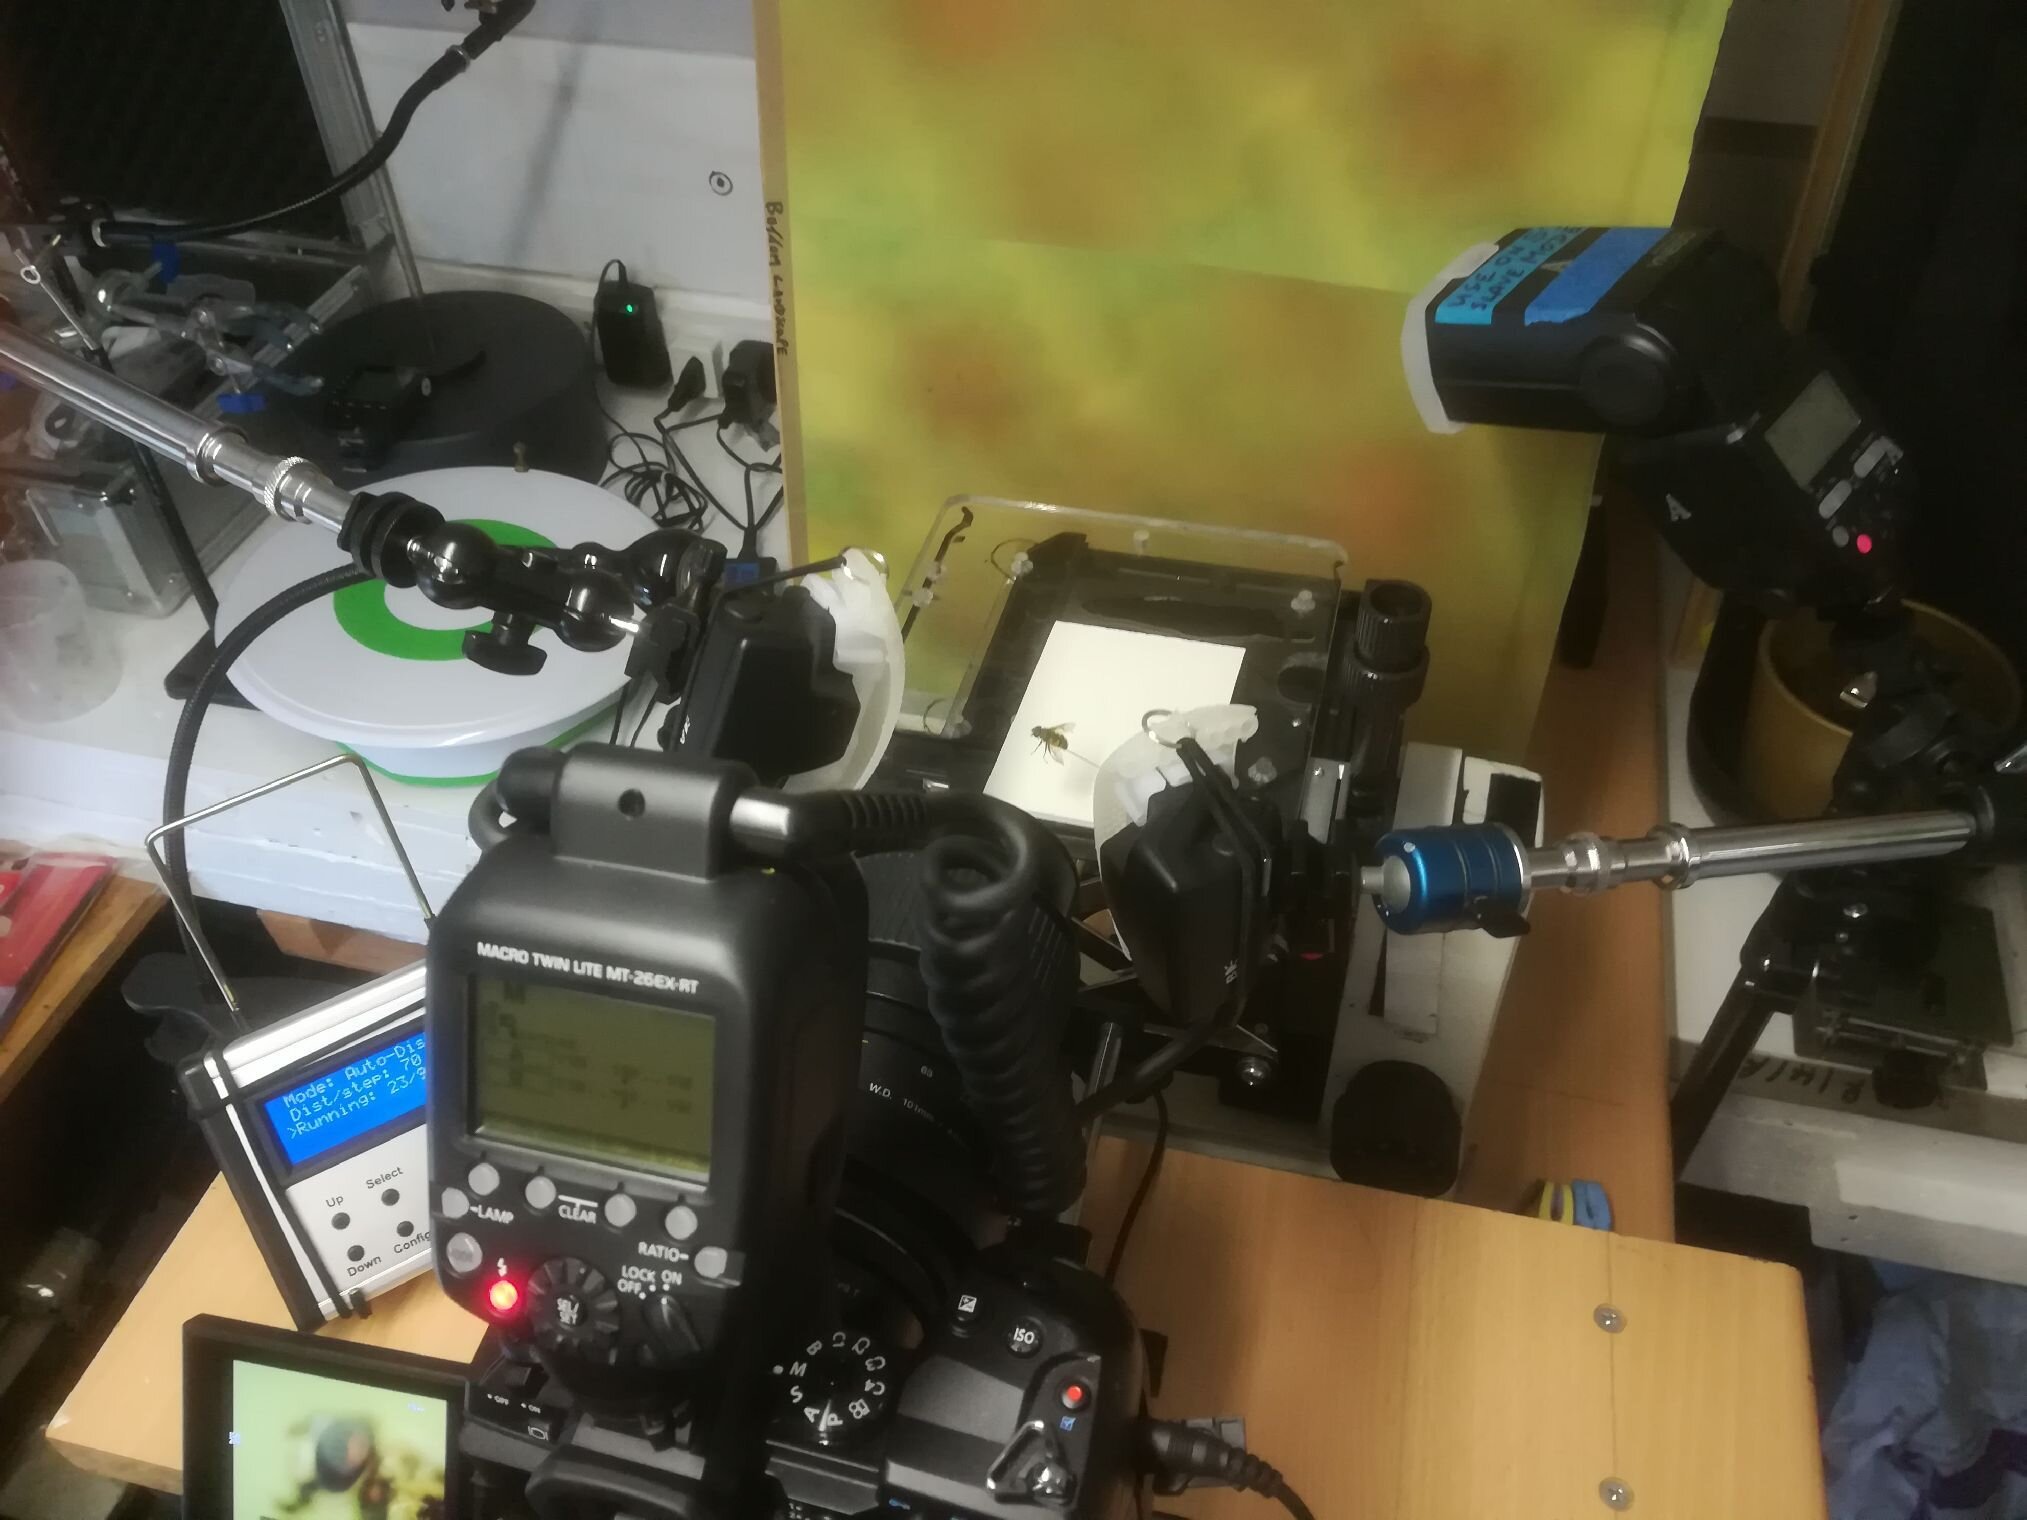
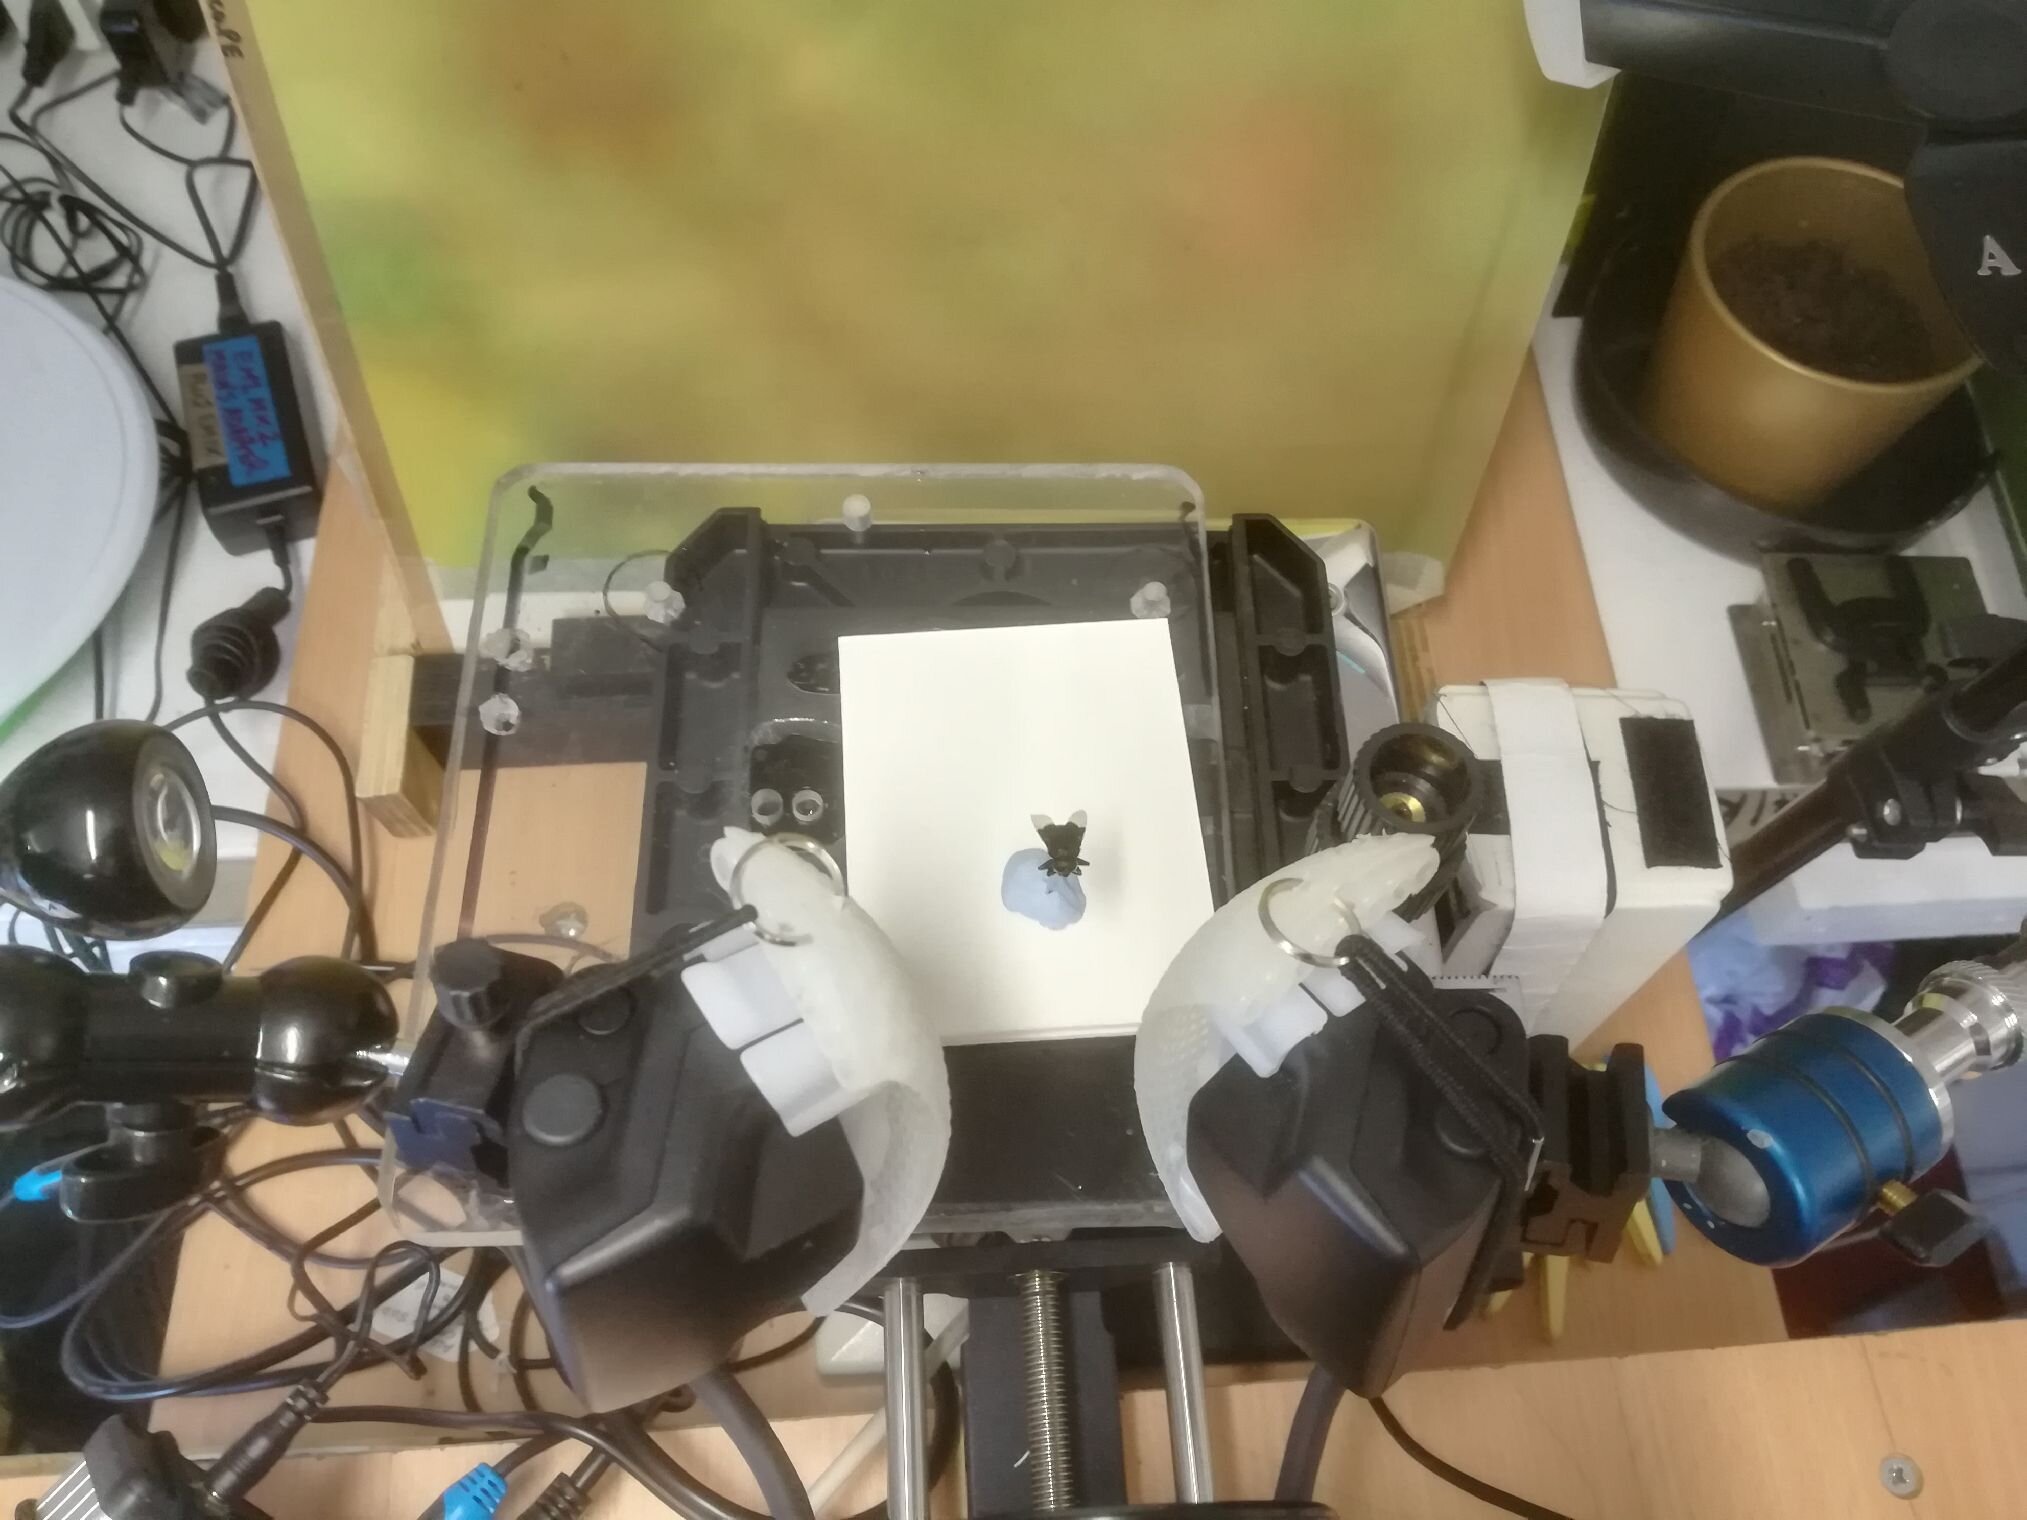
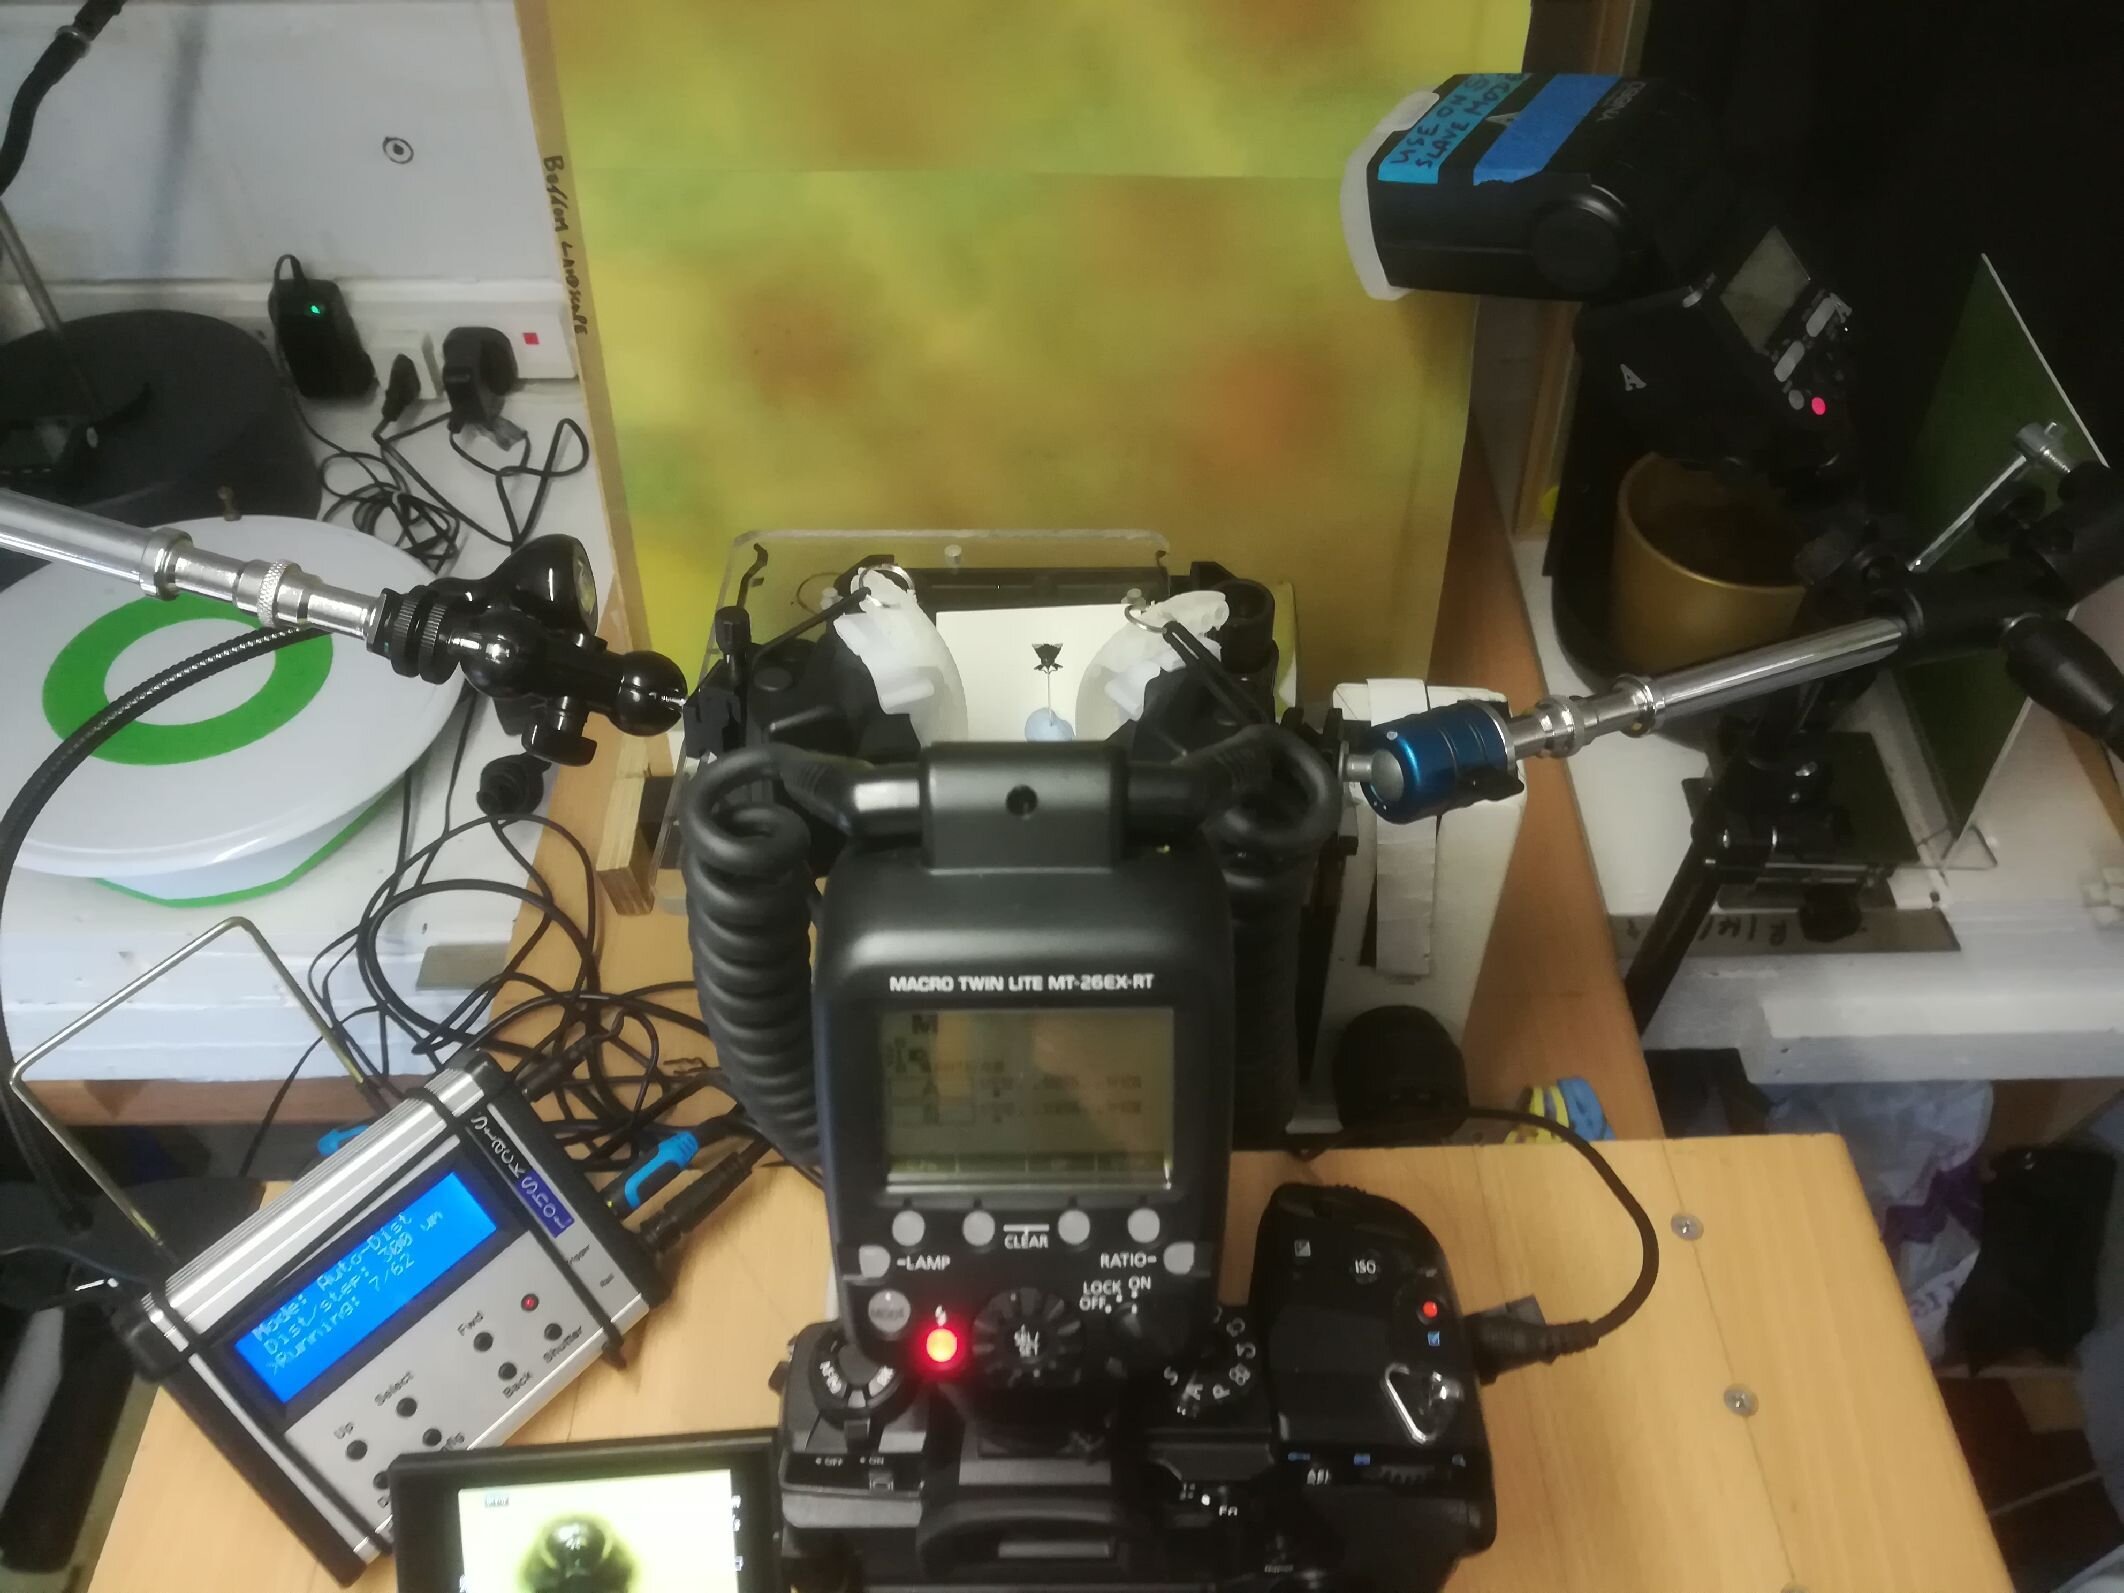
It consists of a heavy MDF board on 6 rubber feet, and I screwed a V slot extrusion to it, to give me a solid sliding rail type platform. My idea was to fix, as rigidly as I could, both the camera and specimen holder to it. It allows me to slide both the camera and specimen, and to fix them firmly.

Having been a Canon user for a few years, I bought a used Canon bellows and already had a couple of old FD lenses 50mm and 28mm lying around. The bellows is, of course from the film days and is FD mount rather than the current EF. I then bought a WeMacro motorised rail, a few adapters, used a couple of old Yongnuo flashes and a remote trigger, and got started.
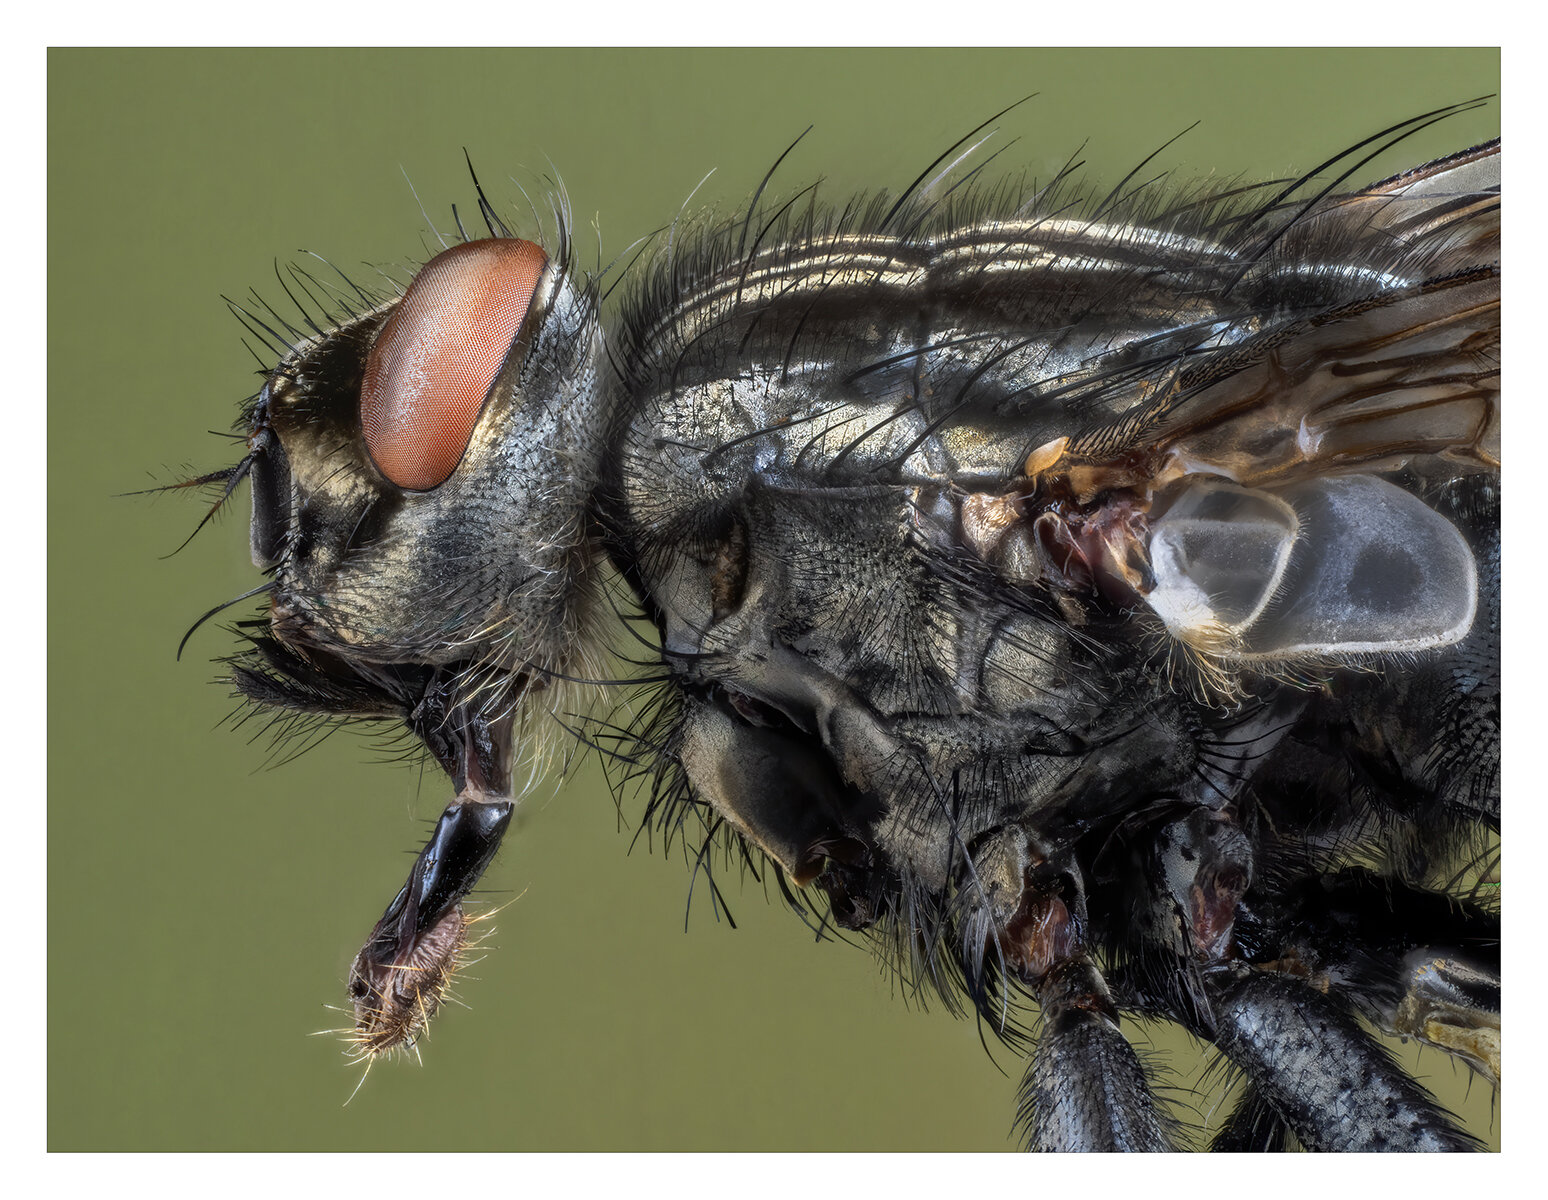
My early attempts at focus stacking, using Helicon Focus were pretty poor. Too many specular highlights, poor composition, chaotic workflow to name a few. Houseflies also get a bit boring after a while, I did catch a nice wasp though which lasted well during my early ham-fisted attempts to pose it. After catching a ground-beetle I began making a bit of genuine progress, mainly because they are amour plated and will withstand a few knocks.

I have settled on a tethered workflow. I use Helicon Remote to control the camera and rail, it enables me to get good focus and to compose an image. I tried using the WeMacro rail with my phone, which worked fine also, but I did not like composing the image using the camera LCD, too small. Also I prefer the images loading straight into my computer, no SD cards to extract.
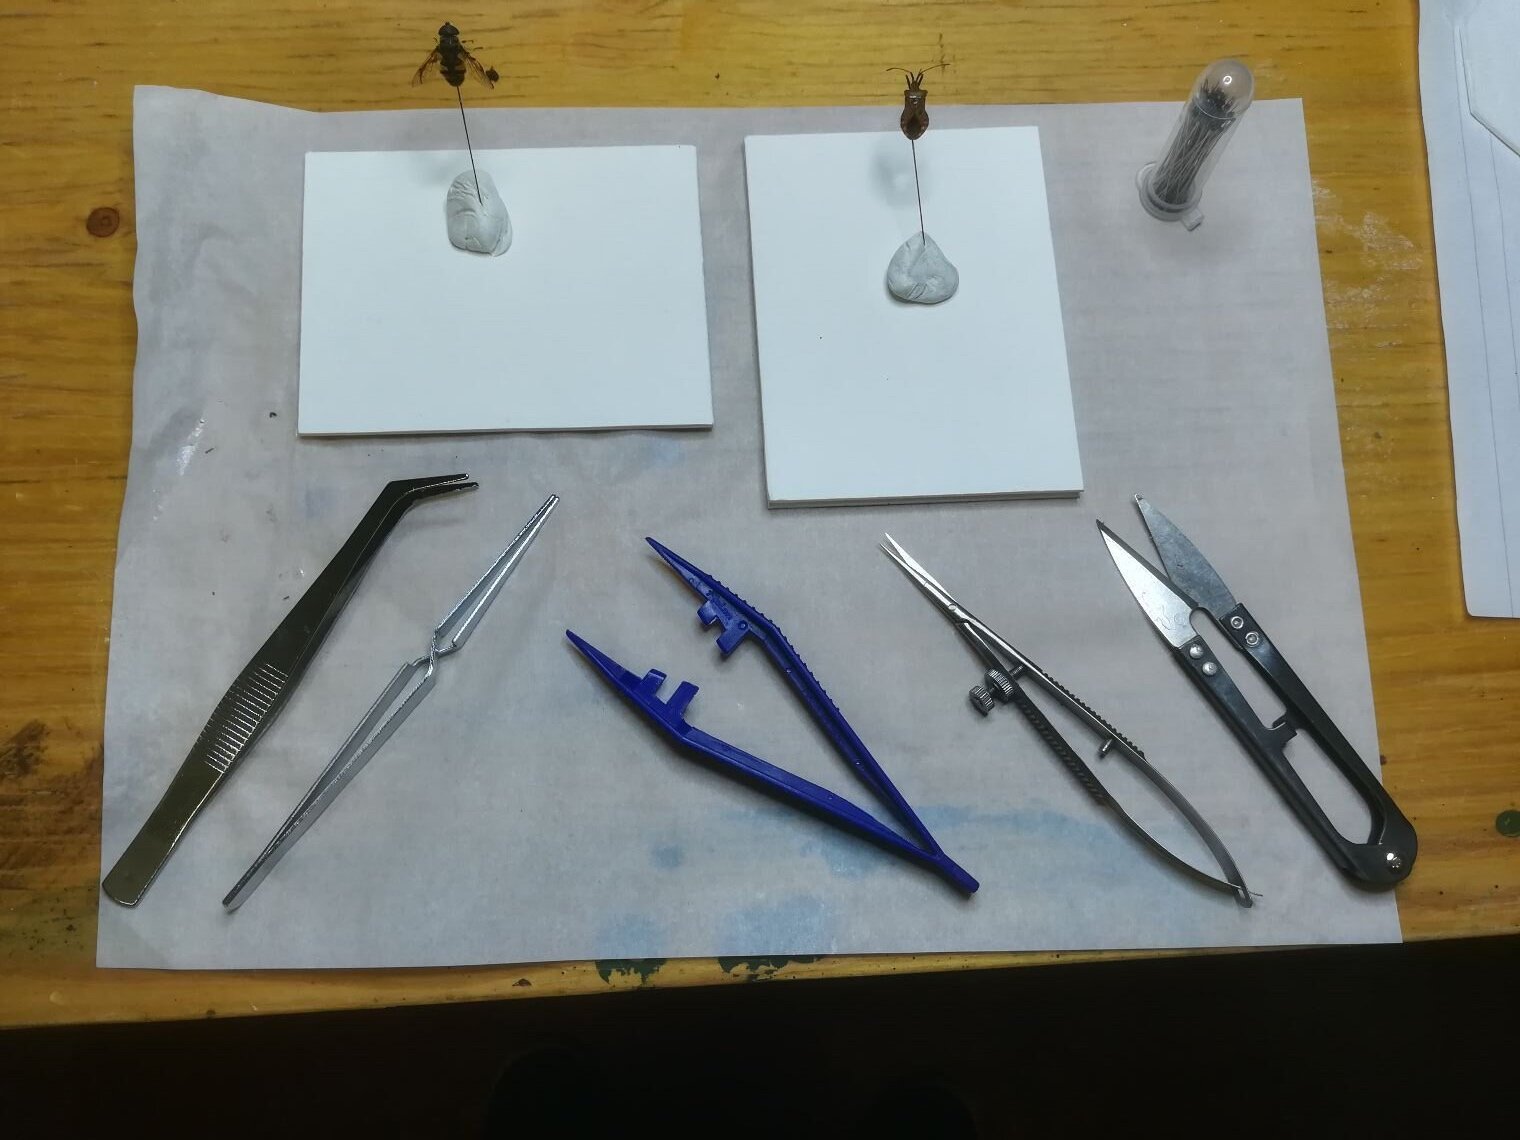
My most difficult dilemmas were holding and manipulating the specimen properly, and diffusion. I am currently using a Heath Robinson insect holder which I cobbled together, it does work fairly well though and the pictures show it in situ. For diffusion I am using a polystyrene chip holder as shown, for bigger subjects I have 3 sheets of A4 opal acrylic which I position using bendy arms. Both seem to work well, together with 3 sheets of tracing paper on each flash head. I only use flash, the bendy lamps are just for initial set up.

I am now trying microscope 4x objectives and have ordered a 10x today. That will probably be my limit, I think. I have tried a bit of stack and stitching, and I love very high res images so this is a way to go for me, my Canon 5DSR is 50 megapixels, and stitching will stretch my iMac quite a bit. I want to try slabbing also which may require a software change, Helicon Focus does not support it well, although I don’t want to forgo Helicon Remote. More money to spend.

The cage in action
I want to begin to produce more artistic and interesting extreme macro images, full of detail but also colour. The type of image that others will want to dwell on for a while. No more dead dusty houseflies for me.
I am very grateful to Allan for his detailed help and inspiration and look forward to more long and interesting videos soon.
Kind regards
Andy Oxley
You can find me on Allan’s Discord app.
The Dennis Felty Setup

Dennis Felty’s remarkable system

DUTUB 2
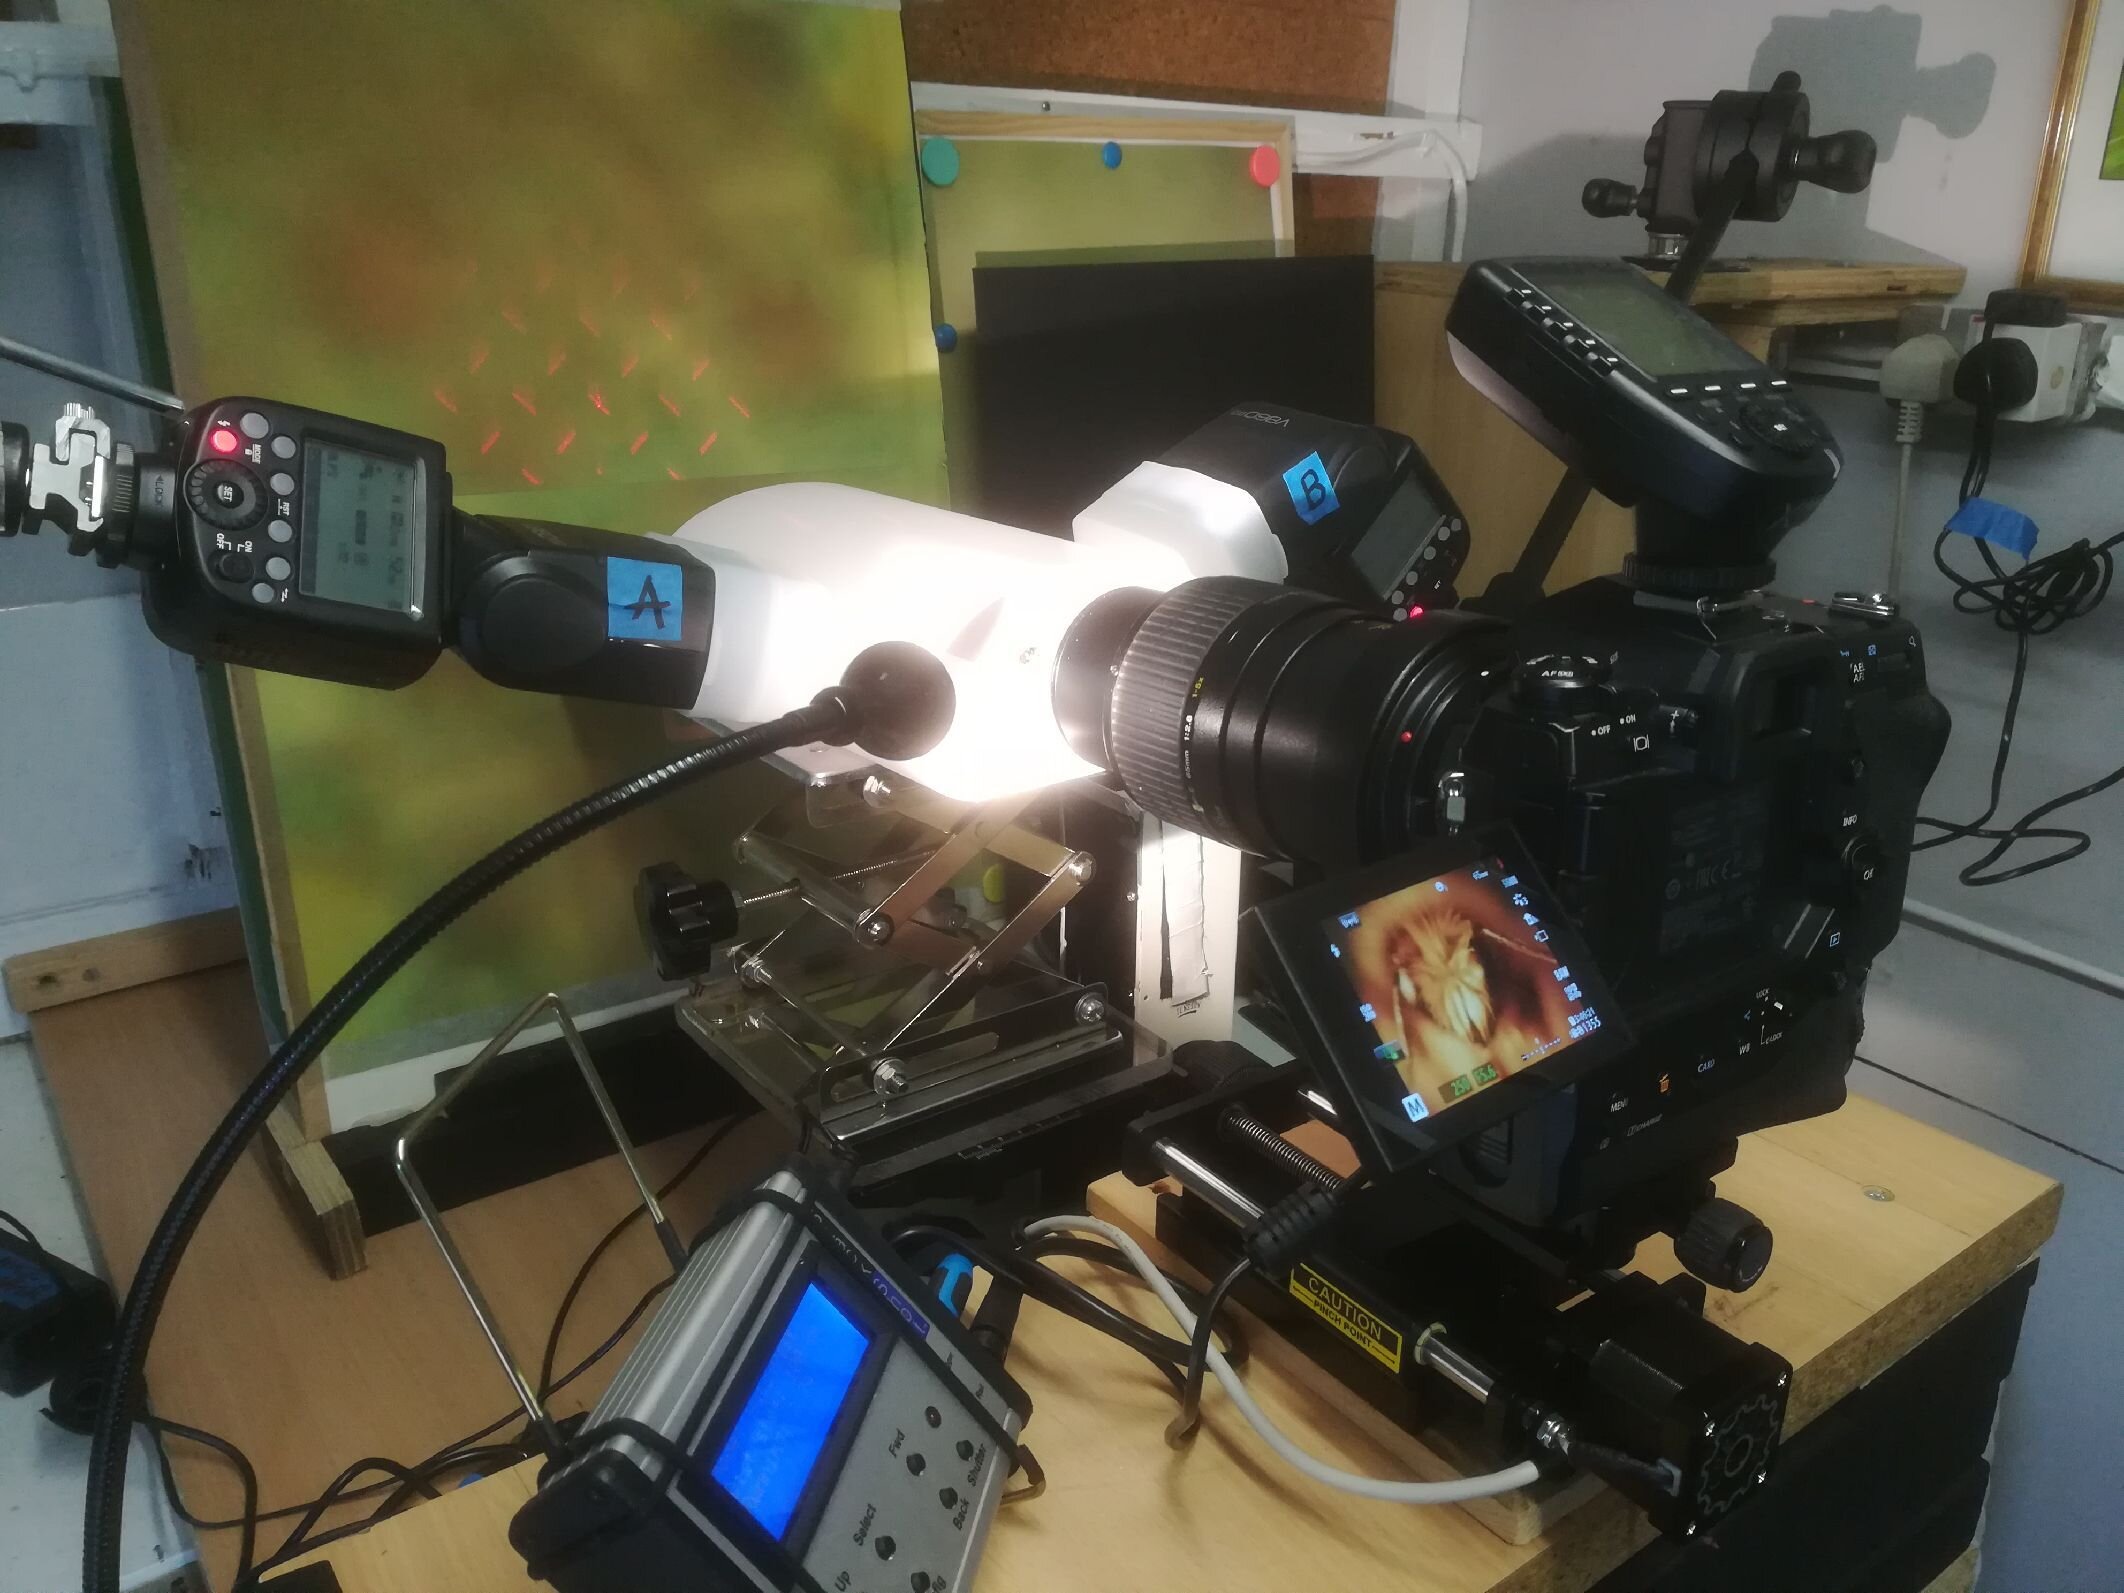
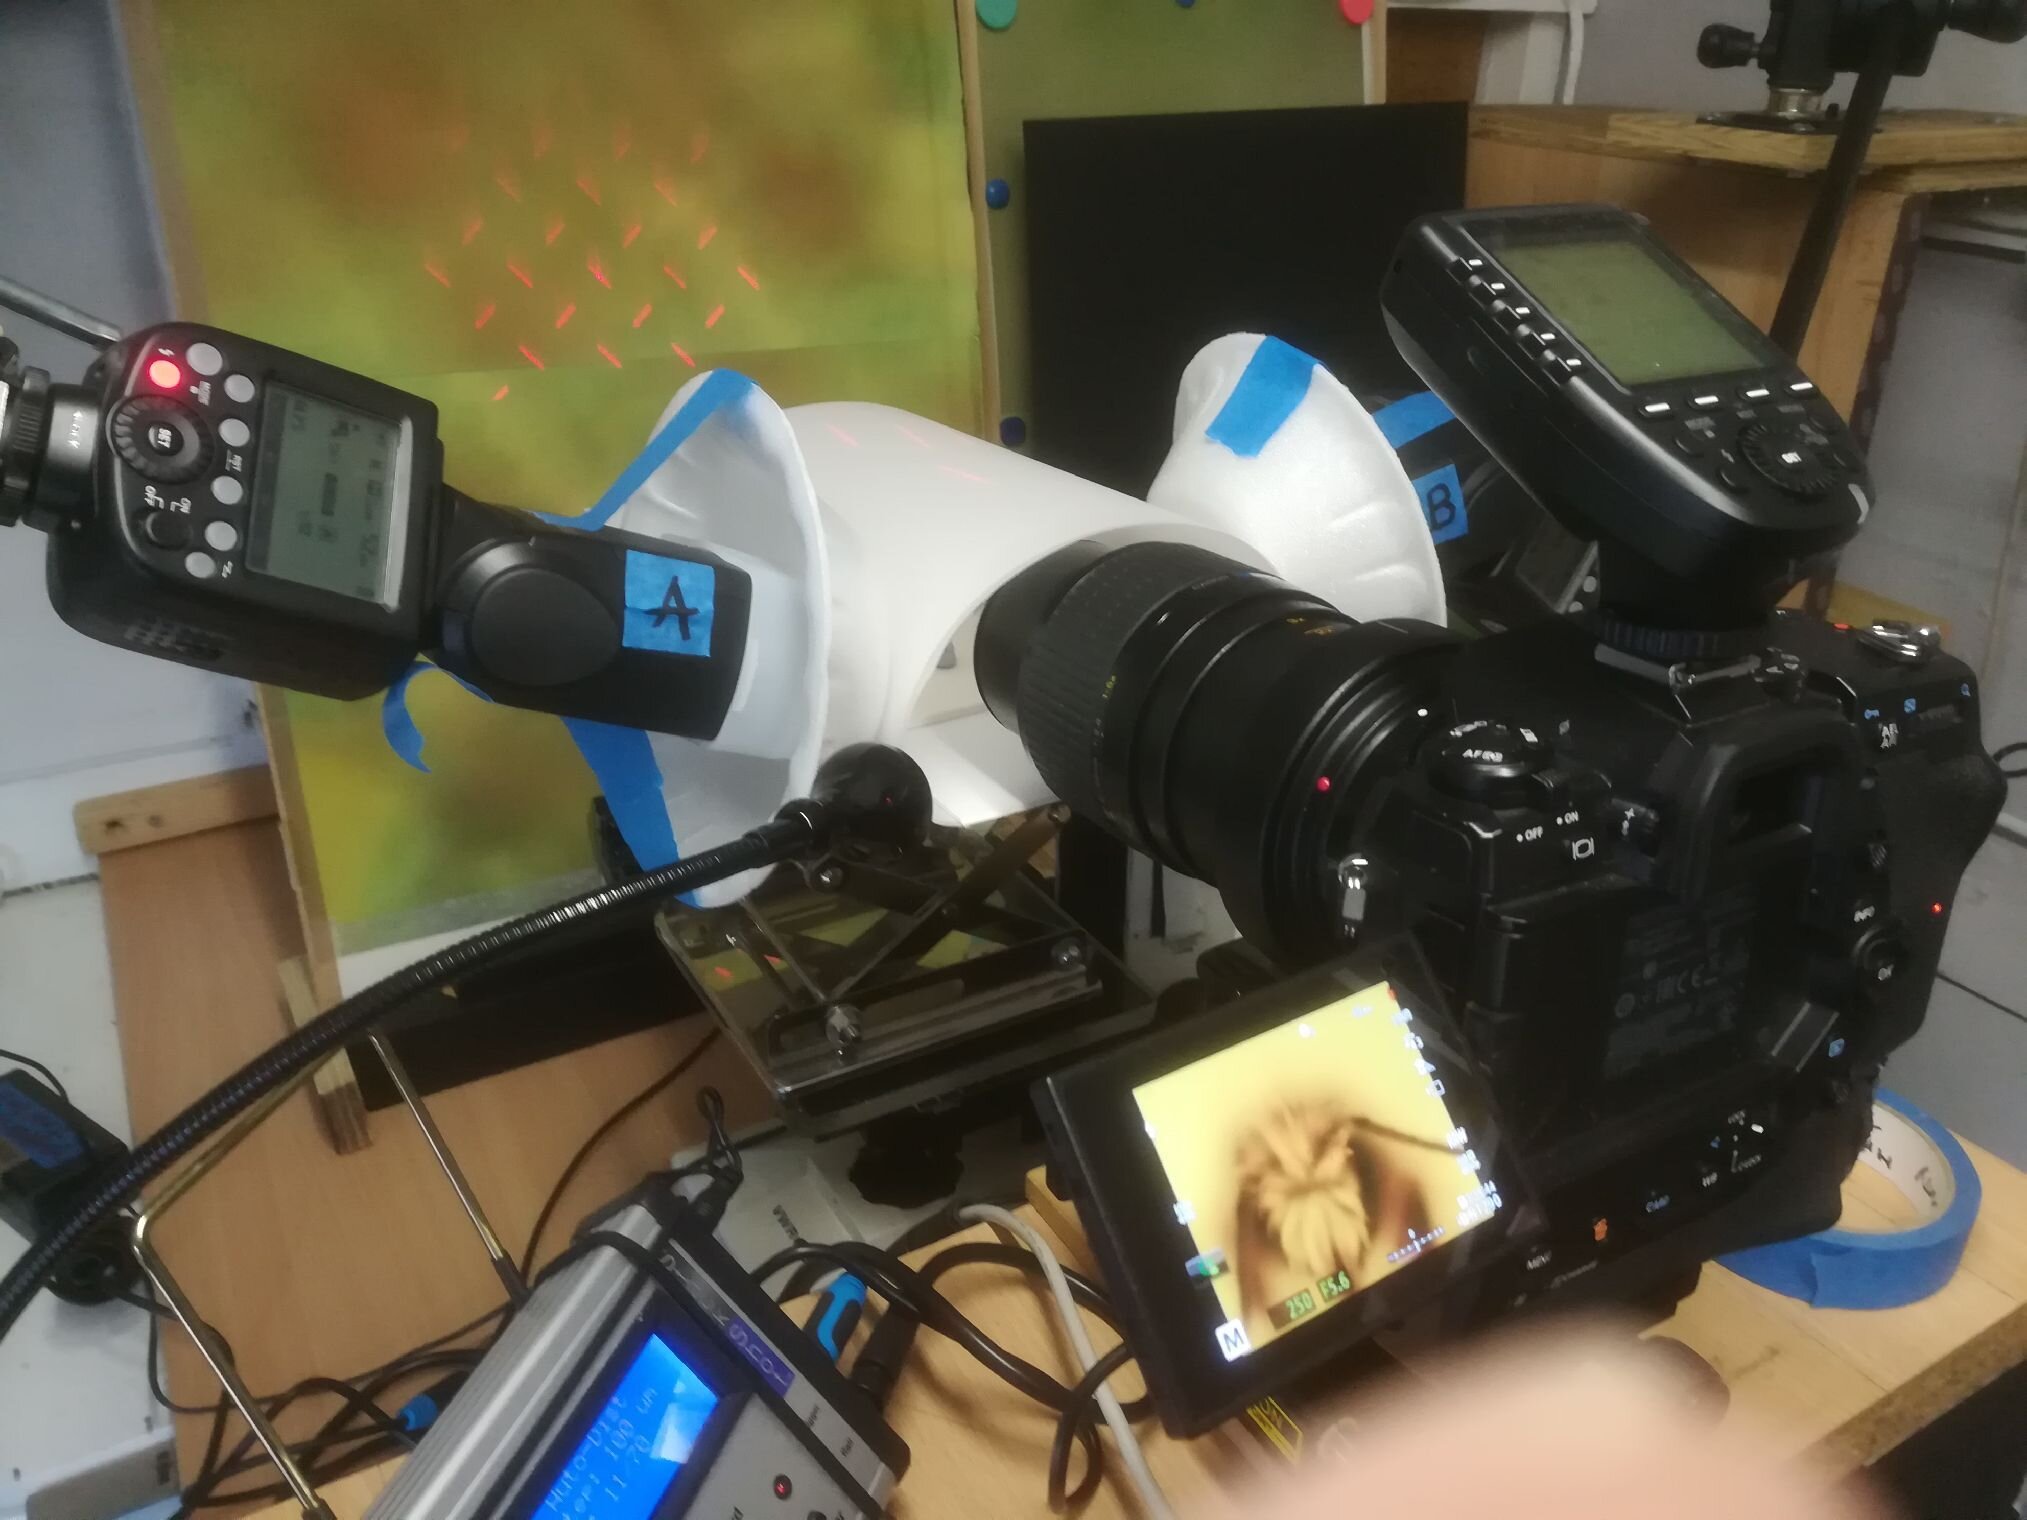
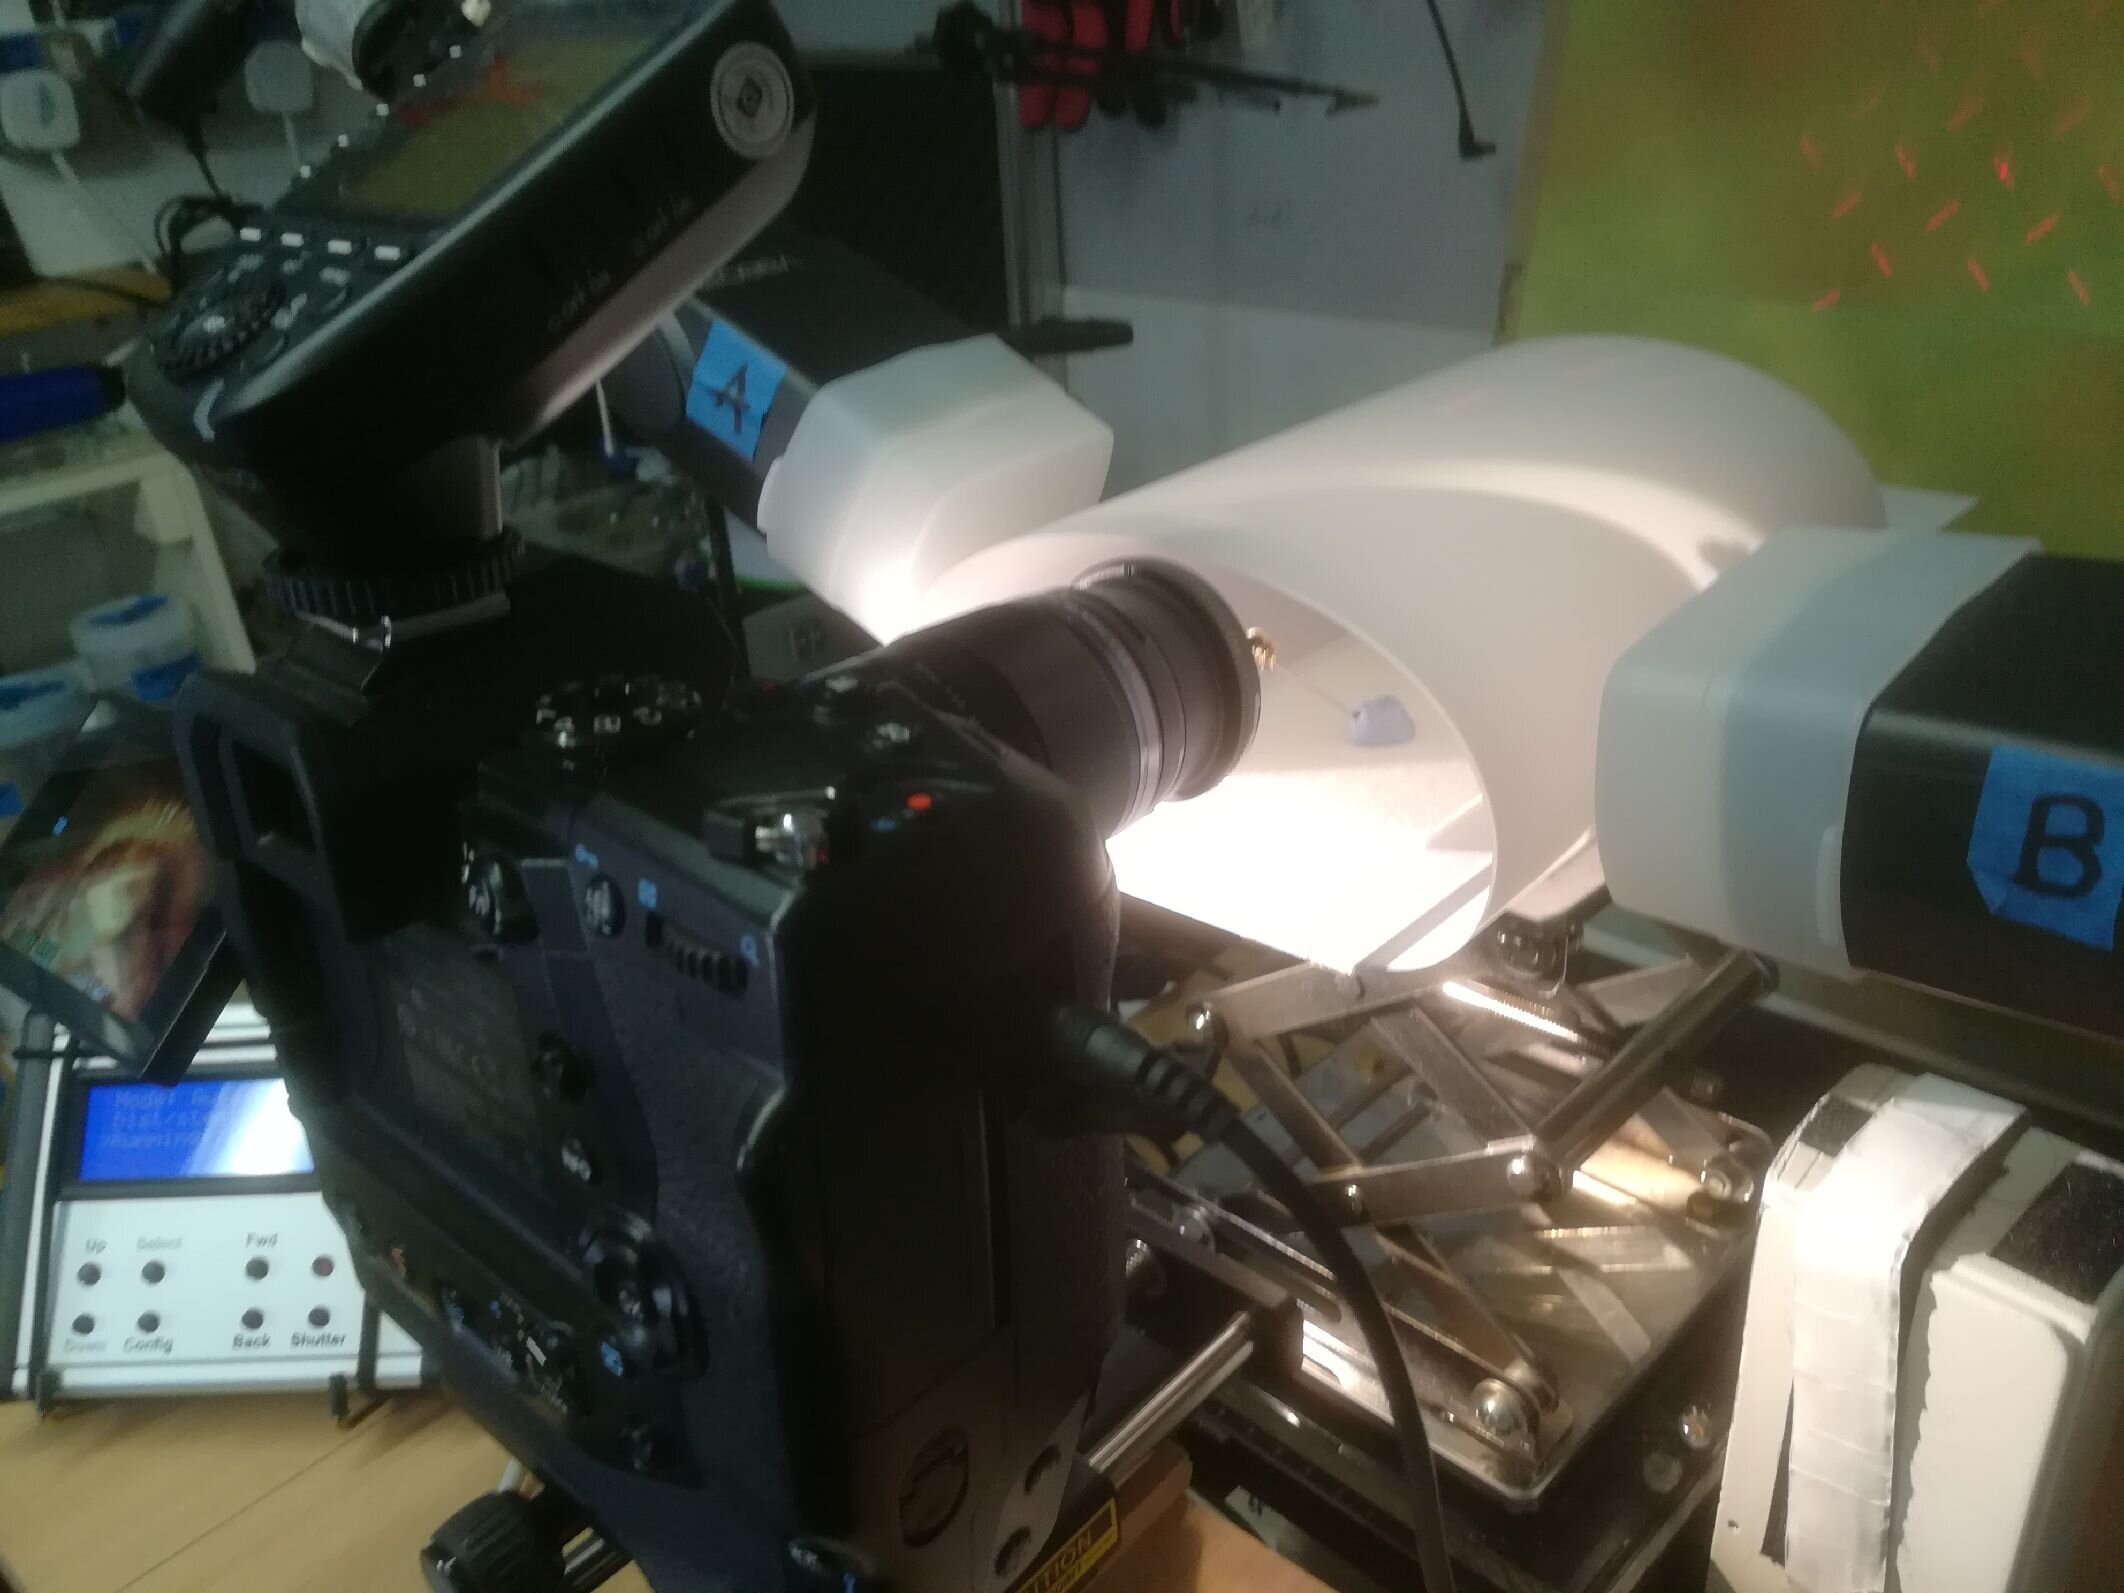
I have been a fine art photographer for most of my life and for the last 15 years have been engaged on the work I call Stone Spirits. Most of the images are focused on Pietersite a form of agate with beautiful micro structures. I am using a variety of macro and extreme macro imaging. I am using a Nikon D850 mounted on a modified Durst Laborator 5x7 enlarger and have recently started using Cognisys Stack Shot and the Lowa 28mm macro lens. The Durst Laborator in addition to being a rock steady stand allows use of a very comprehensive system of bellows extension, lens boards and other attachments.
Many of the images are also made using a Nikon E400 microscope and some images are made with the microscope objective lens mounted on the Durst Laborator replicating the microscope’s optical system. Most of the microscope objective work is at 5X and 10X power. I use polarized light coming from multiple fiber optic halogen light sources.
I have recently retired after 50 years as the Founding President of Keystone Human Services. My current intentions are to pursue gallery representation and exhibits.
You can view some of my work at https://dfelty.zenfolio.com/f563843198 The images of Stone Spirits are in the Stone Spirits gallery and the Anima Mundi gallery.
I would be very pleased to share my setup on your blog as you have offered and It would be great to share other perspectives on our work.
Best Regards
Dennis Felty
The Fred Sillito Macro Platform

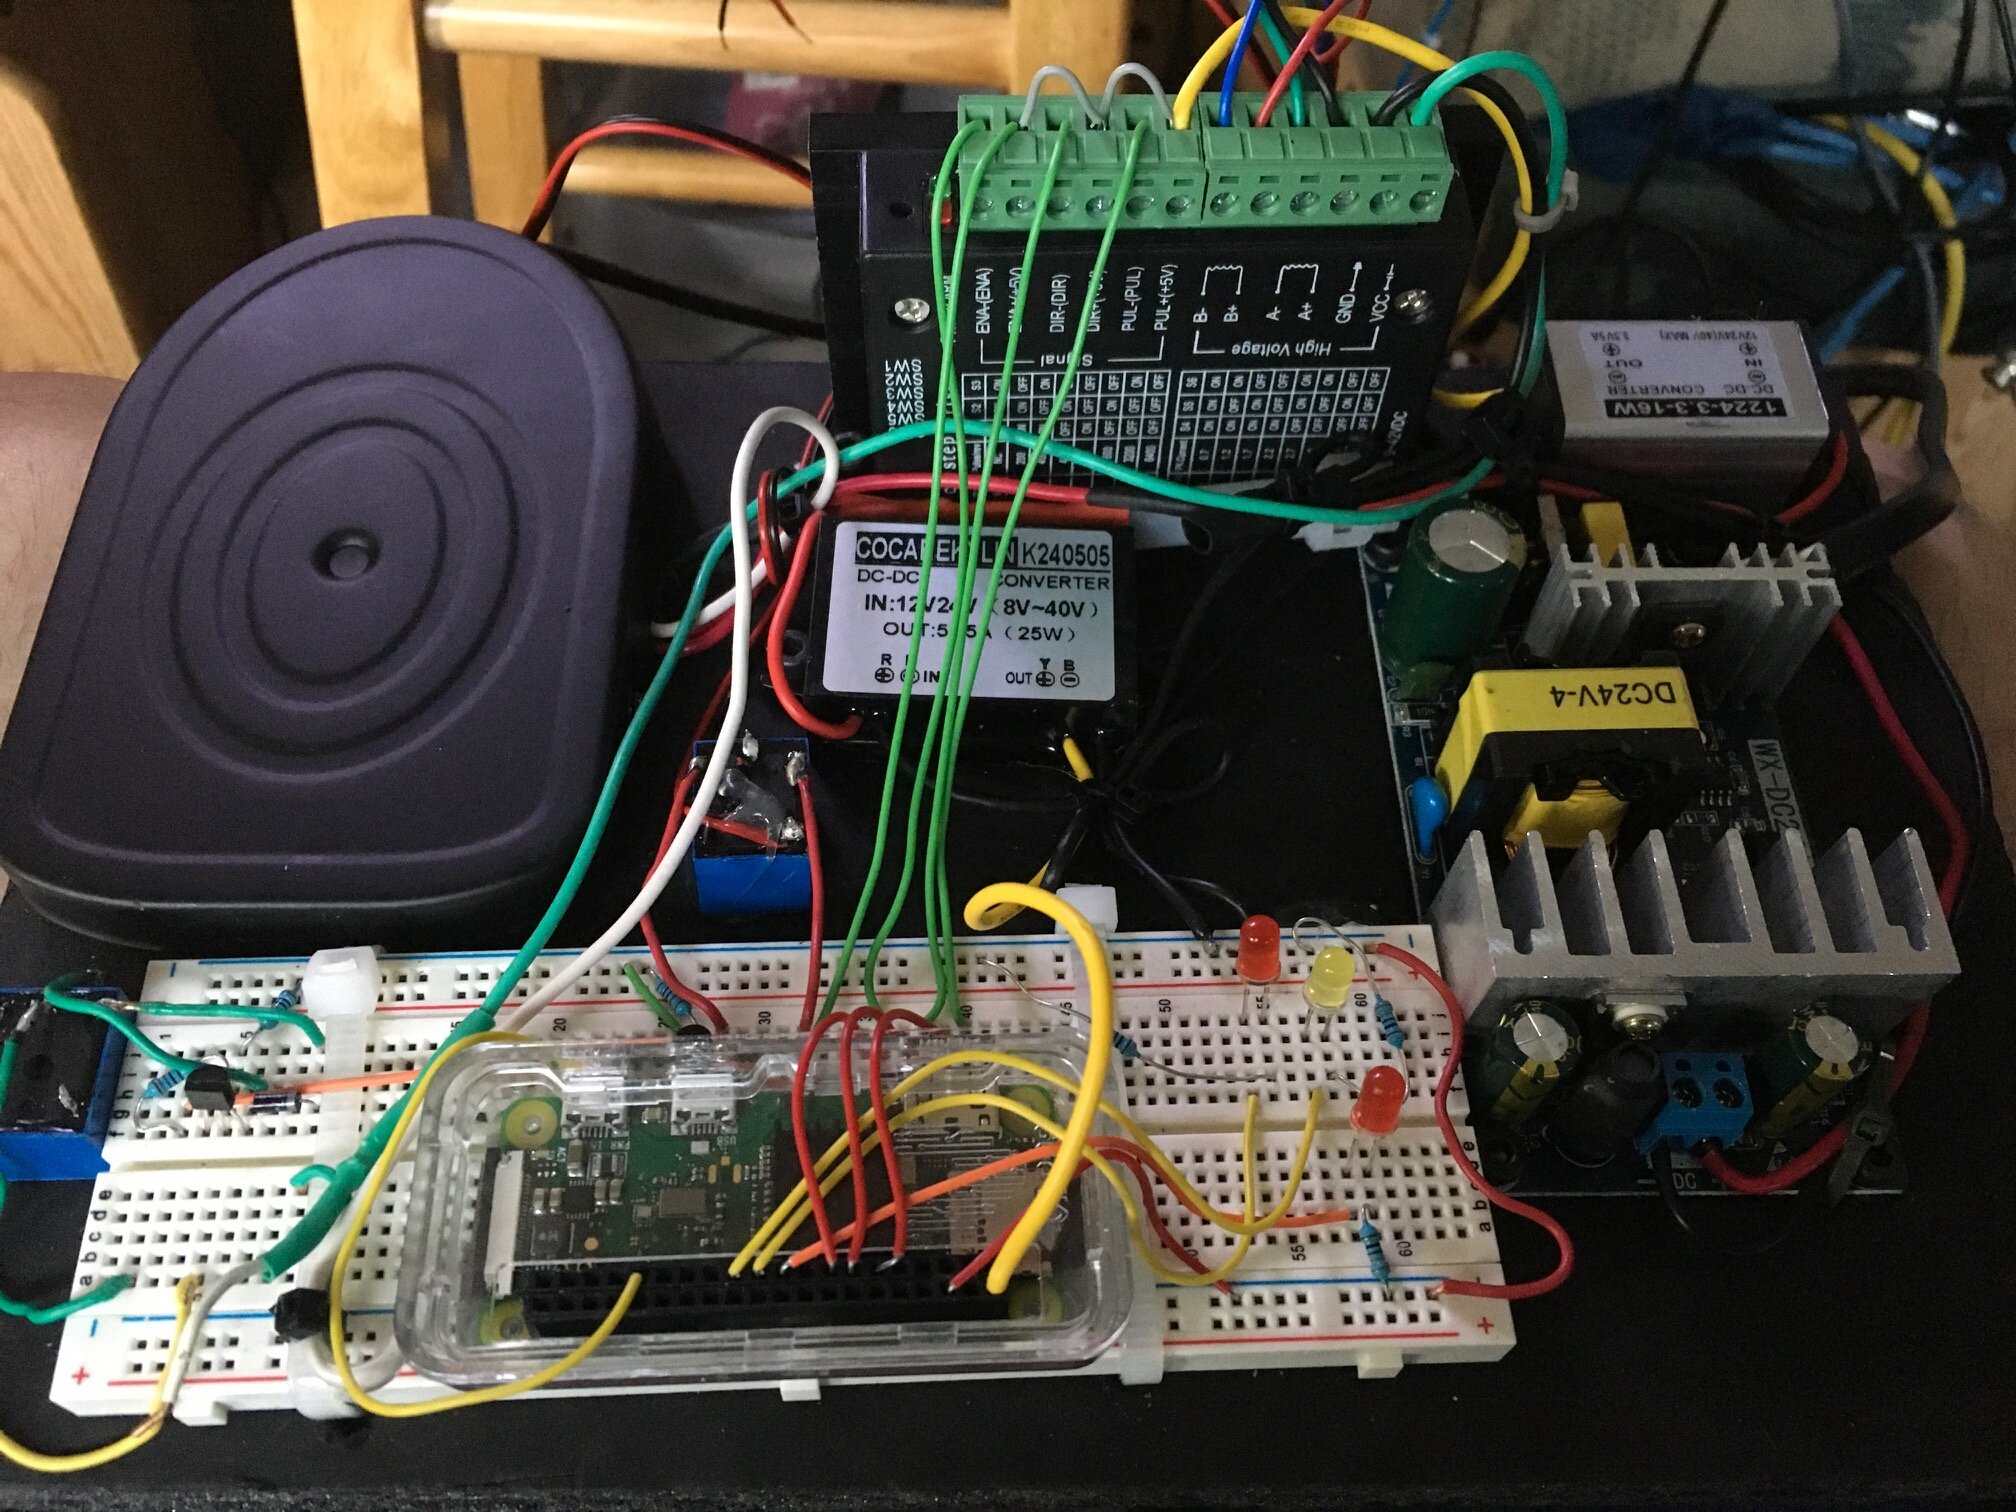
During the lock-down I decided to make my own macro rail (there is a lot of rubbish on the market). The rail started life as manual version and progressed to a motor driven version with my own program.
The rail starts by taking a photograph then a delay followed by advancing the motor another delay then another photograph and the process continues for the required amount of exposures. I can set the steps down to 1.25 microns. When the cycle is complete the rail rewinds to the start position and disengages the motor to manually reset for the next shot. Any settings can be changed.
Using a double rail gives a much more stabile large platform. The rails are on the long side but were on offer!
The build cost me around £90 approx $110 Some parts I had like the tripod head etc.
I thought it might make a project for your channel or to pass on to anyone interested, I could forward the build and program.
Keep up the good work
Fred Sillito


The Philip Hadley Project
By Philip Hadley
Editor’s Note - Mr. Hadley did not provide any setup notes. If you have any questions about the image gallery below, please leave me a message and I will contact Mr. Hadley on your behalf - Allan Walls

The Sam Hanie Setup

By Sam Hanie
Editor’s Note - Mr. Hanie did not provide any setup notes. If you have any questions about the image gallery below, please leave me a message and I will contact Mr. Hanie on your behalf - Allan Walls
The Steve DeMott Cage Design

By Steve demott

The overall view (not a real human head)
Ok! Here we go. After viewing all your videos, well 86 of them, I was really interested in the cage project. So, I built 4 of them and this is the one I like the best.
On the right is an overall view. The cage is made out of 1/2" pvc. I made the diminsions so that the Godox 24" softbox fits on top. No tripod with boom. My wife made a curtian with velcro straps to create a lightbox if needed.
Then there are the outriggers. If you need to move the flash futher away, fold out the outriggers, add an articulating arm, and you move the lights about 2 feet away. Just saved myself the cost of 3 tripods and boom to hold all this crap.
The first two images below show the removable pins. Holes are drilled at 45 & 0 degrees, after inserting the pin the arm is lock in place. Found the need for these the hard way. I made a 1" long pipe that is glued to the 90 degree piece. The T fitting rotates on that small pipe. The tie downs keep the frame from speading apart. Also learned the hard way.
Overall it's a superb piece of engineering. Only took a day to create.
Disclaimer: No animals were harmed in the making of this cage, although a lot of cursing & beer drinking was involved.
Thanks
Steve DeMott
St. Louis MO


