

Extreme macro photography on a budget - part 2 - Capturing the images
/In the first part of this discussion about macro photography on a budget, we talked about the equipment setup and walked through the assembly of the various lens components. In this post we will talk about how to precisely capture the images we will need to build a fully in-focus, composite photograph.

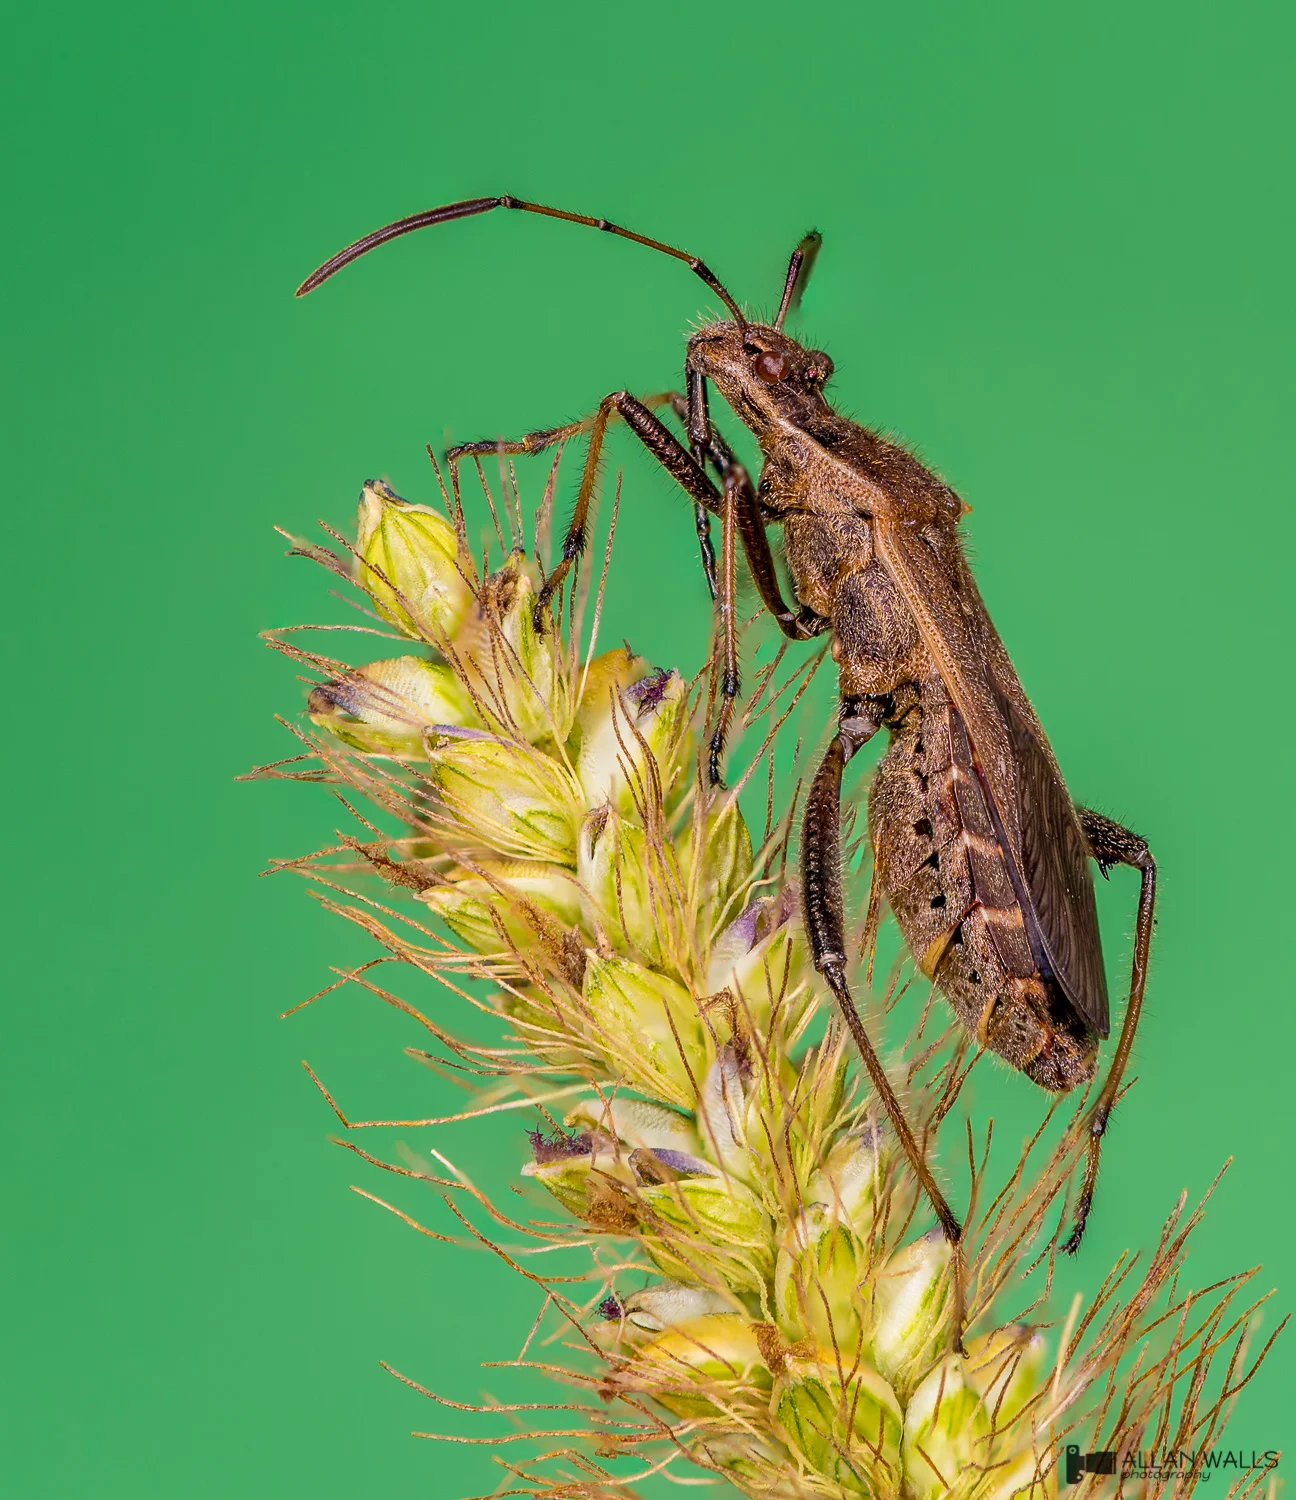
Ready to start focus stacking
In the first part of this discussion about macro photography on a budget, we talked about the equipment setup and walked through the assembly of the various lens components. In this post we will talk about how to precisely capture the images we will need to build a fully in-focus, composite photograph.
Dedicated macro lenses must, by definition, be able to present the camera sensor with a life size representation of your subject. Putting it another way, if I photograph a ruler that is perfectly perpendicular to my lens, and accurately focused, the markings on the image will be exactly the same distance apart as those on the ruler. This is 1:1 magnification and our images will be life-size. The lens that we have built here, made of extension tubes and a reverse-mounted enlarger lens, is capable of magnifying our subject 3.5 times (3.5:1).

The added magnification available with extension tubes and a reversed prime lens
The enlarger lens we are using, a Nikon EL-Nikkor 50mm f/2.8, is not designed as a camera lens and cannot be internally focused. Adjustments to the size of the aperture must also be made manually. I have found this lens to be sharpest when the aperture is stopped down to either f/5.6 (2-stops) or f/8 (3-stops). While the smaller aperture gives us a little more depth of field to work with, it also reduces the amount of light reaching the camera's sensor. For this reason there is seldom sufficient available light and we almost always have to find a more reliable way to control exposure, in this case using a pair of wirelessly triggered off-camera speedlights.


For this reason there is seldom sufficient available light and we almost always have to find a more reliable way to control exposure, in this case using a pair of wirelessly triggered off-camera speedlights.
When working at high magnification and with a fixed focal distance, our depth of field is tiny and only a thin slice of each image will be in focus. To overcome this problem we will need to take a series of photographs in which the focal point is advanced, in tiny steps, from near to far. This must be done by physically moving either the camera or the subject. Everything else in the series of photographs must remain constant so that our focus stacking software can combine the images without creating artifacts or distorting the final output composite.
To ensure that our series of images are optimized for focus stacking we need to pay attention to each of the following components:
The subject - The most important factor in positioning the subject is making certain that it does not move. Even the tiniest, most imperceptible movements can ruin the final image. When posing a dead insect, pay close attention to the limbs. I recommend that you wash preserved bugs in a mild detergent and rinse them thoroughly with plenty of gentle running water. This replaces the preserving fluid with water which can cause the insects' tissues to expand as they take up water, and contract as the specimen dries. Even if you can't see it, a leg that slowly extends under the studio lights will change its relative position in each consecutive image, ruining your final composite. I find the best way to control this drifting is by allowing the cleaned insect to dry completely, in the pose you intend to use, before starting the series. By positioning the drying bug on a Q-tip, a piece of rough paper, or scrap of fabric, the tiny hooks at the end of each limb have something to anchor to and they will be much less likely to move. You will need a good light source shining directly on your subject while you are getting it in position. Without the added light you may have difficulty seeing the subject clearly enough to position it accurately. I use a powerful table-mounted work light for positioning and turn it off for shooting. I like to use a jointed clamp on a solid stand to hold the pin, Q-tip, or fabric on which the subject is posed. This gives me great freedom to maneuver the subject into the most flattering position for the series of shots. Once you have the subject in position, avoid doing anything that could move it. A solid, heavy table will minimize the risk of a gentle bump ruining your composition. To avoid subtle repositioning of bug limbs and wings, turn off any ceiling fans and keep doors and windows closed.
The background - This is matter of personal preference. Whatever you use will be pleasantly and completely out of focus. I like to use a solid, neutral color for background. You can pick up a pad of construction paper, in large sheets and a variety of colors, for pennies at Walmart. Experiment with different colors to find what works for your subject. Black or white foam board are easy to position and won't draw attention away from your subject.
The lighting - This is also very much a matter of personal preference. But we are on a tight budget, so plan on using what you have on hand. The most flexible solution, in most circumstances, calls for a couple of off-camera flash units. You don't need the wireless trigger that I have used here. You can use your built in flash to fire a couple of slave flashes. Some DSLRs even have a built-in wireless commander function capable of triggering multiple speedlights. You can even use good, old-fashioned synch cables to connect your camera's hot shoe to whatever speedlights you have. Remember that we are shooting in manual mode so that we can keep everything except our focal point exactly the same in every shot. For this reason we need to maintain full control over the output from our flash system. Using TTL (through-the-lens) settings will allow the camera to control each exposure by adjusting the power output of the speedlights. We don't want the light to change, so set your speedlights to manual and, once you have found the power settings you like, don't change them until the image series is complete. I like the effect of depth achieved by using one flash as a key light and the other for complementary fill. To get this effect, place the speedlights on either side of the subject, angled away from the camera, and set one to a power that is about 3 stops lower than the opposite flash. With this setup, I set the flash on the left at 1/4 power and set the fill light to 1/32. You will need to experiment with flash position and power settings to find the right balance for your composition. Don't forget to diffuse the light from your speedlights. I used a couple of inexpensive folding diffusers that do a decent job of softening the light. Experiment with whatever flash modifiers you have to get the effect you want. A word on batteries - you are going to be taking as many as 100 images for each individual composite photograph and your flash settings may need to be quite high, especially with the aperture at f/8. I always start with fresh batteries, try not to replace them in the middle of a series, but be ready to switch them out, between series, as soon as the recycle time exceeds about 10 seconds. Have plenty on hand. It is not unusual for me to burn through 24 premium AA cells in a single session (three sets of 4 in each speedlight).
Camera settings - We are going to shoot in full manual mode. Set your shutter speed to the flash synch speed of your particular camera. I used 1/250 of a second. Set your ISO to 100 and turn off auto-ISO adjustment. Make sure the camera is in manual focus mode. Your camera can't change the aperture of this lens so manually set it to f/5.6 or f/8. Shoot in RAW to ensure maximum post-production flexibility and to get the most out of your focus stacking software. Don't worry about white balance, we can tweak the the RAW images in our processing workflow.
Shutter release - The slightest movement of the camera during shutter actuation could have the same ruinous effect on the final image as would a moving subject. Use a shutter release cable ($15 on eBay) if you have one or, alternatively, set your camera to add a 2-3 second delay before releasing the shutter. This will let any camera vibrations settle before the shutter opens.
With the subject prepared and the equipment set up, it is time to take some pictures. This takes patience, concentration, and a gentle touch. The capture process is described below.

Camera body mounted on 4-way focus rail, which is atop a sturdy tripod
To capture a series of images with this budget macro photography setup, I recommend you follow these steps:
Gently move your subject towards the lens until the closest point you want to include in the final image is sharply in focus. Use a bright light to illuminate the subject and give maximum visibility through the camera's viewfinder. Make sure your backward/forward focus rail is at least 3/4 of the way to its furthest setting (closest to you) before positioning the subject. The picture above shows a good starting position for the rail.
Make note of the distance marking on the rail when the closest point on the subject is in focus.
Looking through the viewfinder, slowly advance the focus rail by turning the knob (the one on the right, in this picture) clockwise. The focal point will move through the composition and you should get a feel for how little the knob has to turn to advance the focal point. When you have advanced the camera to the point where the farthest point of interest is in focus, look at the rail and make note of the end distance marking.
Return the rail to the starting point.
Check your flash and camera settings and make sure everything is turned on. If using an additional positioning light you can turn that off now.
Take your first image and check the composition, lighting and ensure that the closest part of the subject is in focus.
Advance the camera forward by a fraction of a millimeter, the knob will hardly turn, wait a few seconds for any vibrations to settle, and take your next shot. This takes practice. With this setup it is going to take about 50 images to cover a depth of field of 5.0mm. The rail will be advancing only 0.1mm between shots! There is a tensioning knob on the opposite side of this particular rail and I like to keep the tension high to prevent advancing too far between shots. I usually don't look through the viewfinder again until I am approaching the end of the series. This is because I don't want to risk bumping the camera and I can get through a long series much faster.
As the series progresses, the recycle time of your speedlights, especially the more power-hungry key light, will start to lengthen. Allow both flashes to recycle fully before taking the next shot. If you do capture an image where one or both speedlights fail to fire, wait a few seconds and take an extra picture before advancing the camera again. We will weed out any "missed" shots later on.
Don't go back to take an image at a closer focal point. Keep advancing all the way to the end of the series. It is important for some software focus stacking programs to be presented with strictly sequential images.
Bumping the tripod, focus rail, camera, or table can ruin the whole series. I recommend sitting comfortably in a sturdy chair, not touching the tripod or table, for the duration of the series.
Brown marmorated stink bug - an 85-image focus stacked composite
In Part 3 of this series on extreme macro photography on a budget, we will take our stack of partially focused images over to the computer and see how to transform them into a single, fully focused photograph.
Thanks for dropping by! I hope you were able to find some useful information to help you take better pictures. I'd love to hear about your own focus stacking techniques and challenges. Please leave questions or comments below; they are always welcome.
Happy shooting!