

The Macro-Photographer in Winter - how to up your macro-game during the off-season
/Here in the northern hemisphere, winter is almost upon us. Our bugs are either dying off or preparing to dig in until spring. The fall macro photography season is drawing to a close and a great many of you may soon be putting your DSLRs, micro-Nikkors, and extension tubes into hibernation for another winter.
Don’t do it! I have a better idea…
In this post I’m going to let you in on a few off-season, macro-related activities that I guarantee* will make you a better macro photographer by the time your mistletoe thaws.
(*100% of your money back if not completely satisfied)

Macro photographer, disguised as penguin, wondering where the bugs went…
These macro-activities aren’t presented in any particular order and there is no particular order in which they should be done. So when the weather outside is frightful, just pick an activity from the list, one that sounds interesting to you, and jump in.
Activity #1 - Learn how to focus stack
You know you’ve been putting this off. It looks complicated and technical, and obviously costs an arm and a leg for all that specialized gear. Well it’s not. It is not complicated and the technical part is less of a challenge than operating your DSLR. You certainly can spend a small fortune on focus-stacking equipment, but you can also do a bang-up job with the tripod you already have, a shutter-release cable, and a $10 focus rail. I have already addressed how to get amazing extreme macro results on a tight budget in other posts (which you can find here, and here) so I won’t get into the details here. But in a nutshell, focus stacking involves capturing a sequential series of images, all at different focal distances, and then using a software tool to combine all the parts that are in focus into a single photograph that is pin-sharp throughout the shot.


For example, the jumping spider on the left was photographed out in the field using a wide aperture of f/4. This aperture results in a very shallow depth of field, and you can see how out-of-focus most of the image is. Making use of the shallow depth of field to draw the viewer’s eyes to those of the spider is a perfectly acceptable technique and indispensable when shooting moving bugs. The image of the mud dauber wasp, on the right, is the result of combining about 40 individual photographs, each at a slightly different focal length, and deploying a focus stacking program (in this case, I used a proprietary program called Zerene Stacker, but a similar result could have been obtained using the focus stacking functionality included in Photoshop). You can easily see how every detail of the wasp is in sharp focus, from front to back.
It would probably take about one afternoon to learn the steps for positioning and lighting your subject, capturing the images, and processing them using stacking software. From there, it is all about practicing and experimenting. You will quickly figure out both your lighting preferences (flash, continuous, neither, or both) and how many individual pictures to take (the larger the aperture, the shallower the depth of field, and the greater number of “slices” to get everything sharp). I recommend you get your feet wet by photographing something simple with loads of clear, sharp edges, like a screw or the spring from a ballpoint pen, until you get the hang of it.
There are several good videos on YouTube that can walk you through the process of setting up your camera and capturing the shots. But for learning how to process the images using Photoshop, I strongly recommend you watch this awesome video, presented by the incomparable Aaron Nace of Phlearn. Actually, you could spend most of the winter just trying to learn everything Aaron has to teach about Photoshop. If you are struggling to get the most out of your Photoshop CC subscription, you should check out his Photoshop course, here.
By the way, I am always coming across dead insects out in the field and have learned to throw a few small specimen containers in my camera bag for such eventualities. Half fill the containers with isopropyl alcohol (it needs to be the 91% stuff), which you can get for a buck or two at the drugstore. Any hobby shop will have a whole range of suitable containers to choose from, but I really like the little 1” clear plastic paint pots (I think that’s what they are meant for), that come with snap-on caps and cost $2.99 for a dozen. These pickled bugs come in really handy when you want to bone up on your stacking technique. I will soon be putting out an entire post that deals with nothing but the preserving and preparing of dead insect specimens for macro photography.
Activity #2 - Build something
Eventually, 23andMe will discover which of our genes is responsible for turning us into crazed macro photographers and, when they do, I am 99% certain that they will find the do-it-yourself gene (and probably the never-follow-directions gene) sitting right next to it.
I don’t know any macro photographers who are not also avid do-it-yourselfers. Sure, our interest is usually born out of necessity - so many of the gadgets and tools we need for our particular style of macro, our specific camera setup, our unique flash arrangement, and so on, are either unavailable commercially, or they are ridiculously expensive. Somewhere along the line, every macro photographer eventually comes to the conclusion that “I can come up with something better than that” and/or “I am not paying $789 for that”. And so is born another DIY-Macro-Chimera.
For most of us, the DIY part of our macro love affair often takes on a life of its own. In my case, it all started when trying to solve the problem of adequately diffusing the flash from a speedlight while shooting in the field. I think the speedlight diffuser may be a common “gateway-DIY-project” that, once sampled by the unsuspecting macro-neophyte, sets the stage for an inexorable descent into the seedy labyrinths of “hard-DIY-projects”. OK… maybe not quite that grim. But you get my point.
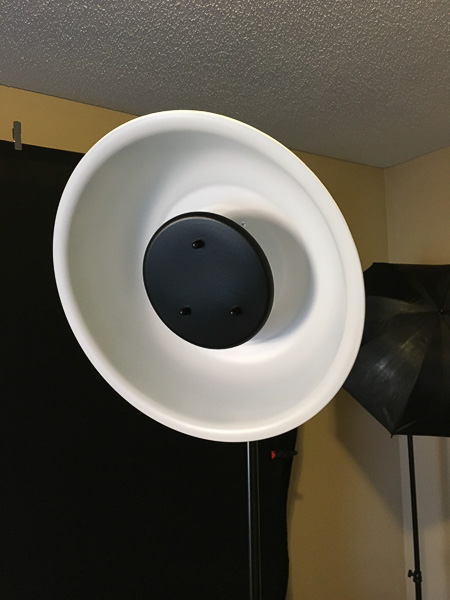
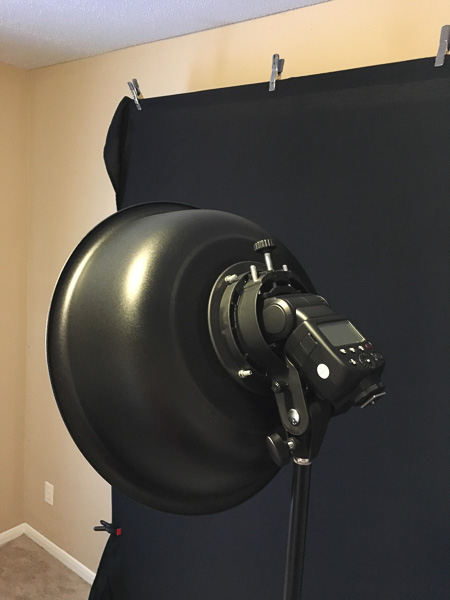
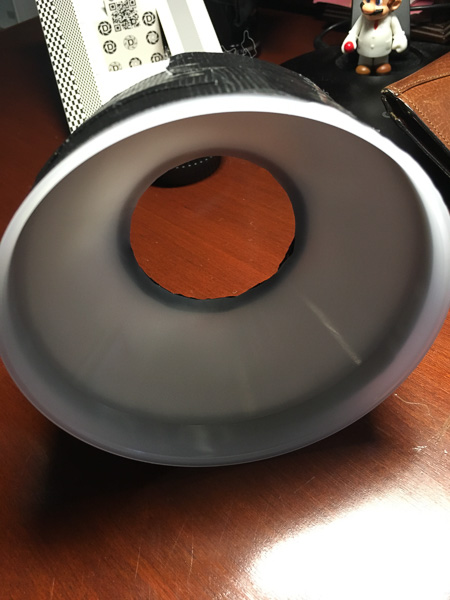
Above are a few shots of my early DIY exploits. In the first two pictures you can see the front and back of my homemade beauty dish. I don’t do a lot of portrait work but, when I do, I like to use one of these light modifiers. I usually use strobes but, in this case, I needed a beauty dish that would work with a speedlight. And I flat refused to pay out a couple of hundred dollars to buy one. Instead, I scavenged a huge mixing bowl, a little metal pizza pan, a selection of nuts and bolts, an old Bowen mount from Ebay, and one or two cans of paint - and then built it myself. It cost about $30 to make and it is built like a tank. I would put it up against a $600 Mola Setti, any day of the week (but only because I’m a useless portrait photographer).
***TIP*** Don’t try to cut a rectangular hole in a stainless steel mixing bowl with a Dremel rotary tool at 6AM on a Sunday morning, unless you live in Montana and your closest neighbor is at least 50 miles away.
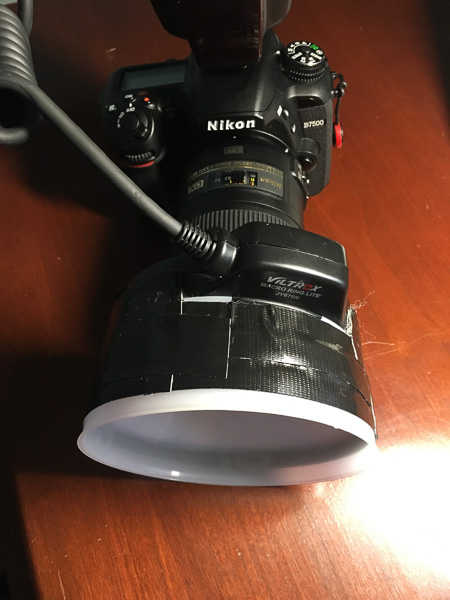
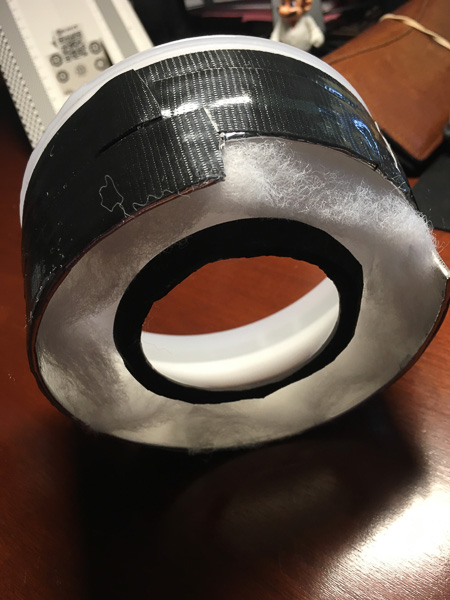
The next three shots show a compact diffuser that slides onto the business end of a ring flash. It was made with a plastic funnel, truncated and glued into a plastic jug (sans handle and bottom) that has been lined with foil tape. The gap between the two plastic layers is stuffed with batting and everything is held together with Gorilla Tape (crazy strong stuff - I use it for everything). It took a while to get it assembled (this is Mk.III) because the parts all need to be exactly the right size and there was a lot of tweaking involved. All the parts came from my kitchen or from Walmart and it cost next to nothing. It works extremely well, virtually eliminating hotspots on all but the shiniest of subjects.
I still have the plans and measurements and will be happy to share them with you, if you want to give this a go. Leave me a message in the comments below.
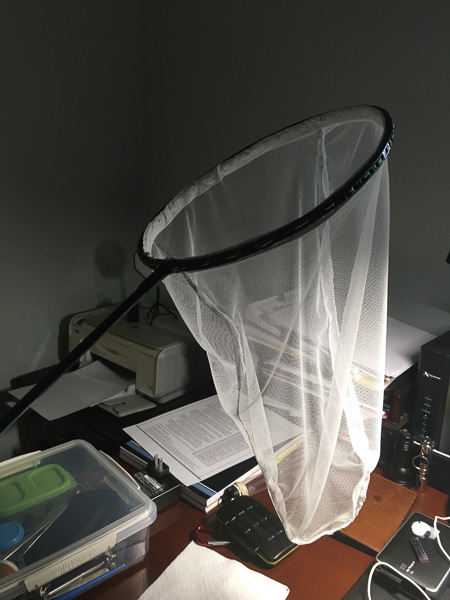
The final picture shows my bug sweep net - a project that I found particularly satisfying. To make it as sturdy and durable as possible, I decided the netting should be machine sewn. Never having touched a sewing machine before, I had a lot to learn. I bought a cheap machine and taught myself the basics in one long session, on a cold, rainy Saturday. Since then, I have made padded lens cases, tripod bags, and a dozen other useful photography-related accessories. But back to the butterfly net… aside from the $50 investment in a sewing machine, the nets cost me around $3 each to make. I found a set of 2 Walmart badminton racquets that were on sale for 98 cents (for both!) and picked up half a yard of mosquito netting from a fabric shop, along with a spool of nylon thread. The nets (I have since made a bunch of the things) are light, compact, and sturdy. I would caution you that running through a grassy glade, waving a pair of these highly visible contraptions, may attract the attention of ne’er-do-well passersby who, if lacking decorum and self-restraint, are wont to offer unsolicited and unhelpful commentary on everything from your technique (“flap harder or you’ll never get off the ground!”) to the condition of your mind (you get the picture…). I digress.
***********
I was going to include a discussion of DIY extreme macro stacking rigs in this section but have decided to do a separate post on that fascinating topic. It should be of interest to any macro photographers wanting to get into micro-photography or photomicrography. It will focus on the astonishing work Chris Slaybaugh, of Bratcam-fame, and should be out soon. Stay tuned!
***********
Activity #3 - Clean up your mess!
I am going to assume that the majority of photographers reading this are using a photograph filing system of some kind, probably Lightroom, in one of its iterations. If you aren’t using one of these fantastic filing and editing platforms, you are missing out on a powerful workflow tool and the best deal in town. I currently use Lightroom Classic CC from Adobe and the package I have also includes Lightroom CC, Bridge, and Photoshop CC 2019 and costs only $10 a month. For that $10, you also get every update as soon as they are released and at no extra cost. It may seem like a lot ($120 a year), but it really is worth every penny.
I’ll be honest, I have no clue what Lightroom CC is supposed to do and I am similarly uninformed about Bridge. Learning about them may end up being one of my winter projects this year (but probably not).
If you are anything like me, Lightroom has a tendency to get a little disorganized by the end of a long, busy shooting season. We go out and shoot 300 pictures and dump the lot into Lightroom when we get home. We get behind on our editing, don’t cull the rubbish from our bulging files, and end up with misfiled pictures, hundreds of duplicates, and yet another overflowing external drive. And that leads me to my third activity recommendation; clean up your Lightroom files.
It doesn’t sound like a lot of fun, but it is surprisingly rewarding and, come springtime, you will be so very glad that you did it.

The longer you wait to tidy up, the longer it will take!
Typically, my workflow consists of importing all the images from a shoot into a temporary holding file in Lightroom. As each image is edited, I also give it a rating between zero and five stars. Images with a zero-star rating are thrown out, while the remainder are moved from the temporary file into the appropriate, category-based, permanent file. I don’t end up with many five-star, portfolio-quality pictures; one or two percent of my images get five stars. The same goes for one-star photographs, which I define as generally unimpressive shots, saved by one or two strong elements. The vast majority of my pictures end up with a rating somewhere in the middle.
The way I approach my off-season cleanup is to go through my Lightroom catalog, file by file, and take a fresh, critical look at every image. During this process I often find images that can be improved with a little judicious editing. I also come across plenty of one-star efforts that aren’t worth hanging on to. This systematic review also uncovers duplicates and pictures that were misfiled during the year. It is a great time to review keyword tags and image filenames, tweaking the EXIF data as I go. The annual cleanup offers the perfect opportunity to reevaluate the overall layout of the filing system and make improvements, when needed. I will frequently rename, split up, or combine categories or folders in ways that make the Lightroom experience as practical and intuitive as possible, and ready for the coming year.
I also maintain a ton of files, separate from my Lightroom Catalogs, where I keep the .jpgs that I have used (or plan to use) on my website, or for posting on Twitter, Facebook, Instagram, and a host of other sharing sites, like Ugly Hedgehog, Pexels, Flickr, and so on. I go through these also, and make sure the images are in the correct sub-files (such as “used”, “perennial”, and “new”) and that the files are properly organized.
If you are relatively new photography, you may not have thought much about the educational value of your image collection. Why do we keep all those mediocre pictures? We do it so that we can look back at our earlier work and see what is working, and what needs improvement. I would argue that there is more to be learned from making a critical reevaluation of my bad pictures than there could ever be from admiring the good ones. The off-season gives us the perfect opportunity to pause, look back over the previous year’s work, and set new targets for the next twelve months. This process can’t be rushed and you can expect it to take a few days to complete. But it is well worth the effort. You won’t regret the work and, odds are, you will learn a lot about yourself as a photographer, and may even find some great images that you had forgotten all about.
Activity #4 - Learn Photoshop (even if you already know everything)
Even if you have been with Photoshop since the dawn of time, there is always more to learn. Depending on the type of photography you are into, Photoshop may be a minor part of your workflow, or it might be the most critical component of your art. Either way, the more adept and comfortable you become with the mind-boggling array of tools and processes, the more valuable the program will become.
Every few months Adobe adds new functionality to this powerful editing program. Very recently, Photoshop CC 2109 was released and with it came a couple of great new tools. The first is an entirely reimagined “content-aware fill” tool. It provides a great deal more control over which pixels the program is allowed to sample when constructing the fill. The user can select no-go areas that the program is then prevented from sampling. Great addition and certainly worth learning.

The “frame” tool is the second new addition. This cool feature makes image masking painless. It allows the user to replace any shape, text, or other selection, with a placeholder, into which you can drop another image. “I can already do that!”, you say. Sure you can, but with this tool the added image is automatically resized to fit perfectly into the frame (placeholder). A very nifty way to quickly and easily add reflections onto mirrored sunglasses, for example.

The creative opportunities that flow from a good understanding of Photoshop are infinite. If you can think of it, you can make it in Photoshop. This very unoriginal example of a Photoshop composite was very straightforward to create but did require an understanding of layers, masks, the (much maligned) pen tool, blending modes and a handful of other tools and tricks. But coming up with this image was also a satisfying and effective way to learn more about the power and flexibility of Photoshop.

The floating photographer
The composite image of me levitating was one of my earliest attempts to create something original using Photoshop. It won’t get snapped up by National Geographic (or the National Enquirer, for that matter), but it was a blast to make and it taught me a ton about using Photoshop to create cool stuff.
If you think that this is something you could use in your photography (believe me, it is), I urge you to check out one of the most talented and entertaining Photoshop compositors on the planet, Nemanja Sekulic. His website, which you can find here, is awesome and his YouTube videos are priceless. Work through a couple of his YouTube projects while your chestnuts are roasting on an open fire. You’ll be glad you did.
Activity #5 - Expand your macro-creativity
We all have our photography comfort zones. We know what we like and we know what we are good at. But our bugs are all either dead or asleep and we haven’t seen a flower worth photographing since we were at the supermarket last week. I usually have several preserved specimens, scavenged during the summer and needing to be photographed. That will keep me entertained for a while but, by the time I’m thinking about decking the halls, I need some fresh challenges. And there are plenty of fun and exciting ways to put your macro skills to the test.
Water drops can make for fascinating images. Suspend a drop from a piece of wire and use it as a lens to create oddly beautiful, inverted photographs of anything you want. It is a cool skill to acquire and it’ll pay off when the ice melts and the bluebells and snowdrops start to blossom. You’ve seen those pictures of dozens of tiny, upside-down blooms captured in a row of raindrops hanging from a leaf, right? A little practice with simple drops, like the one on the right, will help you get comfortable with the setup, lighting, and composition of the more complex water drop scenes you are going to find in the field.


Another indoor favorite is smoke. A great opportunity to learn more about subtle lighting techniques, exposure tricks and image processing. The most dependable way to generate endless, lazy curls of dense smoke is by burning incense. The kind that is shaped like a cone is easier to work with and seems to offer a thicker column of smoke. If you are reading this on the Feast of Stephen, when all the shops are shut, and you find you have no double-strength patchouli incense sticks on hand, fear not. Use grandad’s stogie, or the humidifier from Uncle Henry’s CPAP machine. Just avoid using a block of peat or a stack of old tires - safety first!
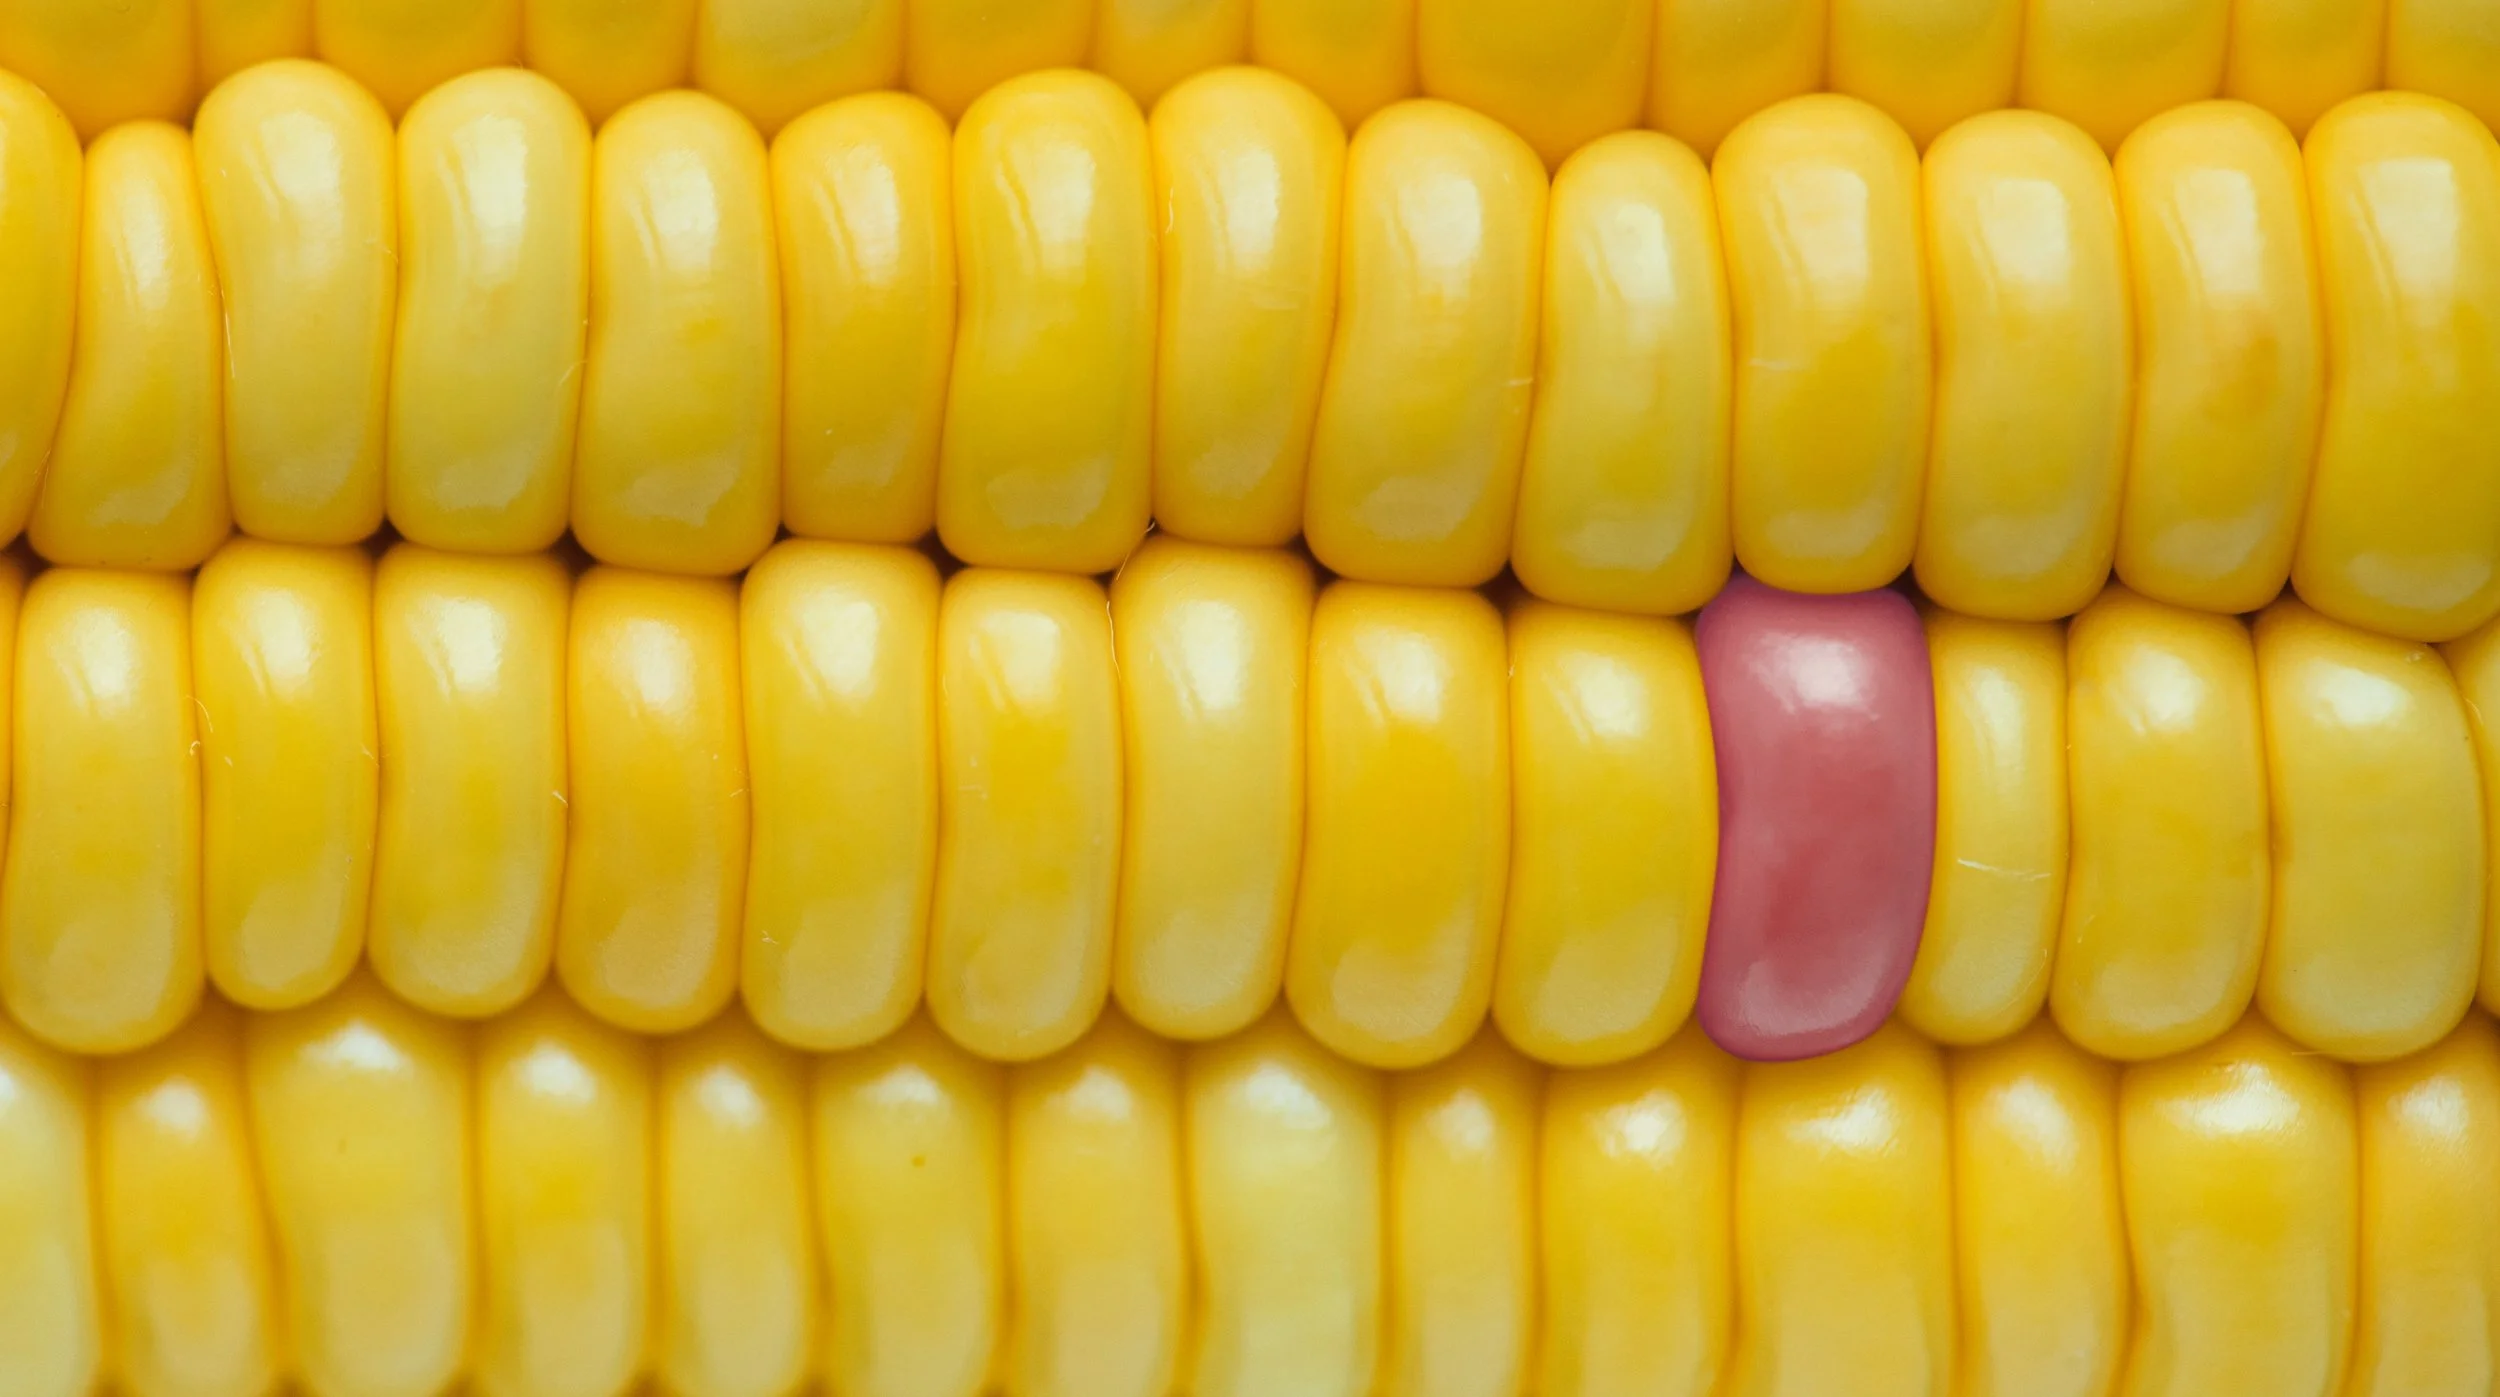
Food can be a blast to photograph with a macro lens. Closeups of veggies, tight shots of the turkey’s revoltingly bumpy skin, or wide angle shots of the Christmas pudding (which can also be set on fire, if you are still searching for smoke to photograph) can all get their share of oohs and aahs (maybe not the turkey skin). I would definitely check with the person responsible for preparing the meals to make sure they didn’t have plans for whatever photogenic sweetmeats you just found in the fridge.

If you are up for something a little more technically challenging, you might want to try catching images of liquid droplets in action. Pictures like this can be captured using nothing more than a camera, an eye dropper, and a speedlight. But if you want to get really creative, capturing drops colliding with the previous splash, for example, there are some cool tools you can build or purchase to make it possible. A cottage industry has sprung up around this fascinating art form and, for a modest outlay, you can get your hands on devices that automatically dispense droplets of a precise size and at a precise frequency, freeing you to concentrate on freezing the action with your lighting setup. You can even purchase hardware that synchronizes the drips, releases the shutter and pops the flash, all automatically. There are a number of systems out there, but I really like the Time Machine Drip Kit, created by Bryan Mumford of Mumford Micro Systems in Santa Barbara, California. Check out Bryan’s website to see some of the jaw-dropping results of his system. The system is not inexpensive, running close to $500 for the intervalometer and drip hardware, but it works beautifully and takes the guesswork out of the setup. Using a variety of liquids, colors, and lighting techniques, while adjusting the drip timing, you can create stunning and original art and keep your toes warm and toasty all winter long. There are plenty of other useful resources to help guide you through the various techniques and setups and I highly recommend you start by checking out the excellent tutorials by FirstManPhotography on YouTube. Everything you ever wanted to know about freezing water droplets is right here.
Activity #6 - Get out of the house!
So, not all of my recommendations are going to keep you warm and cozy while you brush up on your macro skills. And definitely not this one.

See that white stuff? Go take pictures of it.
I am not a great fan of the bitter cold. Sure, it beats the sweltering heat of high summer, but not by much. But there are some things to entertain an eager macro photographer out there on the permafrost. I am led to believe that snowflakes can make for interesting photographs.
It is not something I have ever tried but, because it is on my list of cool things that I want to learn how to do, I decided to put it on your list as well.
I have spent enough time in the ice and snow with camera in hand to know that you need to be particularly careful with your gear and with your digits. Protect your camera and lenses (lower-end bodies and lenses usually lack weather sealing) with one of the barrier systems available through Adorama or B&H, carry gloves and hand warmers, and keep a spare battery, or two, warm in your pocket (they run out of juice quickly in the cold).
Individual snowflakes are not the only interesting closeup images that await the intrepid sub-zero macro bunch.


The way to find interesting compositions differs little from our usual macro technique. Get down on the same level as your subject, pay attention to the background and take enough time to nail the lighting. Be careful with your own shadow.
One camera setting that is of particular importance out in the snow is the white balance. Forgetting to correct for the snow will result in images with an overly blue cast. This might be something you actually want to use as a creative element, but you don’t want to overdo it. Find some snow that is in the shade (direct sunlight will mess up the setting) and use your camera’s menu to set the white balance point while the camera is pointed at the shaded snow.
That’s enough… I’m freezing… time to head back inside and check out the last few winter activities on my list.
Activity #7 - Buy a tablet and learn how to use it
This was a more significant challenge for me than most of the other activities. One of my wonderful children gave me the latest Intuos Pro pen tablet from Wacom a couple of years back. I was thrilled to have it but have had a hard time incorporating it into my usual editing workflow. The interface takes a bit of getting used to but it is not for lack of trying that I am still struggling to master this device.

It is an undeniably impressive piece of technology and photographers across the world are using them and most swear by them (I actually swear at it, more than by it). Every photo editor whose work I follow uses one or another version of this device, and to great effect. So what is my problem, you rudely inquire. Well, it’s almost certainly a matter of my not having invested sufficient time and energy in learning how to use the device. Every time I plug it in (every winter, in other words) I have to switch gears and set aside everything I have learned about navigating the Photoshop interface with keyboard and track pad. The result is my workflow slows to a crawl as I try to recall all the button assignments and pen commands. I stop paying attention to the images as my concentration shifts to pen pressure, stroke direction, mysterious buttons and a perplexing touch dial that only intermittently recognizes my index finger as human. I must do better this winter… I must do better this winter… I must do better this winter…….
Activity #8 - Learn product photography
World class product photography is something we all see every day, in every nook and cranny of our lives. It’s on billboards, in magazines, plastered on the sides of buses and buildings, and it is the primary content (only content?) on every one of the 7,948 channels available on my new smart-TV. But if you’re like me, you probably don’t notice it much anymore. When I looked a little closer into this type of photography, I was taken aback by the immensity of the product-photography industry and by the sheer talent of many of the professionals working in this area.

My first reaction was “how hard can this be?”, it’s not like you’re photographing a snow leopard giving birth or doing a portrait shoot with a pair of hyperactive twins, high on birthday cake! No. It’s a perfume box, for crying out loud. It isn’t trying to eat you, it’s not traveling across the room at 500 M.P.H., and it doesn’t keep hopping off the table to go hide in the shadows every time you turn around.
So… having an inquiring mind and wanting to know, I was left with no alternative but to give it a try myself. And it wasn’t pretty.
I found it to be somewhat like macro photography, but on a slightly larger scale, and with extraordinarily exacting standards. It really requires a dedicated space, and a larger one than you might think necessary to photograph, say, a bar of soap. You need flawless surfaces or fascinating textures. The lighting has to be perfectly consistent and needs to be almost infinitely maneuverable. Oh, and you need a camera. I was surprised to see so many product-pros shooting medium format with Pentax 645Ds or Hasselblads costing more than my car. It seemed like overkill. Until I remembered the buses and billboards.
But, trust me, you absolutely do not need expensive cameras and the best lenses to shoot fantastic product photographs. Don’t believe me? Check out photographer and YouTube star, Peter McKinnon’s video on the subject. You can find it on the PetaPixel photography website, right here.
Obviously, we aren’t going to grab our point-and-shoot camera, pop up the flash, grab a bottle of Wild Turkey (to photograph, of course) and start churning out magazine ads. So why do I think this activity should be on the list? Trying to figure out how to capture razor sharp, flawless images of anything is good practice, but doing so with something like a simple box leaves you with no margin of error. We can get away with a tiny bit of fringing on the last segment of a scorpion fly’s left antenna and still turn out an awesome photograph. But that approach just won’t fly with a white Chanel #5 box. The slightest aberration will be glaringly obvious.
Glass is notoriously difficult to photograph well, with all those uneven surfaces, diffraction issues, and odd reflections. But spend a few winter evenings away from the snow (regardless of how deep and crisp and even it may be) and teach yourself how to photograph a bottle. Use the gear you have (a tripod is a must) and work with the same continuous lighting, speedlights, or strobes you use for your macro work. Use cards to block some of the light to introduce shadows, and use reflectors to intensify and aim the light where you want it. Try different backgrounds and vary the feel using backlighting. Try using focus stacking or exposure bracketing and learn how to manipulate the images in Photoshop to bring it all together.
I assure you that your investment of time and effort will be rewarded with objectively better closeup photographs when you incorporate these new techniques into your macro work.
I think that should be enough to keep you occupied until the bugs wake up.
But before we wrap it up, I have just one more tip to leave you with. It’s really more of a warning than a tip. Let’s call it a non-activity. Nobody gave me this warning, so I actually tried this one time. It didn’t work out well for me and, unless you are a qualified camera technician, it won’t work out well for you either. So…..
NON-Activity #9 - Do not take your camera apart to see what’s inside
Enough said.

No matter how bored you get this winter, do not do this!
These are only a few of the off-season exercises and activities that I’ve tried over the years, but I think you can probably see a trend. Everything I’ve discussed in this post has, directly or indirectly, made me a better photographer. You should give some of them a try.
Your turn…. I would love to know what you do to sharpen your skills when you can’t get out and take pictures. Leave a comment and tell me what I missed. Also, if you have a question, don’t hesitate to ask it, I answer all of them personally and promptly.
Be on the lookout for my next post, where I will be discussing photomicrography and what comes after extreme macro. Until then………..
*************
Thanks to the fine folks at Pexels for allowing access to their awesome collection of stock images. Special thank you to artists Egor Kamelev (snowflake), David Dibert (frost), Cody Berg (skeleton), Raphael Guajardo (smoke), RawPixel (corn), Pix.com, and Pixabay for the use of their images. Used with permission. All other images by author.