

Lighting Best Practices in Macro Photography
/This article…
… is the companion piece for my Macro Lighting Best Practices videos, of which there are three. The first covers macro lighting in the field, the second is all about studio macro equipment, and in the third video I discuss lighting technique for studio macro.

bumble bee in natural light
Hello all! Welcome back to Allan Walls Photography!
This is the final part of the never-ending (that’s a contradiction - but I like it) Lighting for Photography Series, AKA - Part VII - “My Best Practices for Lighting in Macro Photography”. And this was a monster of a video to put together. By the time I was finished it topped out at one hour and forty minutes! Obviously, I wouldn’t do that to you! So I went back and split the material up into three separate chapters (clearly what I should have done in the first place).
Surprisingly, the edited content broke down into three, roughly equal, standalone videos:
Macro Lighting - Best Practices in the Field
Macro Lighting - Best Practices in the Studio - Equipment
Macro Lighting - Best Practices in the Studio - Technique

Skipper having lunch
Before I go further, my sincere thanks to my wonderful Patreon supporters and to the marvelous human beings who have made donations through my donation page (https://www.allanwallsphotography.com/donations). None of this would be possible without your support!
If you are not among these fine individuals, but would like to support my efforts and help keep the videos coming, please consider signing up as a Patreon patron, which can be done by going to https://patreon.com/allanwallsphotography. I could certainly use your help!
Let me hasten to add a special “Thank you!” to supporter, friend, and awesome photographer, Alison Pollack, whose fantastic slime mold images are featured in this video. I asked Alison to let me share these photographs (they were used with permission) because I couldn’t think of any better example of how continuous LED can be used in the field, providing you have the requisite talent (which is why I didn’t have any of my own to share!). Thanks Alison!
To see more of Alison Pollack’s wonderful work, check out her instagram page…
https://www.instagram.com/marin_mushrooms/
In Chapter One - below - I share with you all the things that I think are important for macro photographers interested in shooting in the field. We talk about natural light, continuous artificial light and, of course, flash. I don’t go back over material we have already covered, but rather, I try to take all that information and put it in the context of field macro photography. As the title suggests, it is presented as a list of my “best practices” - the things that I do myself, and the things I encourage my students to do. A few of these practices include planning your shoot, managing your equipment, packing light, keeping a notebook, and critiquing your work. But there is a lot more than just that
In Chapter Two - below - we focus our attention on lighting for macro photography in the studio. I discuss the various options for macro lighting and explain why they may, or may not, be a good choice for studio macro. I compare continuous LED lighting with flash and try to demystify the process of selecting the best light source for your project. I explain why some LED lights may be better than others, and why flash is my go-to weapon of choice. Finally I share some important tips for making a wise choice when purchasing lights of either kind. And, of course, there is a lot more. I only wander off the reservation a couple of times, but amuse myself both times, so that’s OK.
In Chapter Three - below - we build on everything we have covered during this series, and I lay out my recommendations for shooting macro in the studio. The techniques and ideas that I talk about are the same things that I do in my own photography, just as they are the same things that I teach my students. We cover a lot of ground, talking about visualizing your shot, selecting the right lighting, and setting everything up to get the best possible images. I also walk you through an example of how I set up my lighting for a rather unusual subject (maybe “weird” is a better description?).
By the way, if you like the demonstration format used in that part of the video, and if you want me to do more demo-based videos, tell me what you want me to shoot. Just leave a suggestion in the comments. If I get any requests, I’ll put together a full video covering the catching, prepping, cleaning, posing, lighting, shooting, editing, printing, and sharing of one single image. But you have to tell me what you want me to tackle. I think it would be great fun! Please don’t ask me to photograph anything aggressive, deadly, or smelly.
Below is a selection of the equipment that I use and discuss in the three videos. It is not exhaustive, but it covers the important stuff. Some of the following links are paid links and, as an Amazon Associate, I earn from qualifying purchases.
When I was talking about carrying a shoulder bag when out doing field macro, this was the bag I was referring to. It is by far the best messenger bag I have ever owned. It is roomy, comfortable, indestructible, and it looks great. I love this bag!

The AA batteries that I have come to love, since of you guys talked me into trying them, are the Eneloop Pros. They are, in my opinion, the longest lasting cells out there. Perfect for power hungry devices like speedlights.

The ring flash you see attached to my macro lens is this one. It is by Yongnuo and although this particular one is made for Canon cameras, they make the same device for Nikon and other brands. It is sturdy and reliable and has two separate flash tubes, allowing for some clever lighting effects. I have had it for years and never had a problem.

If you are looking for the very best field lighting option out there, you cannot go wrong with the Nikon R1C1 macro flash. This is the one I described in the first video. I no longer have mine, but I wish I hadn’t sold it!

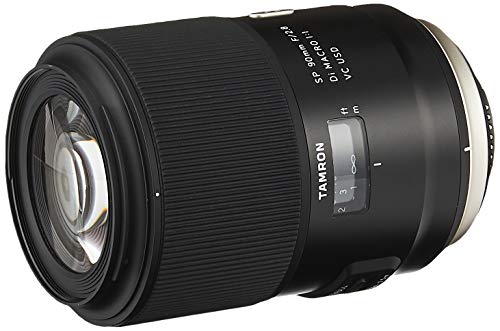
By the way, the lens that I used to shoot all the images in all three of these videos (not including Alison’s images, of course) was my all time favorite macro glass. It is the 90mm macro lens from Tamron, and I love it. I use it almost every day, and you can see the results for yourself!
By the way, the LED panels that Alison Pollack used when she took all of the images at the end of video #1 were the Luxli Viola RGBAW 5” panels shown here. I have ordered a pair of these myself.

Here are the famous Ikea Jansjo lamps that every macro photographer I know owns. I think I have about seven or eight of these things and they are still my go-to lamps. I think that they may be discontinued in the relatively near future (rumor that I read online), so you might want to grab a few of these before they are gone. This is the lamp with the single bright LED and lens - no clustered low power LEDs.

These are my current favorite speedlights, the V860 II N flash from Godox. You can’t go wrong with this flash. It does have TTL and has a ton of power (guide number is 60m), but costs much less that camera brand speedlights. They also use long lasting Lithium power packs that last forever. Great flash for studio macro.

These are the compact folding soft boxes that I use all the time, both in the studio and in the field. The most convenient solution for diffusing a speedlight!

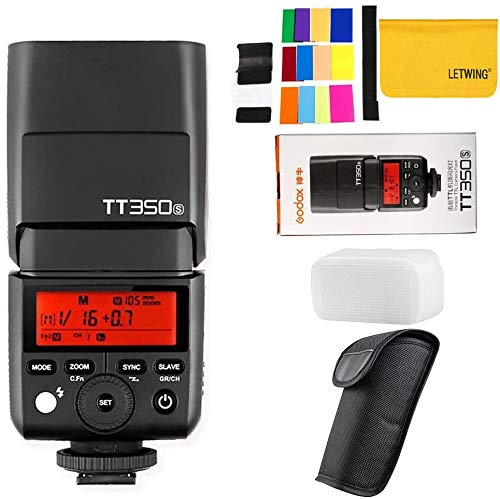
When I was talking about using smaller, more compact flash units in your macro cage, I was talking about the SB200s, which come with the R1C1 from Nikon. But there are much less expensive options, that use normal batteries, and give you all the power you will need for close-in shooting. This is a guide number 36m device, which is plenty for using in the cage. This one is the Sony version, but they make the same flash for most major camera brands.
I am always asked about the articulating arms and clamps that I use in my macro cage. I have tried every one on the market and for reliability and price, nothing beats the Small Rig clamps and arms. I use them for almost everything, as you know, You can get them here…


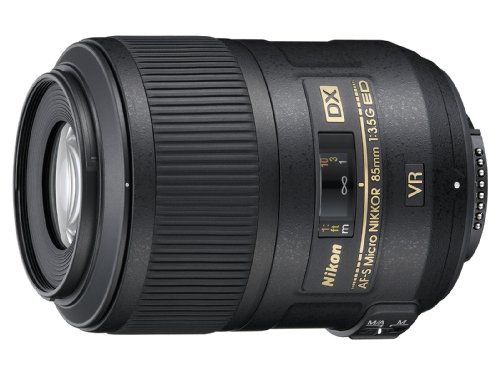
You will notice I am using a different camera and lens in the demonstration at the end of video 3. This is the Nikon D7500 fitted with the Nikon 85mm f3.5 (Micro Nikkor) macro lens. The camera is my favorite crop fram DSLR and I use it more than my full frame camera when working in the cage. Very solid and reliable mid-range DSLR. The lens is fantastic. It was the first Micro Nikkor lens I bought for a digital camera - I’ve been using it for many years. Sharp as a tack!

I know I will be getting questions about the packing foam I use for diffusion in the demo video. This the stuff that I use. I found it completely by accident (after a move!) and I find myself using it all the time, both indoors and out.

The last piece of gear that I talked about was the LumeCube LED light. They aren’t cheap, but as a standby macro light in the field, they are worth the investment. They are also small and easy to lug around in a pants pocket, which certainly helps! I found this deal, that includes a handy tabletop tripod. Very useful!


A composite made using the Westworld figures and another image
Let’s wrap it up there. I hope you enjoy the videos and find something useful for your photography. By the way, I took the two figurines that I described in video number 3 and put together a quick and dirty composite (above). I’m surprised how well it turned out - and this is a great example of what I mean by trying new stuff with your macro skills. Keep it fun, people!
Thanks for dropping by. See you again soon,
Allan