

Macro Photography Gear - My go-to macro setup for handheld fieldwork
/I don’t know if this happens to you (assuming that you are a photographer-type), but it seems like every time I’m out crawling in the dirt, taking closeup pictures, someone is going to stop me and ask about the odd looking camera setup I’m using. It happened twice during a 45 minute sunset bug-stroll on the beach just yesterday, and it gave me an idea for a quick post.
So, with the help of a few pictures, I will walk you through my everyday setup, explain why I like the various components, and give you all the information you need to build something just like it yourself.

Ready to shoot! My go-to macro setup.
There several features of this setup that I believe are worth a closer look. I’ll show you why this is the system I rely on for 90% of my handheld shooting in the field. There are, of course, plenty of exceptions; some days I’ll carry a tripod or monopod, use multiple off-camera lighting sources, or use a variety of other lenses. But this is what I’ll grab when I don’t have a plan and need maximum flexibility. It is a very simple arrangement and, if cost is an issue, it can be put together for next to nothing (except, of course, for the camera - more on that shortly).
The two most expensive and functionally critical components are, unsurprisingly, the camera body and lens. But bear in mind that I have used this same general setup with many different cameras and they have all worked fine. More specifically, this macro system does not require a full frame DSLR, just as it doesn’t need a dedicated macro lens. The very same system will work perfectly well with an entry-level DSLR and any short prime lens mounted on a set of $15 extension tubes (if you want details for a particular camera or lens combination, let me know in the comments below). My first setup consisted of just that.
When I am out looking for bugs to photograph, my camera never leaves my hand. When I was using a smaller, APS-C or cropped frame body, the small grip size made it uncomfortable to hold and would virtually guarantee that I would develop cramps in my hand and fingers in no time. The switch to a full frame camera proved to be a real game changer. The Nikon D850’s more comfortable ergonomics, along with its stunning resolution, color accuracy, and unparalleled low-light performance made this the perfect camera for the kind of handheld macro work I love to do. You will notice I don’t use a battery grip. I haven’t found the extra power necessary and don’t need the added frame rate in continuous high shutter release mode. I have also found the MB-D18 to be bulky enough to make the whole setup a little less maneuverable in tight quarters. I always carry an extra EN/EL-15a, just to be on the safe side.

The exceptional Tamron 90mm f/2.8 Di VC USD
My favorite dedicated macro lens is Tamron’s latest iteration of the 90mm f/2.8 Di VC USD. Providing true 1:1 magnification, this lens is built like a tank and packed with premium features. Optical performance is as good, or slightly better, that any of Nikon’s macro primes. The autofocus is super-fast and very accurate. It has a three-position focus limiter, making focus virtually instantaneous for each focus range. The lens is also weather sealed and has a dust, water, and oil repelling fluorine coated front element - useful features for a fieldwork lens (especially as I prefer not to use UV filters for macro). Best of all, this incredible lens sports a vibration compensation (VC) system that is second to none, giving it a 4-stop advantage. I love this lens!
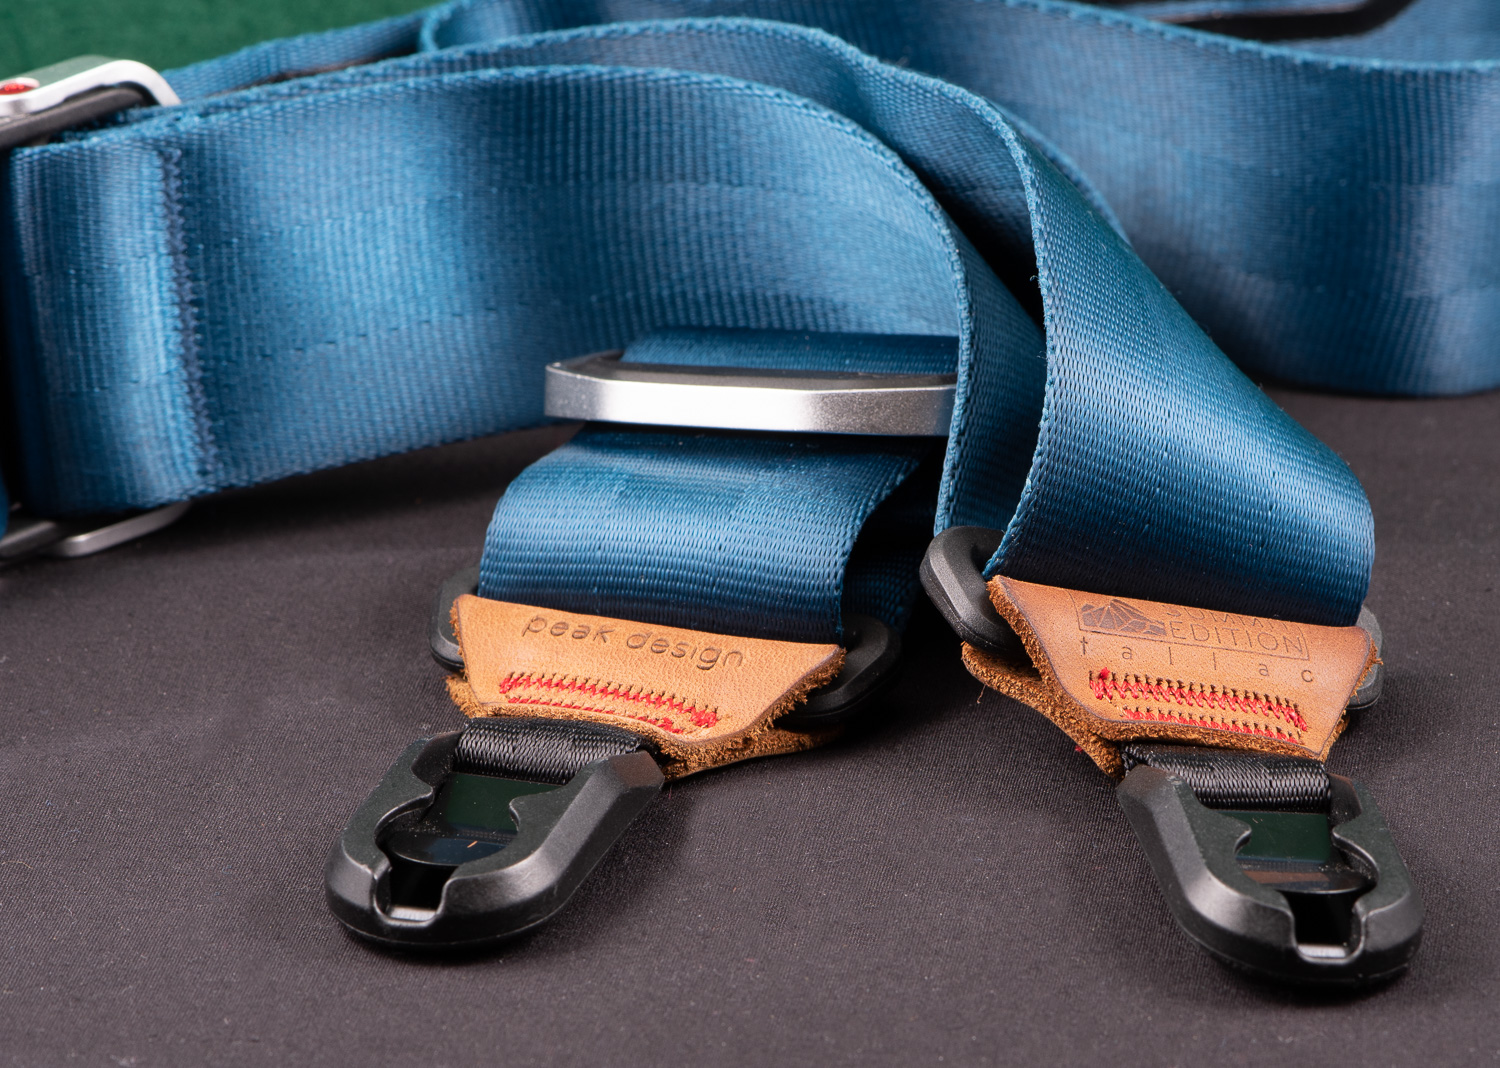
To keep my setup secure in the field, I use a Peak Designs strap. This is a premium strap with some very cool features. It is tough, soft, infinitely adjustable, and utilizes the most versatile of mounting systems.
I like to use natural light for my field macro shots, where it is feasible. But I never head out without an artificial lighting system, set up and ready to go at a moment’s notice. I have tried everything from the cheapest LED ring lights to the stupidly expensive Nikon R1C1 macro lighting system. Every different lighting solution that I have worked with comes with its own peculiar strengths and weaknesses - something I will go into at some length in another post. My go-to system is simple, sturdy, reliable, inexpensive, and produces some great lighting effects.
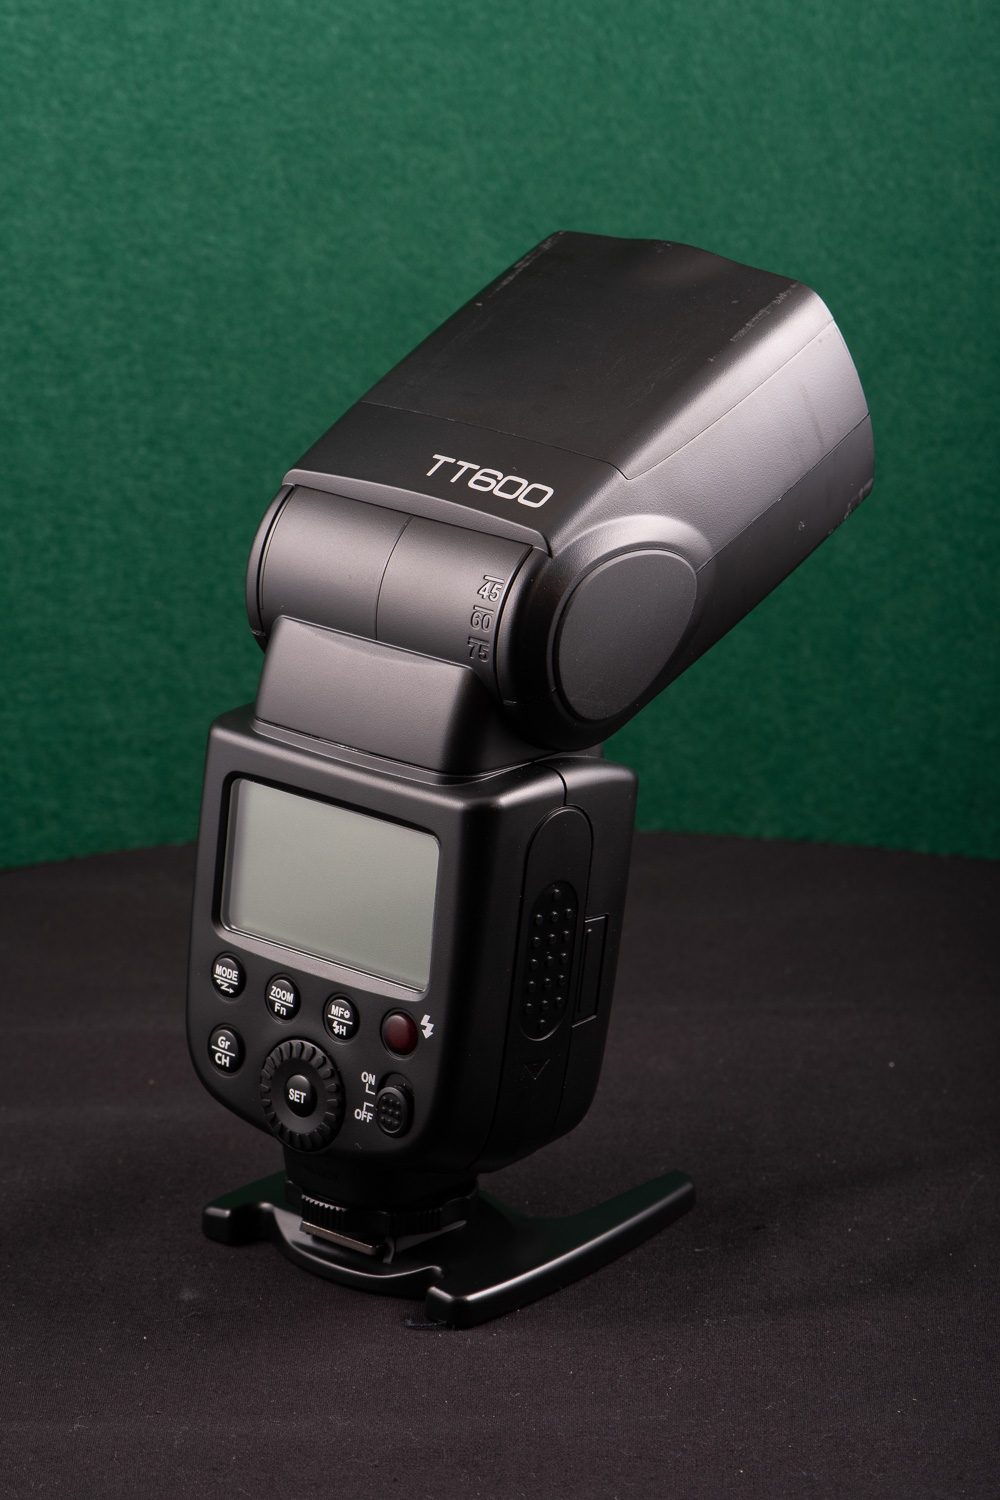
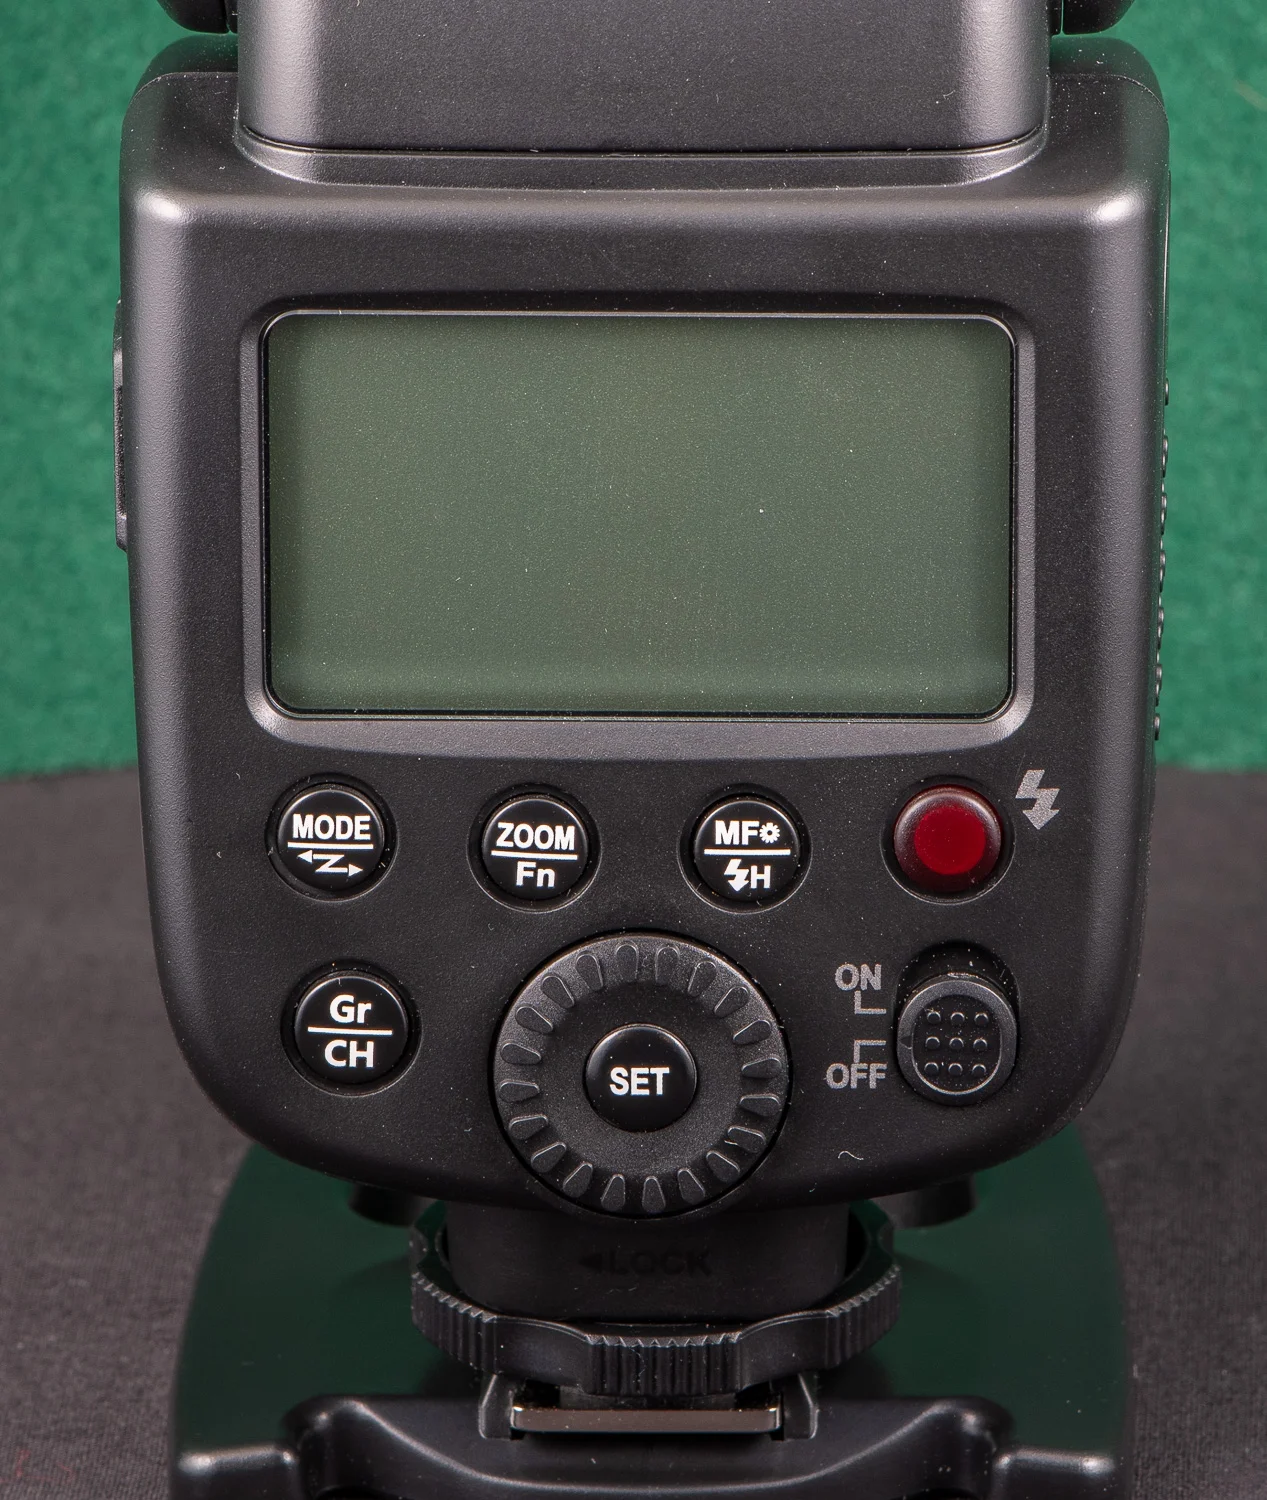
I don’t use TTL metering to control flash output when shooting macro, preferring to adjust my flash output manually. For this reason the flash source I chose didn’t need to be TTL capable. This Godox speedlight clone actually does have TTL capability, but I never turn it on. I picked this flash because I had several handy, it is well built, its output is consistent, and it has a low minimum output of 1/128 power. It takes 4 rechargeable AA batteries, which last all day when shooting at low output. Best of all, you can buy ten of these solid little speedlights for the price of one new Nikon SB500 ($600). Amazon has the Godox TT600 flash unit listed for $65 at the time of this post.
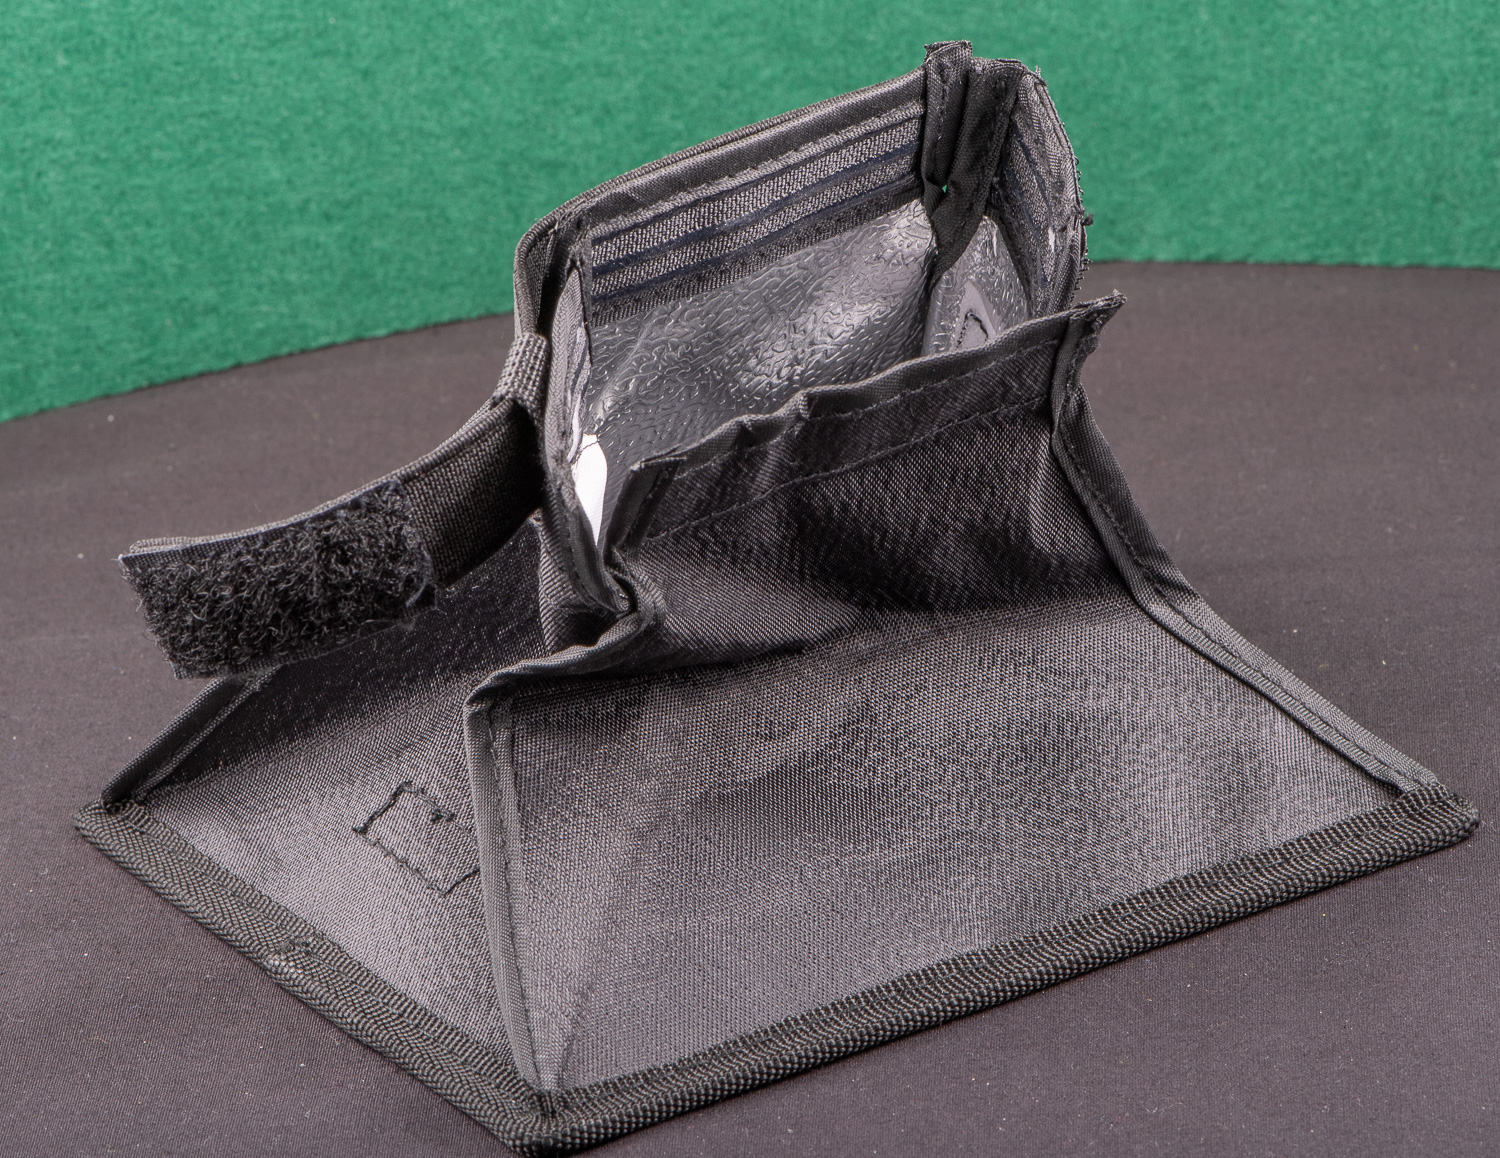
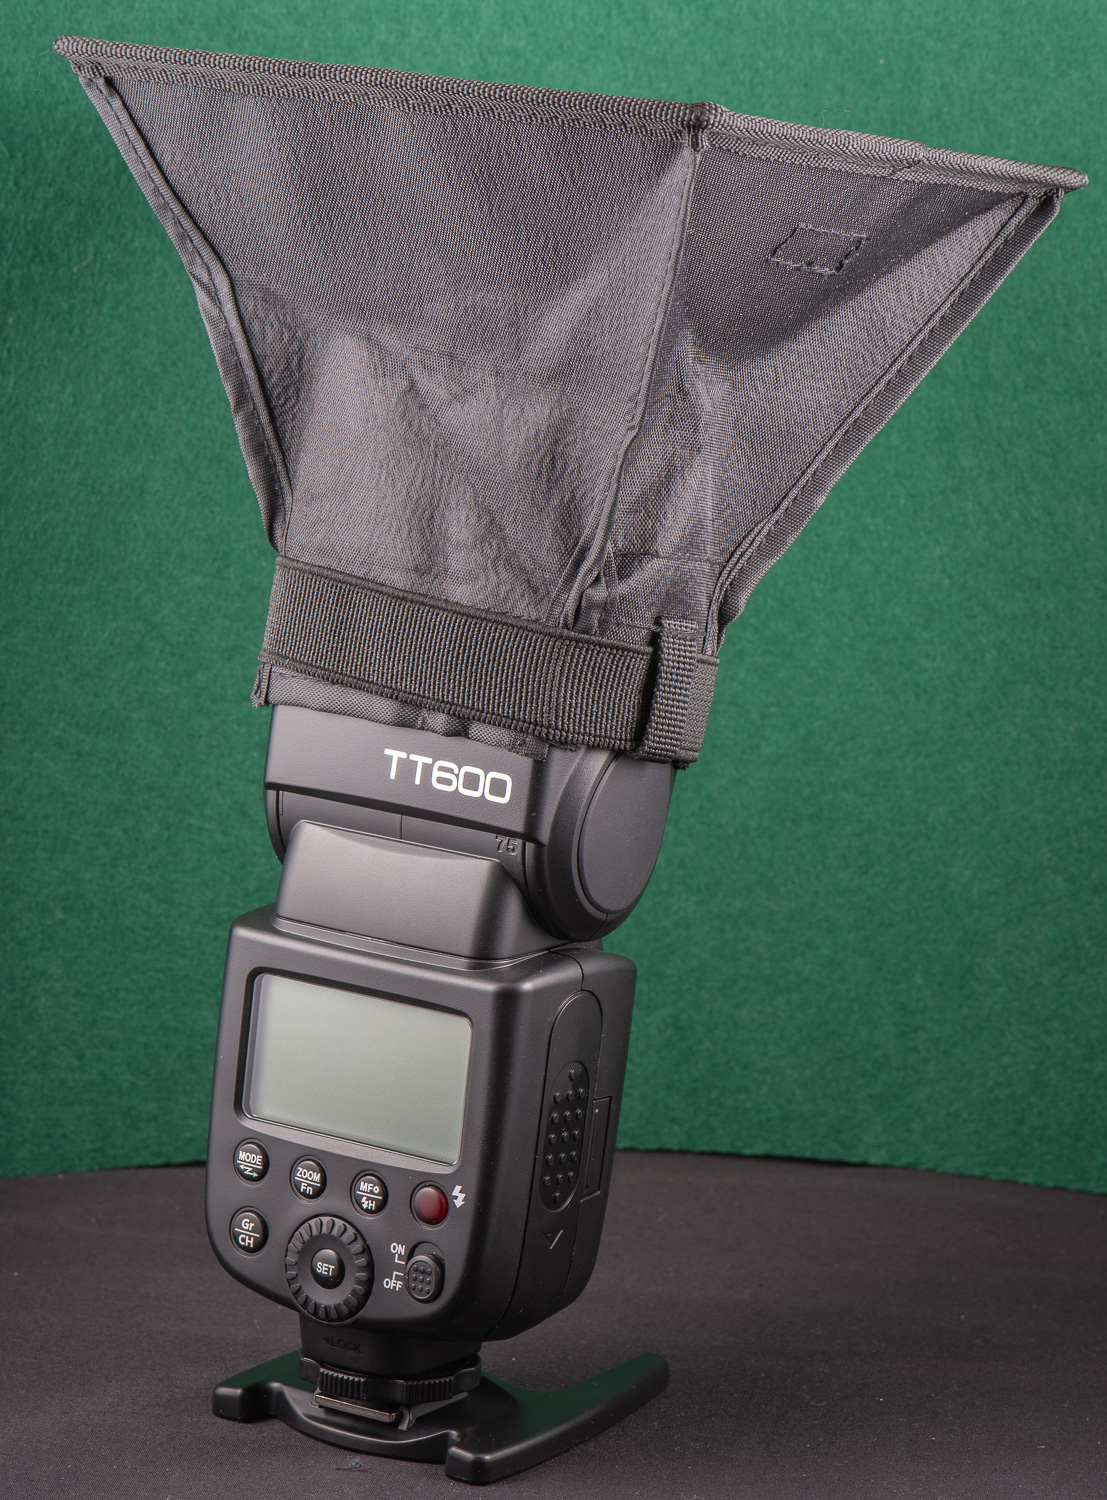
I find the 6”x5” soft box to be the most versatile size but I keep a 9”x7” in my bag for when I need an even softer light. The smaller one is from Altura and you can pick one up here, for $13, on Amazon’s website.
The minimum focusing distance of the Tamron macro lens is a little more than 11 inches. That is plenty of working distance and allows the light source to illuminate the subject nicely from above without interference and shadowing from the barrel of the lens. By positioning the diffuser soft box as shown above, the subject can be bathed in a soft, even light with very little shadowing. The diffuser is lined with a reflective material that greatly improves the efficiency of the system at low power.
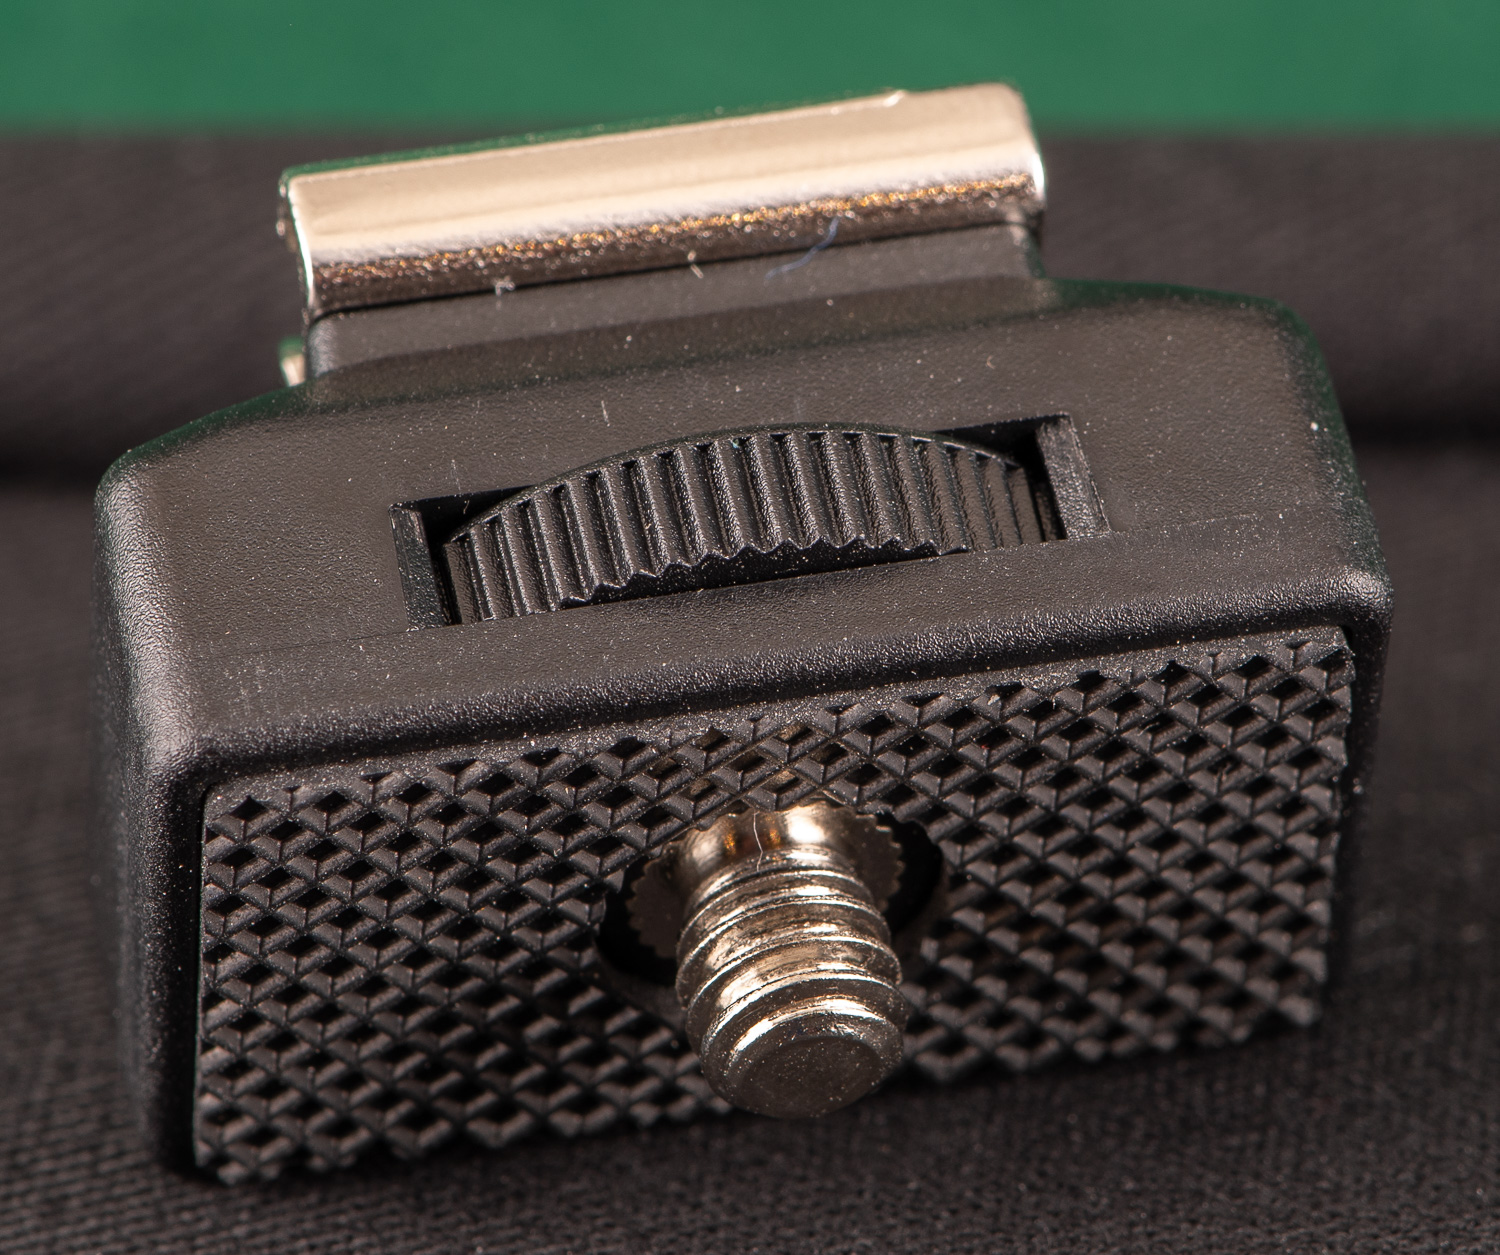
The key to this system is the positionable hot shoe adapter shown here. With this little gadget, the speedlight can be angled slightly forward, allowing the diffuser to be positioned slightly in front, as well as slightly above, the end of the lens. I tested several mounting adapters before finding this one. It is light, sturdy, and, even though it’s made of plastic, holds the speedlight in position very firmly. You can pick one of these up for about $10, right here, through Amazon.
You will notice that this adapter has a male cold shoe plate at both ends. There is a 1/4” 20 hole in each plate but I am not comfortable attaching an accessory with a simple screw. If the screw lacks a friction pad of some kind, the flash has a tendency to swivel on the screw’s axis when turning the camera vertically on its right.

The key component of the lighting system

Male to female cold shoe adapter
Base with non-slip mounting pad
This nifty cold shoe adapter proved to be the missing link. When this is screwed into the speedlight end of the angled adapter, the rubberized pad prevents it from turning, allowing the flash to be held firmly in position at any angle. This adapter, from JJC, will set you back another $10 and you can get one here, also through Amazon.


All that remains is to connect the mounted speedlight to the camera. The most convenient solution was to use a synch cord with a screw-in PC plug attached to the D850’s PC outlet, and a standard 3.5mm for the speedlight.

PC flash synch cord

PC connected to camera outlet
This cord works perfectly and is short enough to stay well out of the way of the lens focus ring and camera’s screen and controls. Don’t skimp on the screw-in PC plug! The older style PC plugs will do what all older style PC plugs have always done - fall out. This handy cord was only about $8 from Amazon.
Be aware that this particular setup was designed around the D850 and the Godox TT600 flash. You will probably need a different sync cable in order to connect your particular camera’s sync port to your speedlight’s input.

Ready for business
This wouldn’t be a complete description of my setup unless I also pointed out the limitations of the system. There aren’t many, but these are the situations in which I will use an alternative system:
When I absolutely require directional lighting and need multiple light sources of independently variable power. Then I will use the Nikon R1C1, a dual bulb ring flash, or off-camera speedlights with radio triggers.
When my subject is extremely skittish. It can be very difficult to ease up on some butterflies and small flies. In these cases, the large white soft box tends to scare them off before I can get close and I will switch to using whatever natural light is available, often requiring a higher ISO and a wide open lens.
When the wind is blowing. Bug hunting becomes less fruitful in a stiff wind, but that won’t stop me from trying. The soft box in this setup can and will behave a little like a sail when the breeze picks up, and this in turn can vibrate the system beyond the capacity of the Tamron VC to compensate effectively. The fix in this situation is either to go with natural light or to go home and catch up on my editing backlog.
I’ll wrap this up with one interesting observation. If you already have some kind of camera, and either a true macro lens, or one that you can adapt with a set of extension tubes, then you can build your own copy of this awesome macro setup. Not only that, but you can do it for $106, at today’s prices. So, if your other option is Nikon’s R1C1, you could build your version of my system, go out and buy a brand new Tamron 90mm f/2.8 DiVC USD, and still have $45 left over to buy me lunch. Twice.
Thanks, as always, for dropping by!
I hope this was helpful. If not, please let me know what I left out. There are as many novel macro setups as there are macro photographers so, if you have a system that works for you, share it with us by leaving a comment below. It is always a pleasure to hear from you!