

7 ways to improve your handheld macro photography
/Macro photographers love their gear! Focus rails, bellows, complicated lighting setups, stacking software, microscope lenses, extension tubes, and on, and on....... But sometimes we want to get out of the studio and find our subjects where they live. I'm going to tell you what I do to capture sharp, interesting "keeper" macro images on (almost) every shoot.
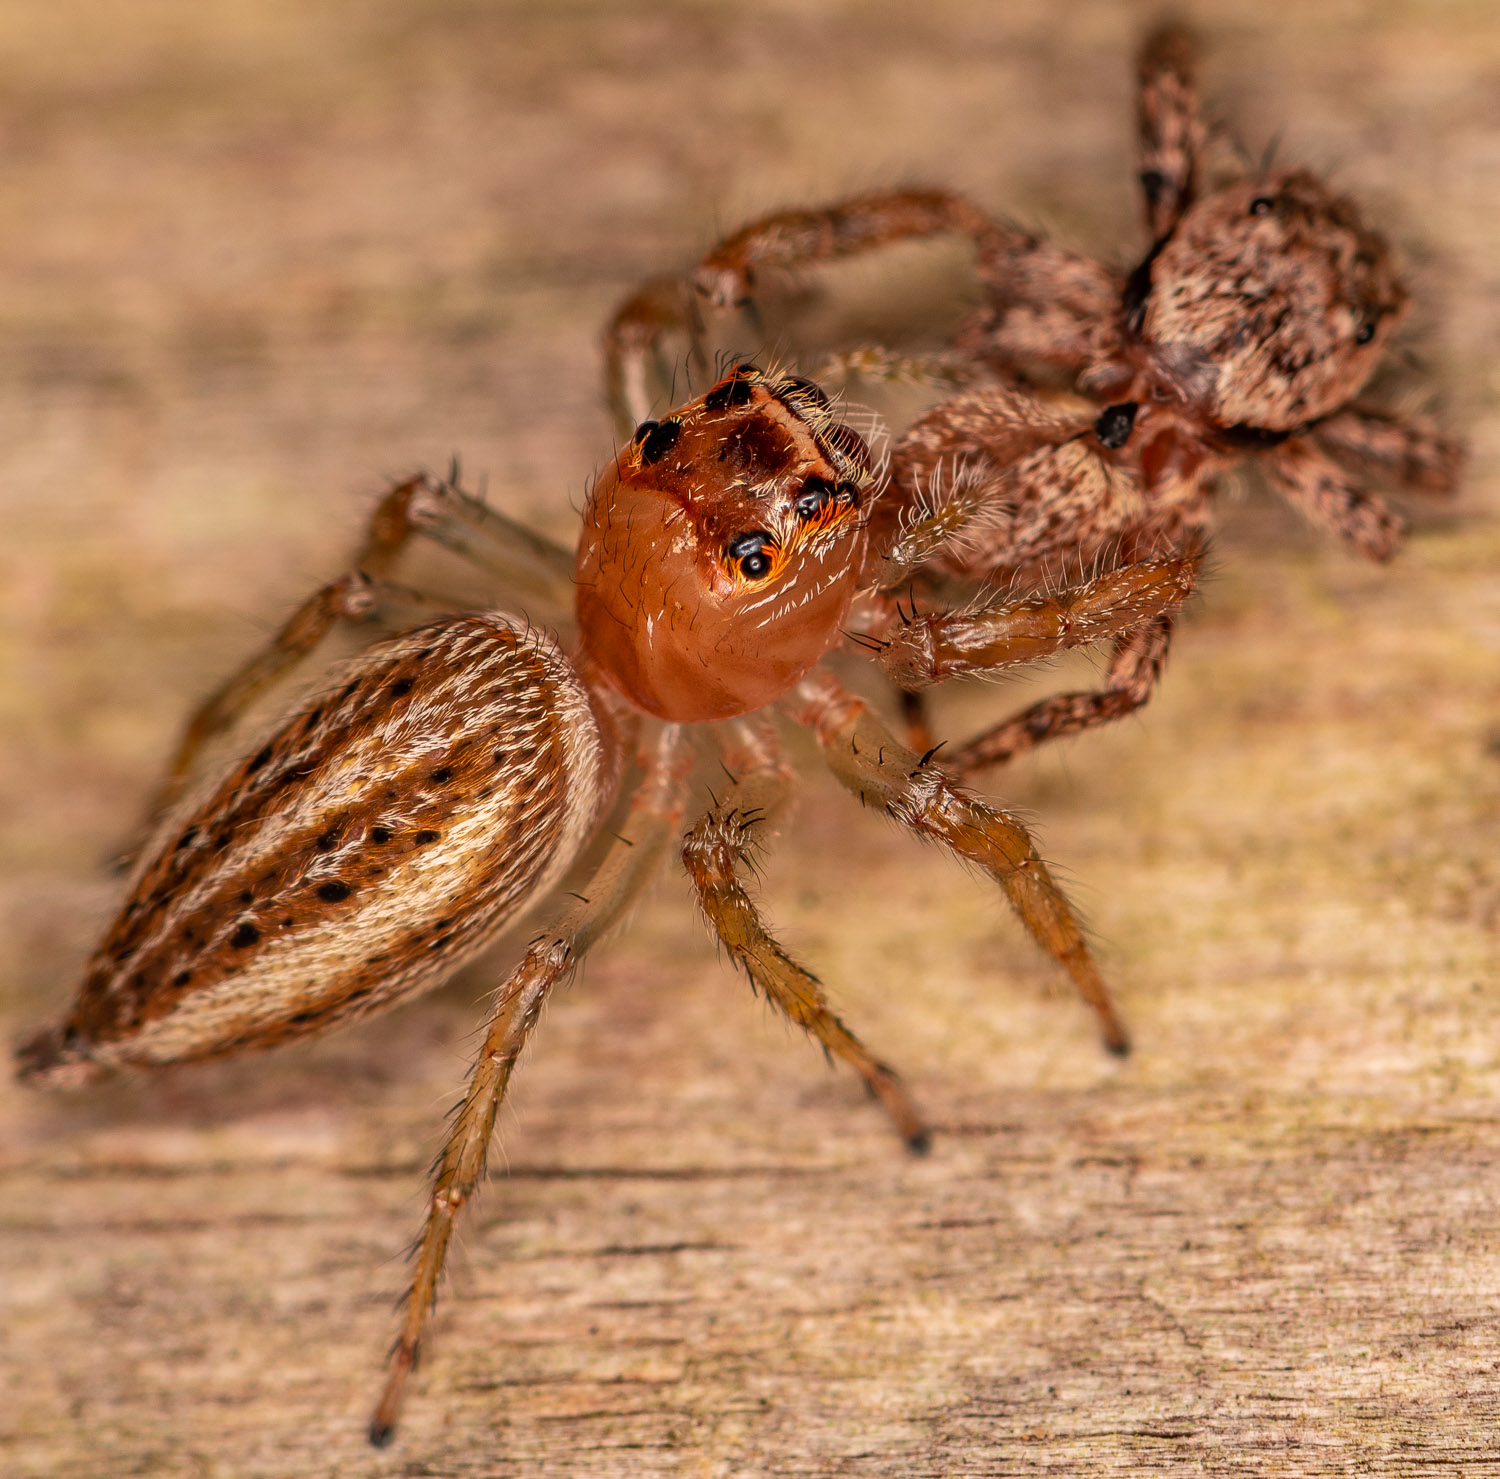
A male Colonus jumping spider snacking on his next-door neighbor
Good handheld macro images are the result of preparation, precision, patience, and persistence. These suggestions will help you with the first two; the last two are up to you.
TIP #1 - CONTROL THE LIGHT
Your subjects are not good models - they will usually be moving erratically, flitting in and out of the shadows - using natural light is hit-and-miss at the best of times. Use a camera- or lens- mounted light source, continuous or flash, to take charge of your exposures. You don't need to spend a fortune, although you certainly can, on a reliable lens mounted flash but it will allow you to control exposure accurately and on the fly. Depending on your camera, use the maximum available synch speed (usually around 1/250sec) and leave the flash in manual mode. See my post on macro flash settings for more information.
TIP #2 - SHOT RAW
Even with ideal lighting, the unpredictable behavior of your subjects is going to cause problems with exposure. Shooting in RAW will allow you to pull the most detail from over- and under-exposed areas of your image during editing. You can also adjust white balance, tweak colors, selectively sharpen, and reduce noise when editing RAW files.
TIP #3 - BACK BUTTON FOCUS
Focusing on tiny, moving subjects is a challenge. Many macro photographers, including the great Thomas Shahan, recommend focusing manually. This is an important skill to develop, especially if you are interested in higher magnification and use extension tubes or reverse-mounted lenses. But must of us are out there with a dedicated AF macro lens mounted on a DSLR. I won't go into the details of setting up your camera for back button focus but, thanks to the folks over at Improve Photography, you can find an excellent summary right here. With back button focus enabled you can quickly acquire focus and instantly switch to manual focus by releasing the assigned focus-on button. I use a combination of single-point, continuous autofocus, to get in the ballpark, and tiny back and forth camera movements to nail the final focus.
TIP #4 - STOP DOWN
When shooting handheld macro it is vital to control the depth of field to ensure that the point of interest, usually the eyes when shooting bugs, is in sharp focus. With a wide open aperture, the depth of field can be so limiting that only a tiny sliver of the image will be in sharp focus. But we don't need to shoot at f/2.8 because we remembered to bring our own light. By adjusting the output of our lens- or camera-mounted flash we are able to make use of a much smaller aperture, f/14 in the image above, and get more of our subject in focus. Experiment with your camera and lens combination to find the sweet spot.
TIP #5 - SUPPORT YOUR CAMERA
OK... this is probably pretty obvious, but it makes such a huge difference, it is worth mentioning. To minimize camera shake, and increase your hit rate, find a stable support for your camera. This is important even if your lens, camera, or both have vibration reduction technology built in. Use your body, a wall, a fencepost, the ground, your backpack... anything that you can use to brace yourself will work to sharpen your pictures. Anthills and electric fences are poor choices - trust me.
TIP #6 - KEEP SHOOTING
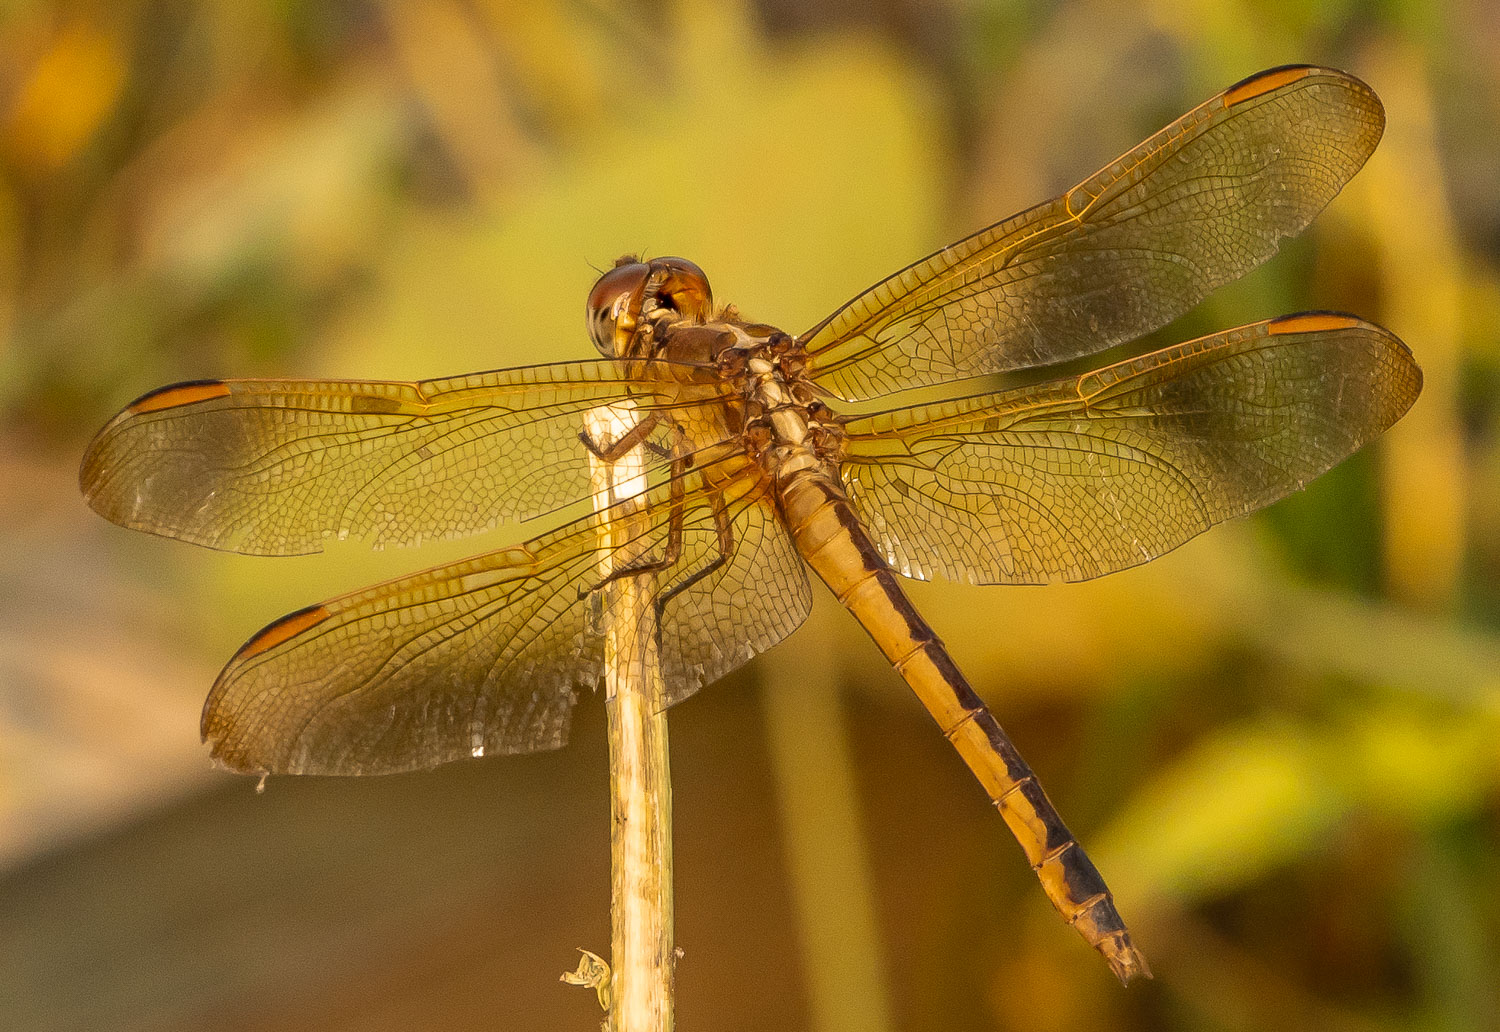
No matter how carefully you prepare, or how precisely you shoot, handheld macro photography will virtually always yield far more misses than hits. I end up discarding between 95 and 99% of my images from a typical handheld shoot. One way to increase the number of keepers is to increase the number of shots. Sometimes you will only get one shot at a subject. But sometimes they will sit quietly and pose until your flash batteries die. Dragonflies, among my favorite subjects, are often so accommodating I get the odd feeling they enjoy being photographed. So if your jumping spider seems to be striking a pose (they usually stop running around to eat), keep shooting! Change your angles, try different flash and aperture combinations, hold an interesting background feature behind her, and shoot, shoot, shoot.
TIP #7 - SLOW DOWN
This has taken me a long time to learn. The macro world is vast and breathtaking, and it is right under our noses. But we are are bound to miss almost all of it unless we slow down. According to the Smithsonian, there are 200 MILLION insects for every human on the planet (presumably that includes macro photographers). They are everywhere (though Antarctica is a less popular habitat for most species). When I started shooting little things, I would hike through the woods, scanning the grounds, the trees, and the underbrush. I would occasionally find something interesting, usually when it stung me or flew up a nostril, but more often not. Today, I prefer to go to a promising location or specific habitat, and find a spot and get down on my hands and knees. Gently turning over fallen leaves and branches, or looking on the underside of vegetation will usually reveal dozens, even hundreds, of opportunities for a photograph. Sitting or laying down in a patch of wildflowers is a surefire tactic for getting up-close to bees and butterflies. Slow down, pay attention, and be patient.
I hope these pointers are helpful. If you have any questions you can ask them here, and feel free to leave a comment below.
See you in the bushes...